Git

Git Repository (cont’d)
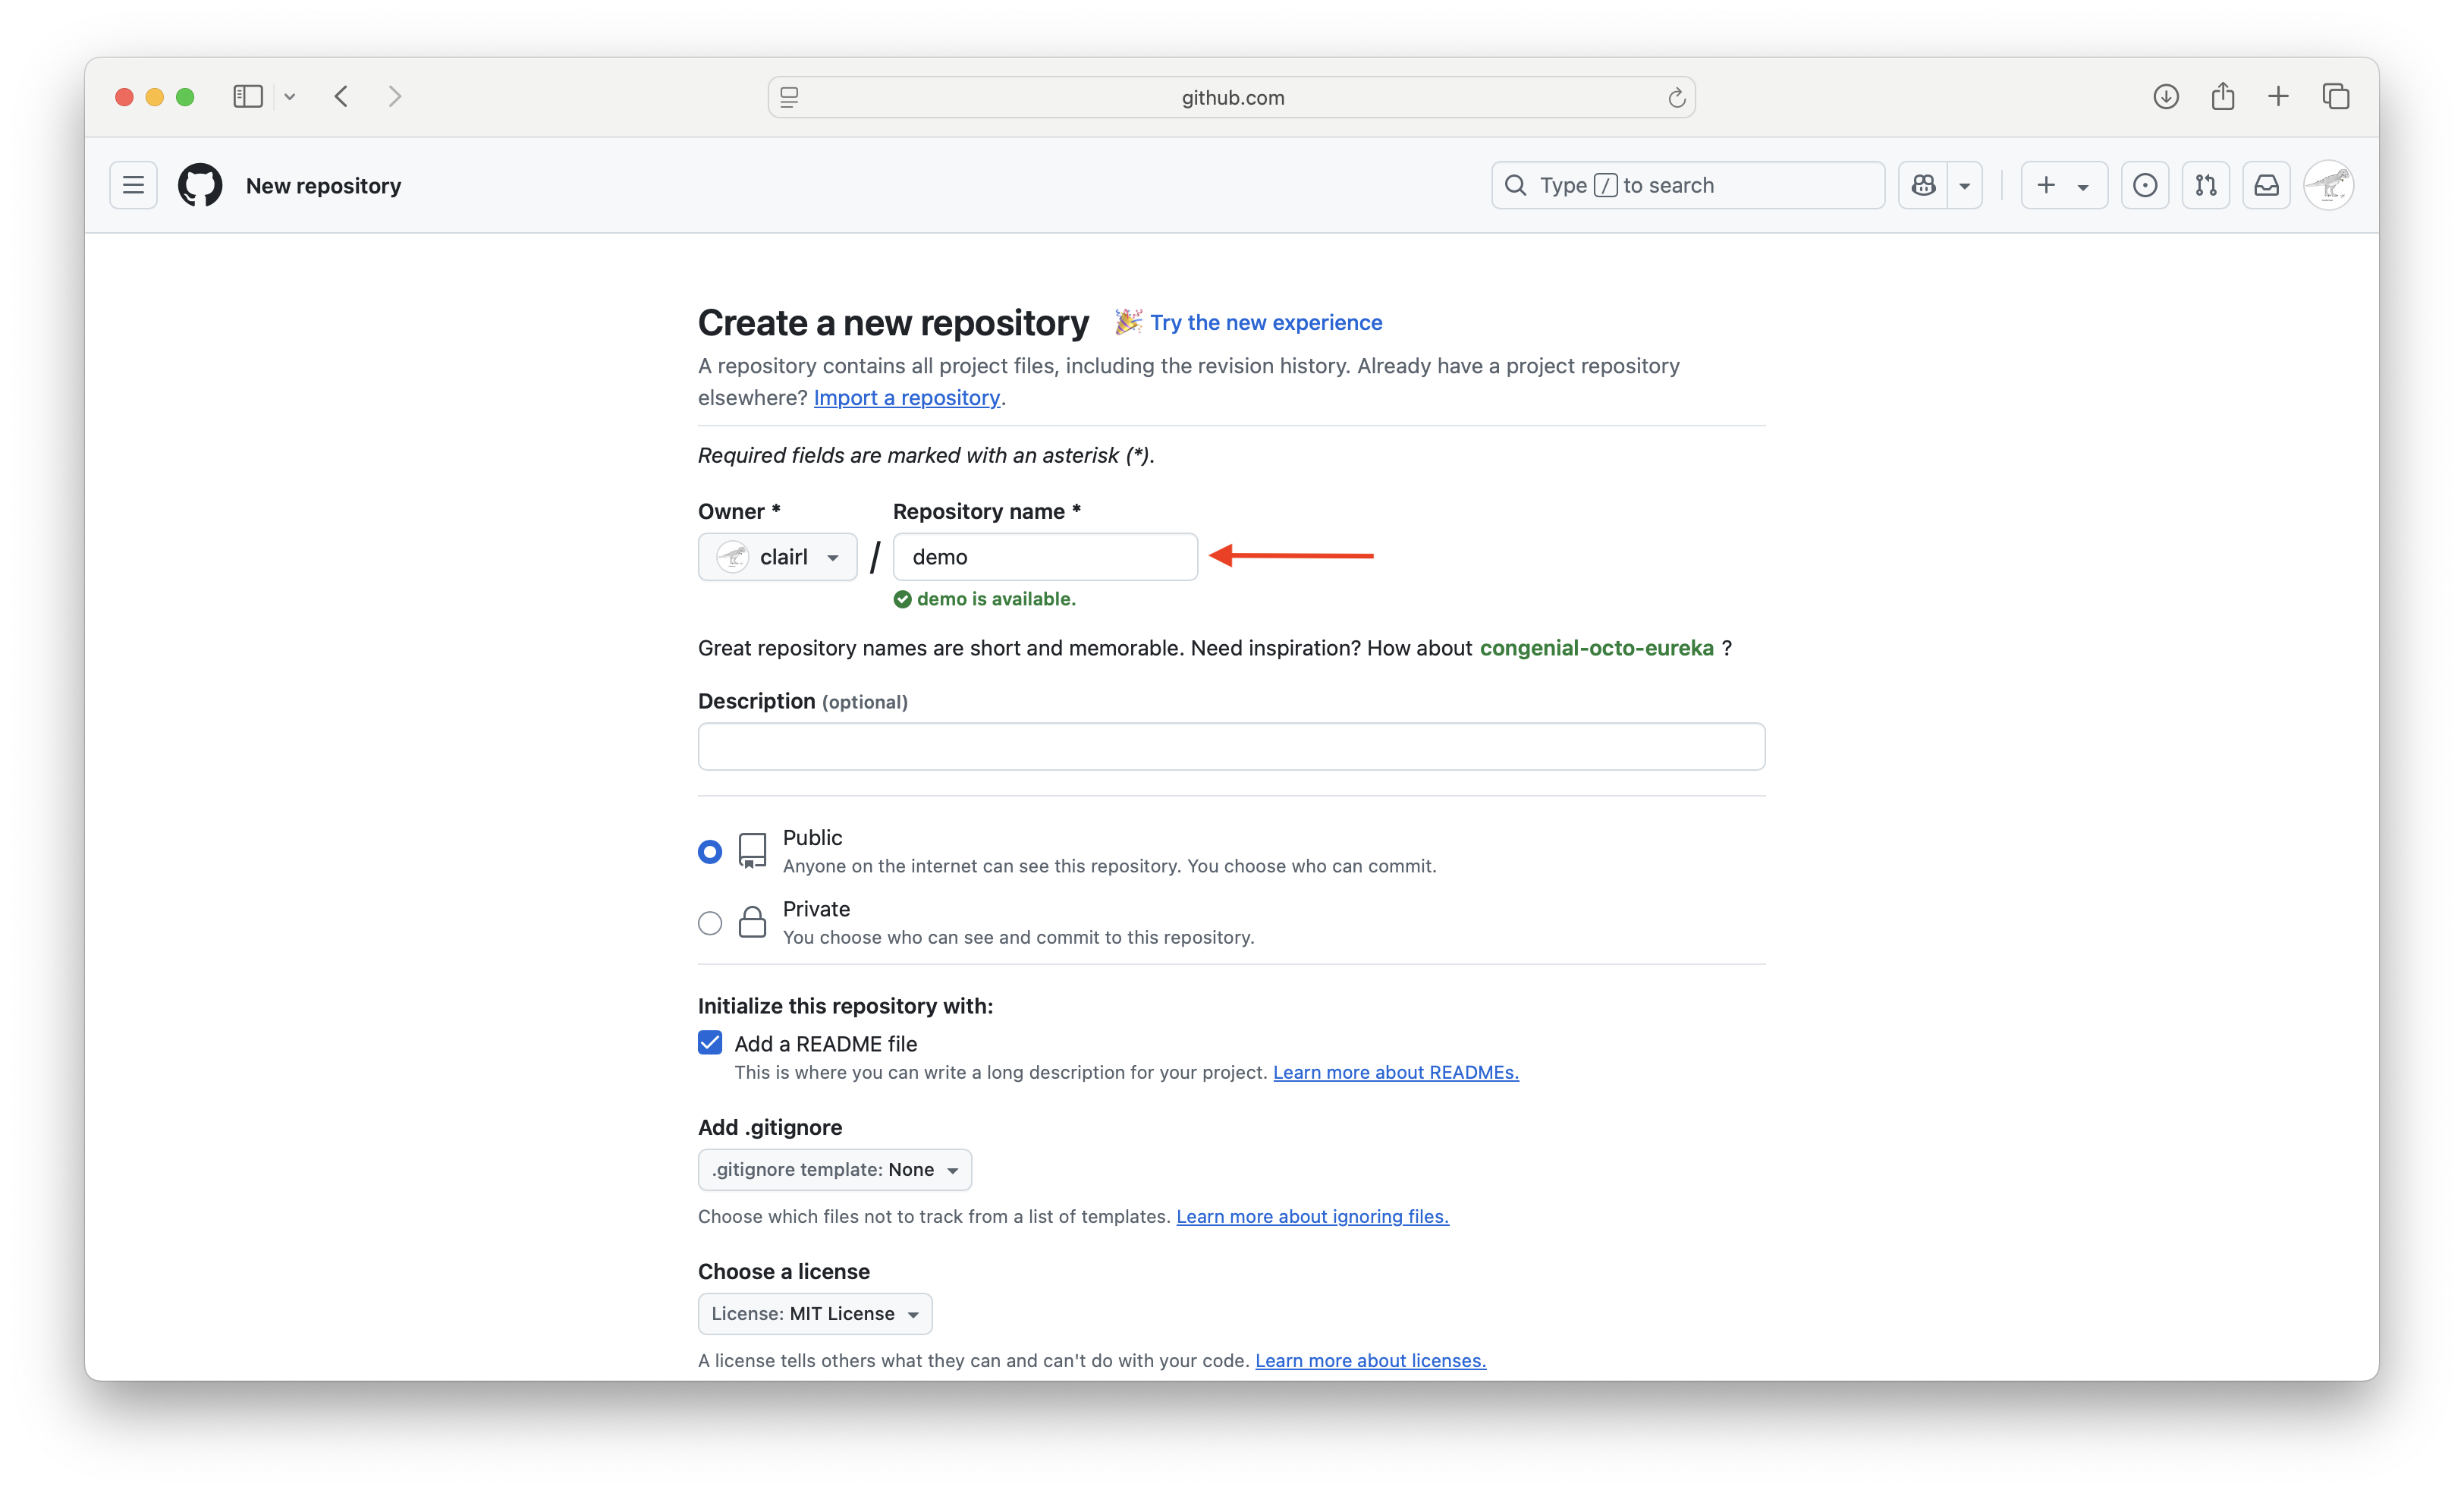
Create Git Repository on GitHub
- Go to github.com and sign in
- On your home page, click the
![]() button
button
 button
Create Git Repository on GitHub (cont’d)
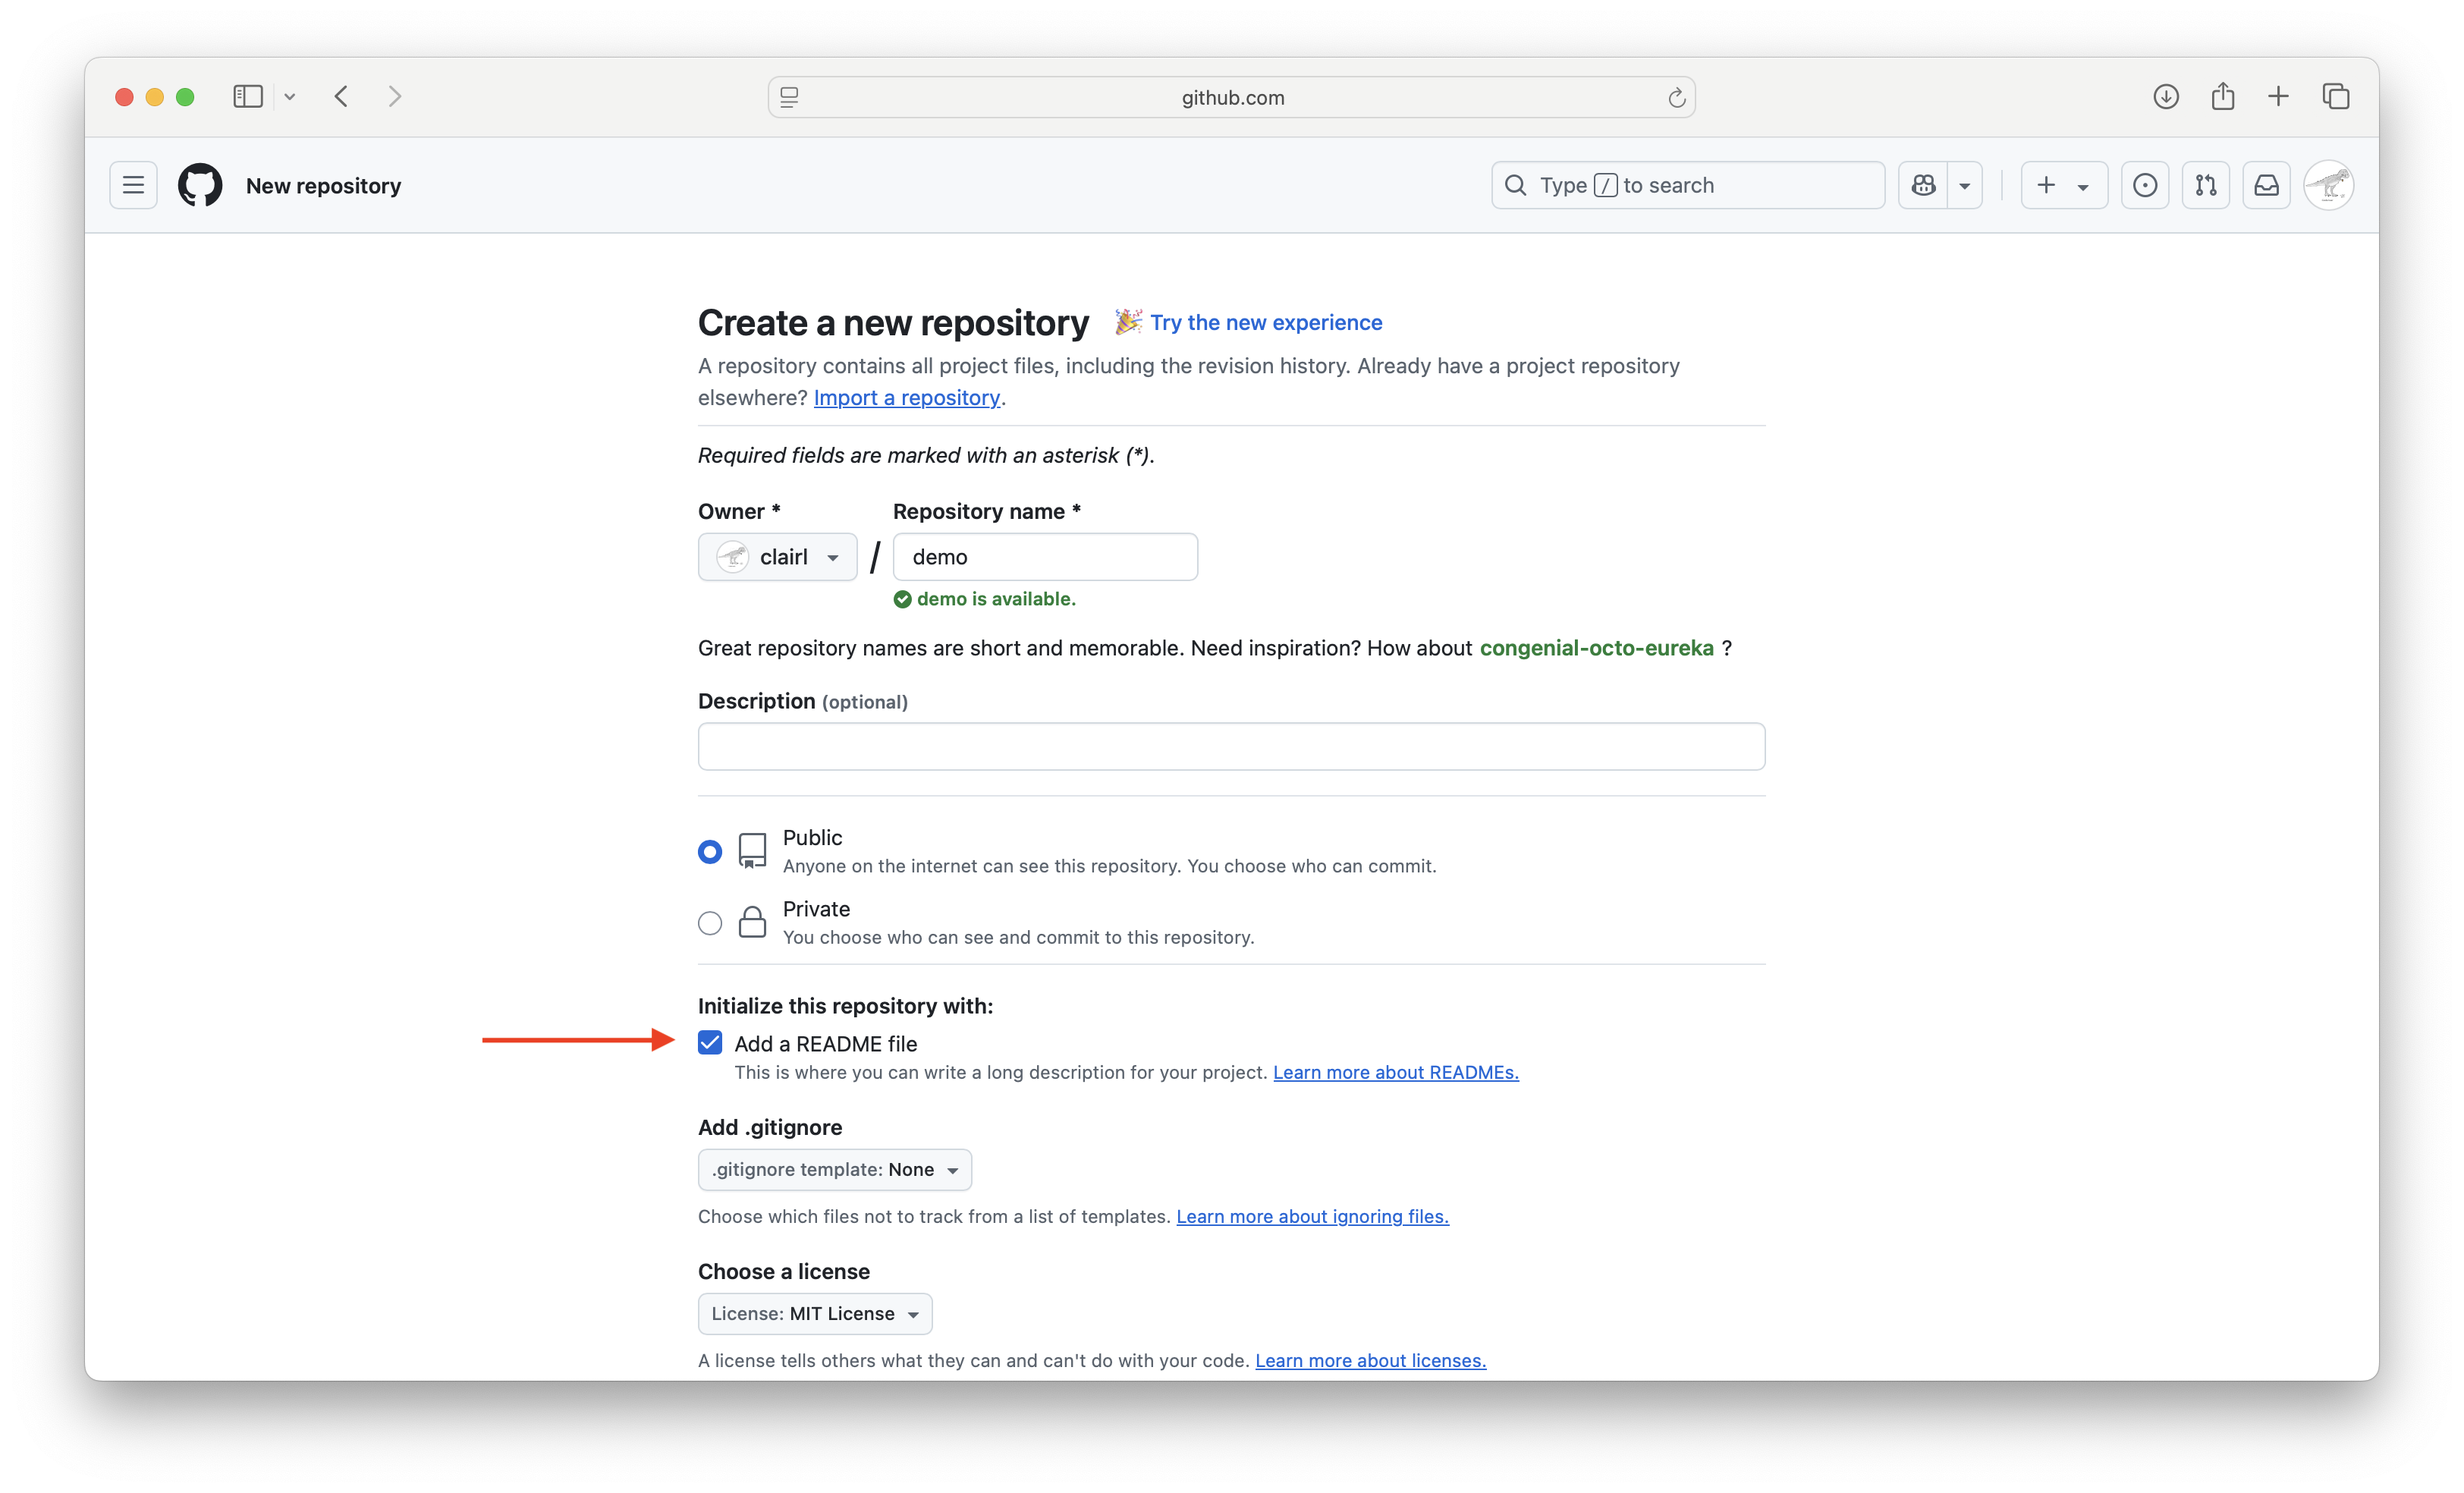
- Enter the name of the repository
Create Git Repository on GitHub (cont’d)
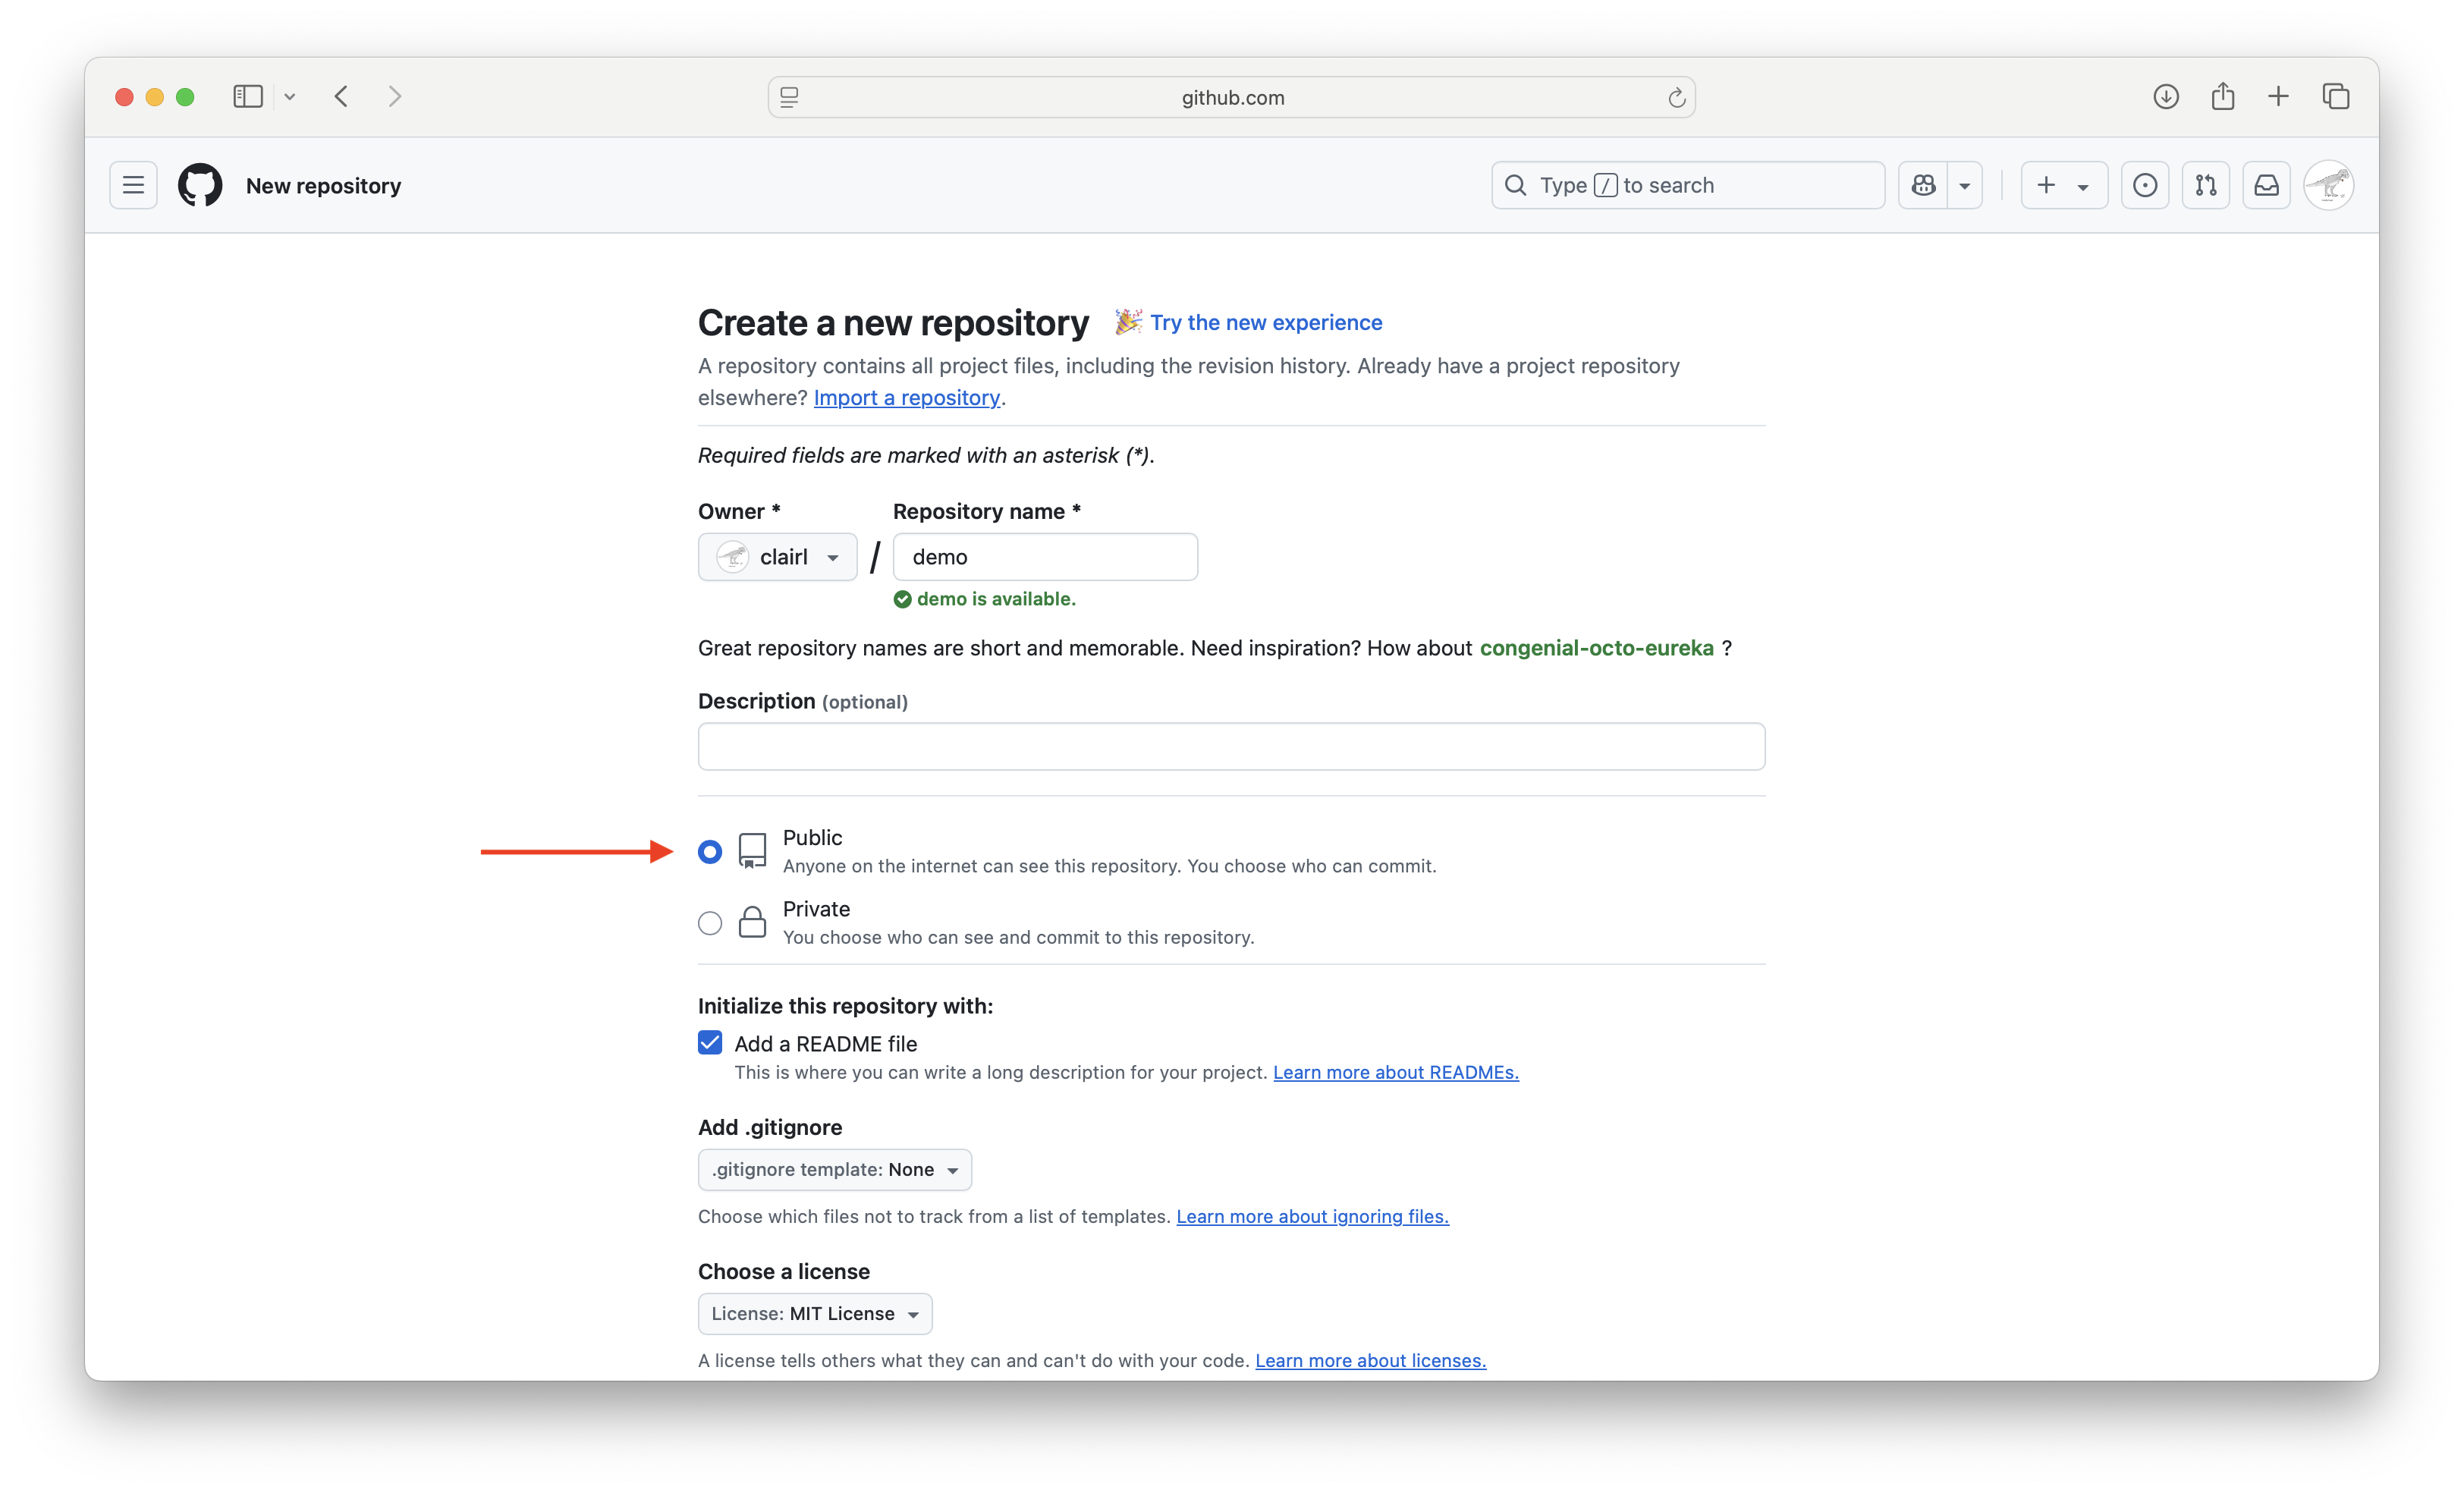
- Choose whether you want the repository to be public or private
Create Git Repository on GitHub (cont’d)
- Add a README file, which gives a description of your project
Create Git Repository on GitHub (cont’d)
- Choose a license, then press Create

Create Git Repository on GitHub (cont’d)
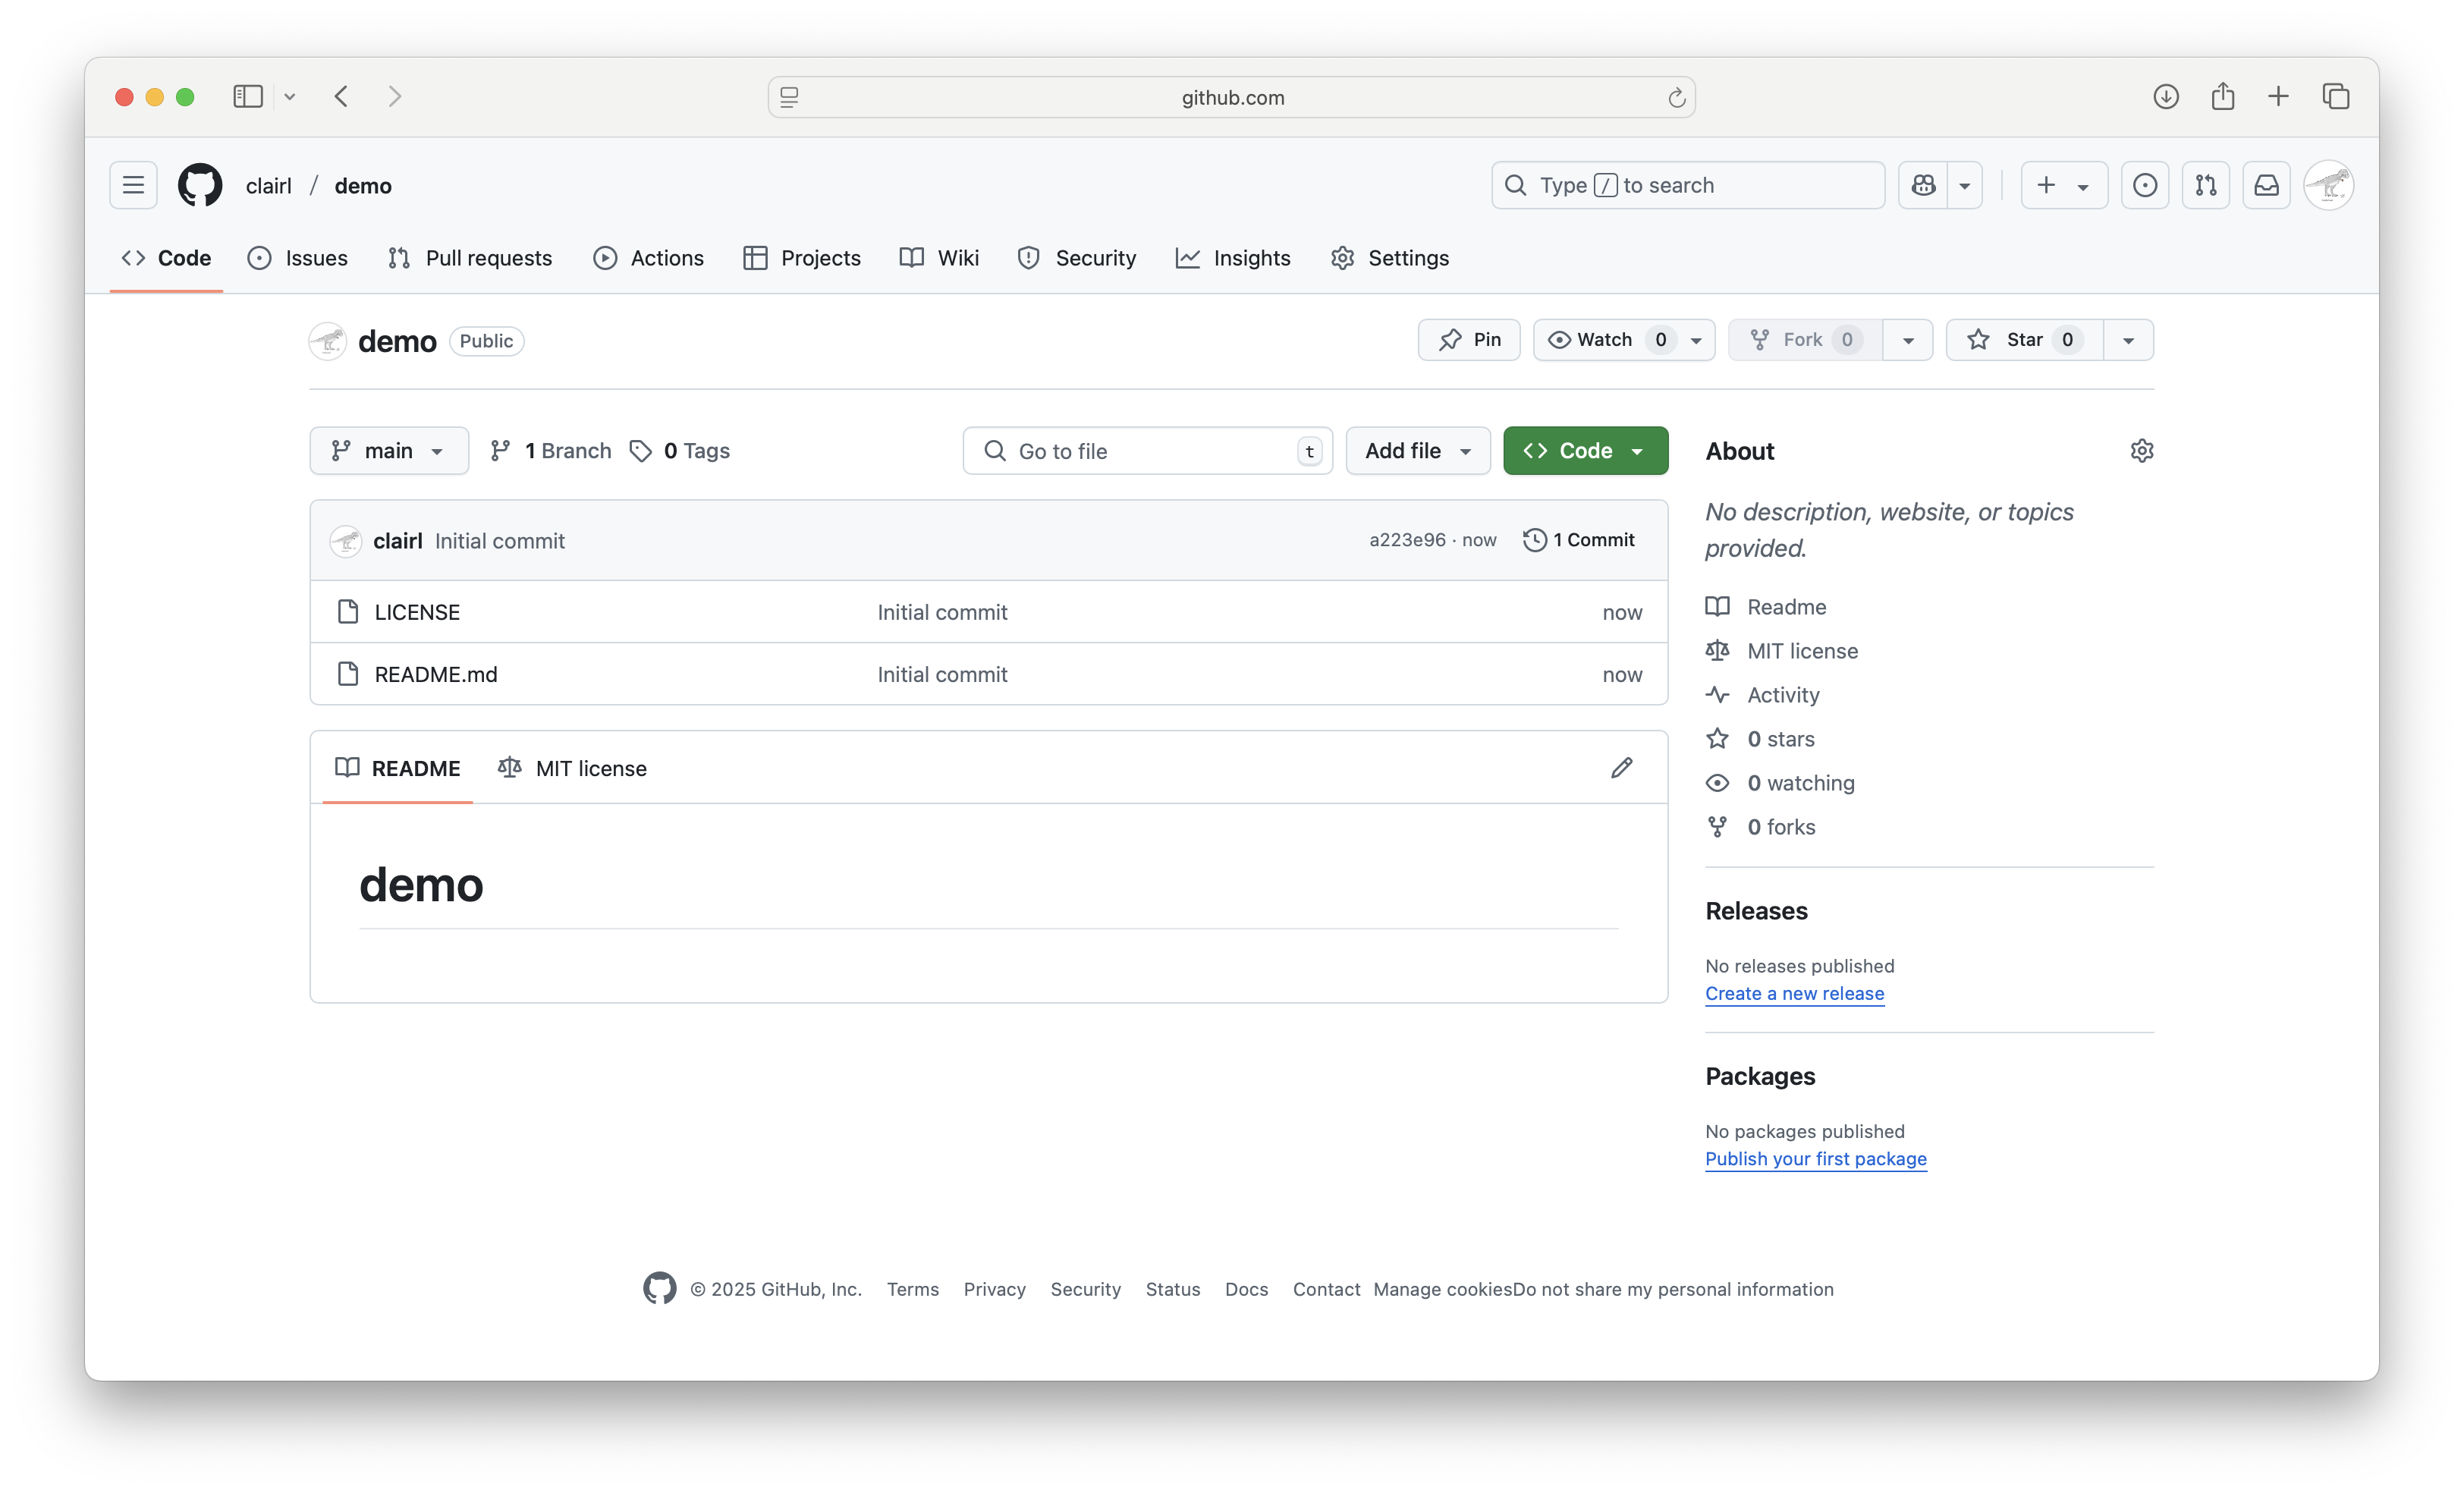
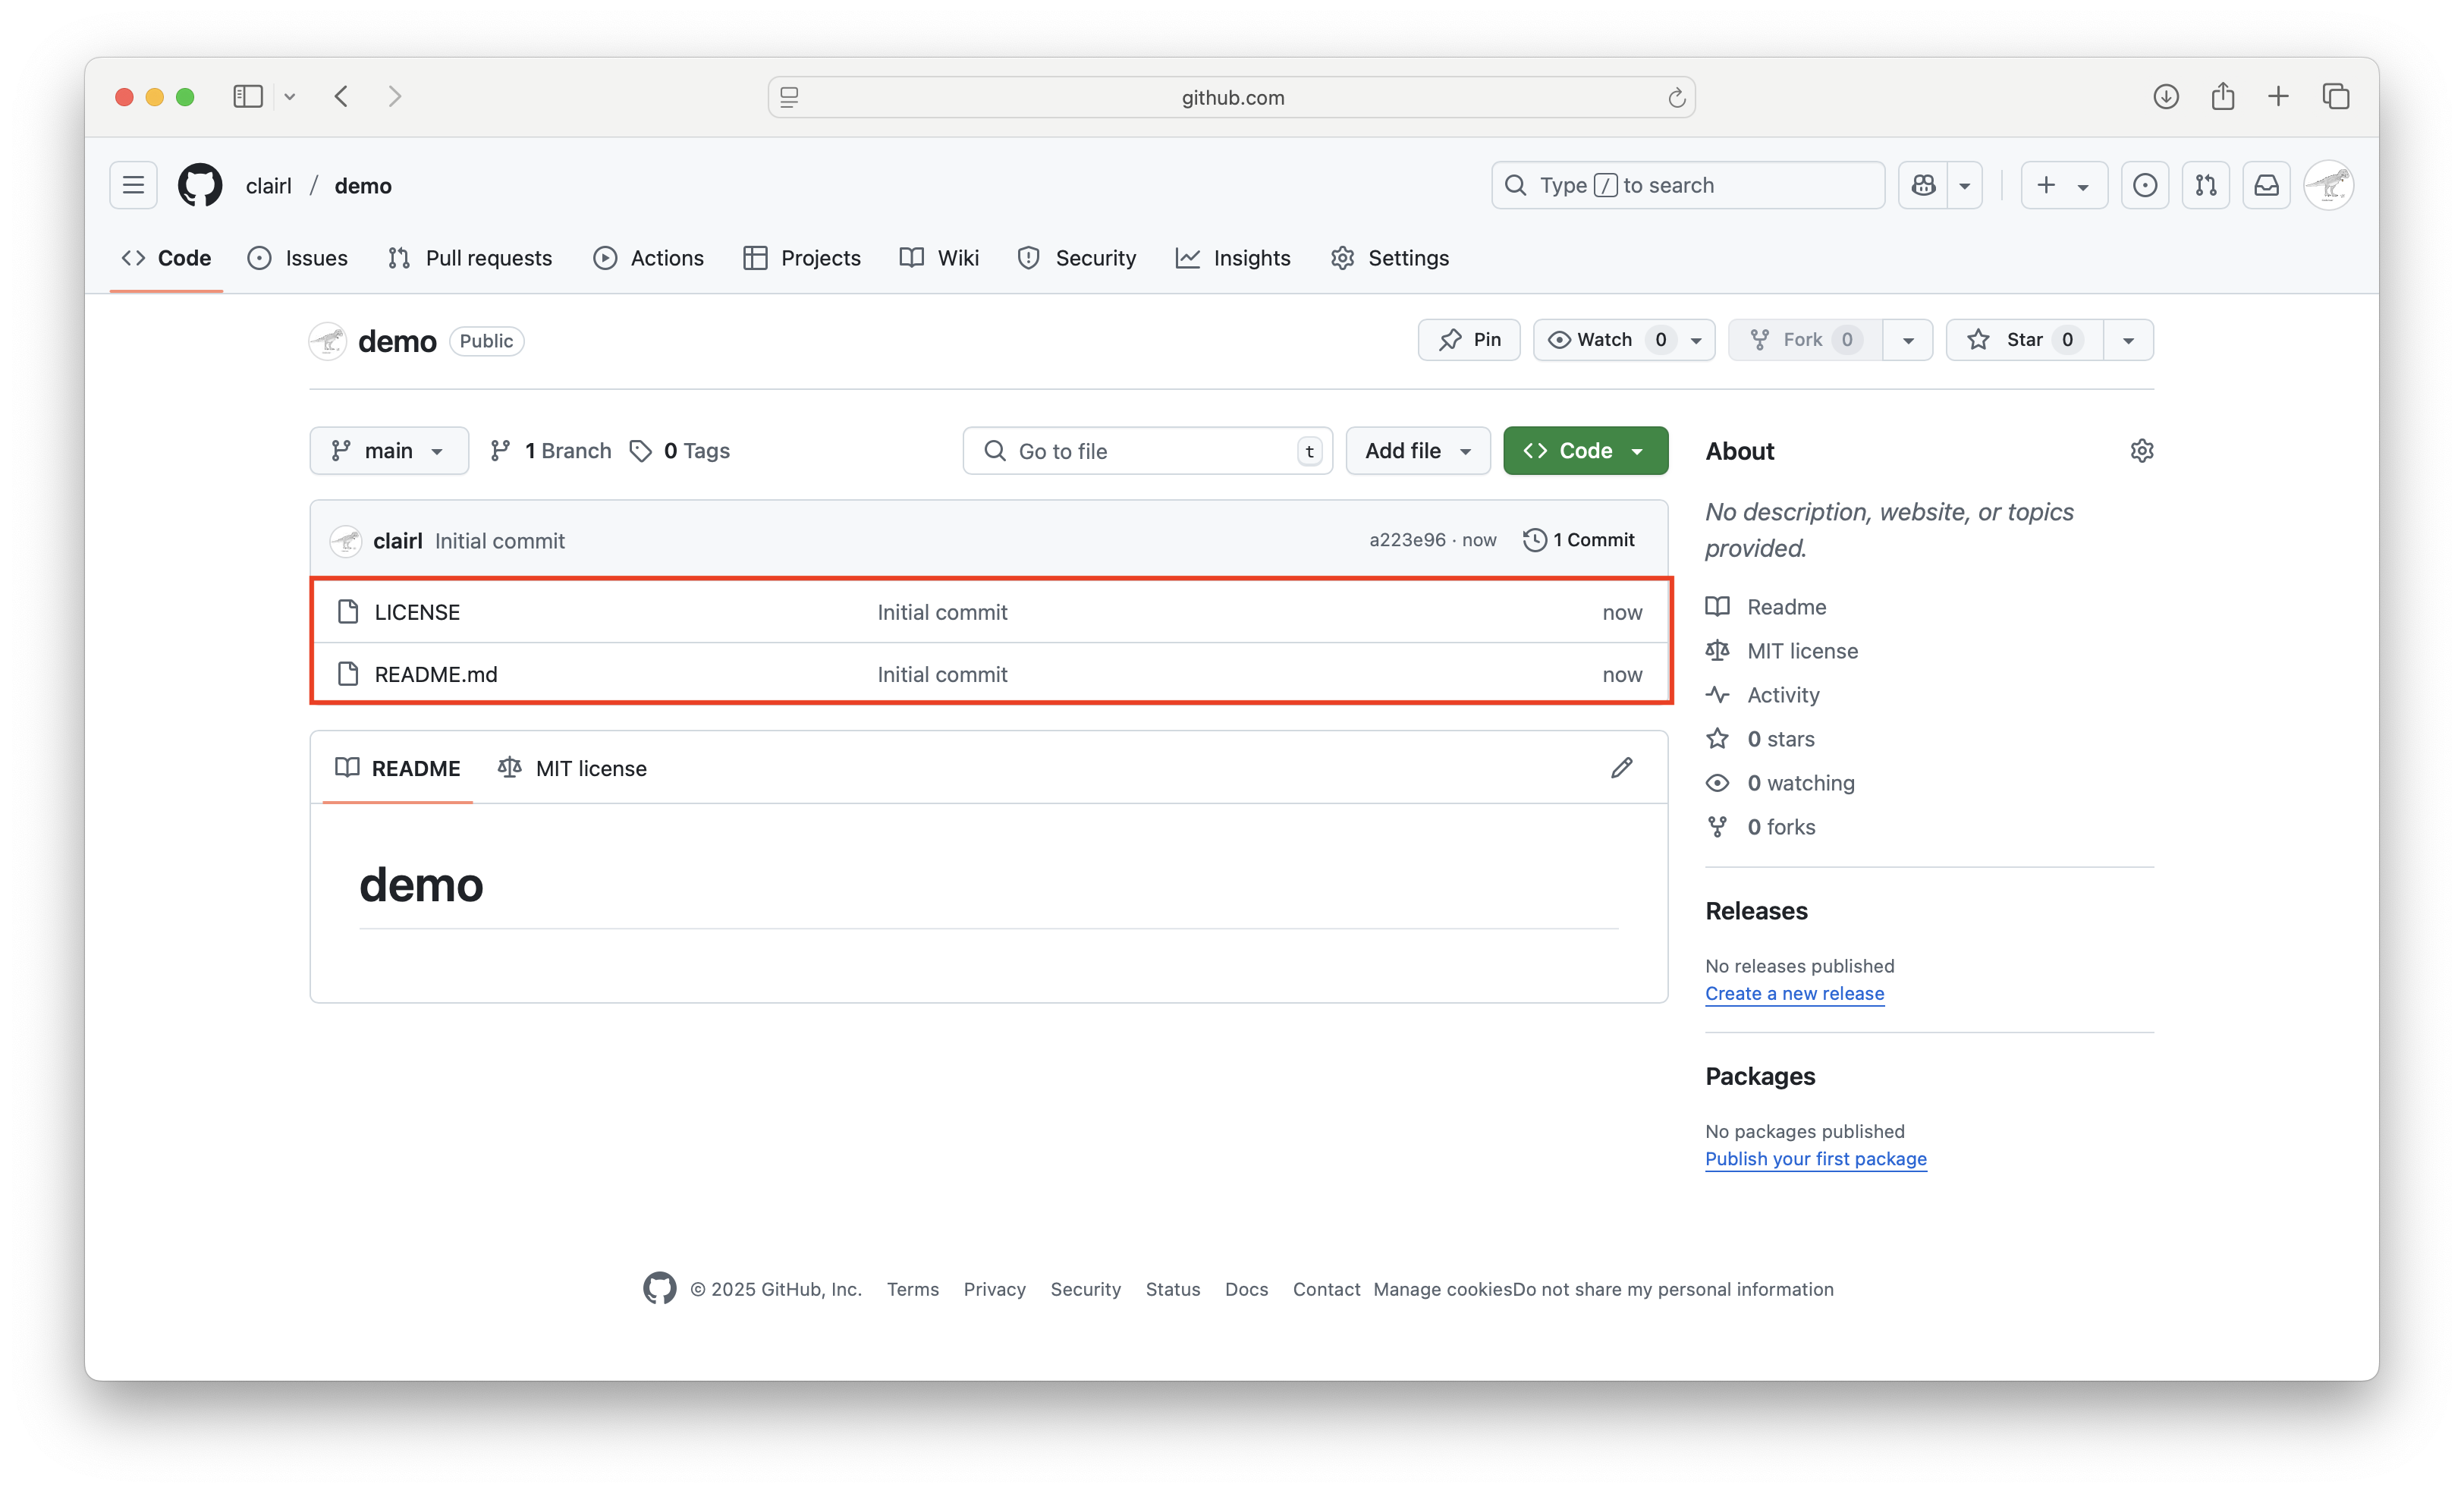
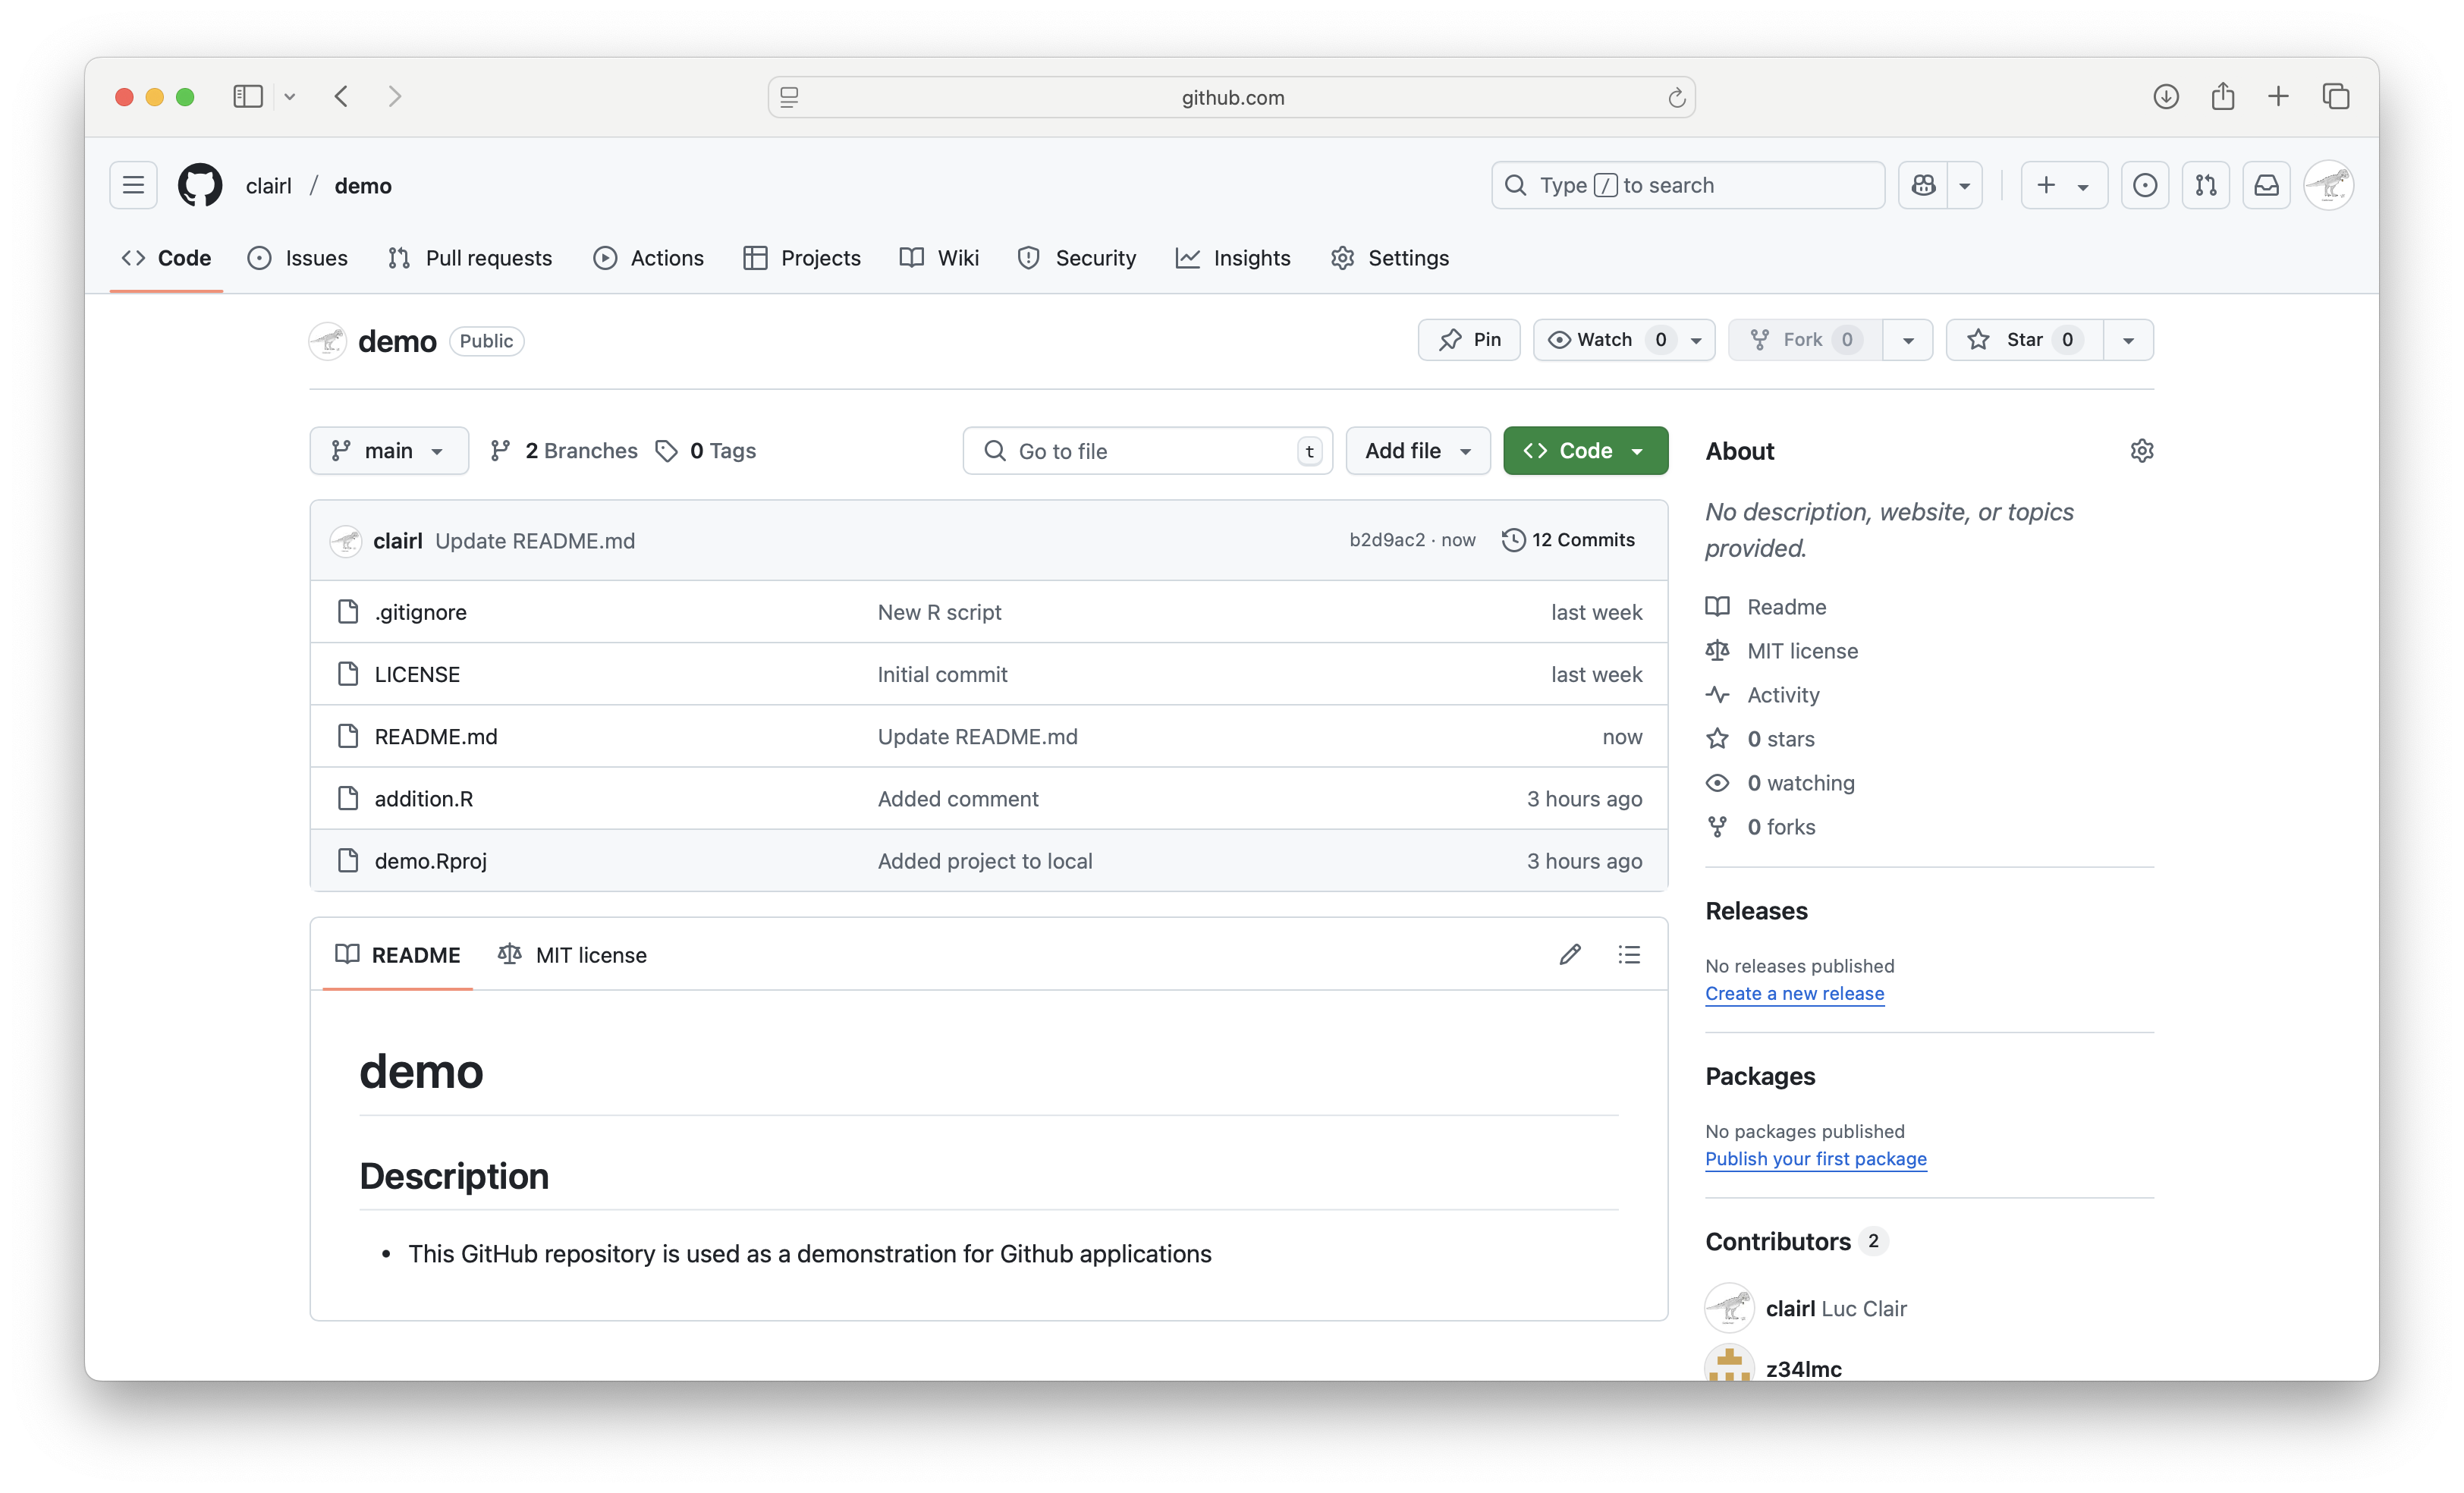
- Your repository has been created
- Here are a few things to notice
Create Git Repository on GitHub (cont’d)
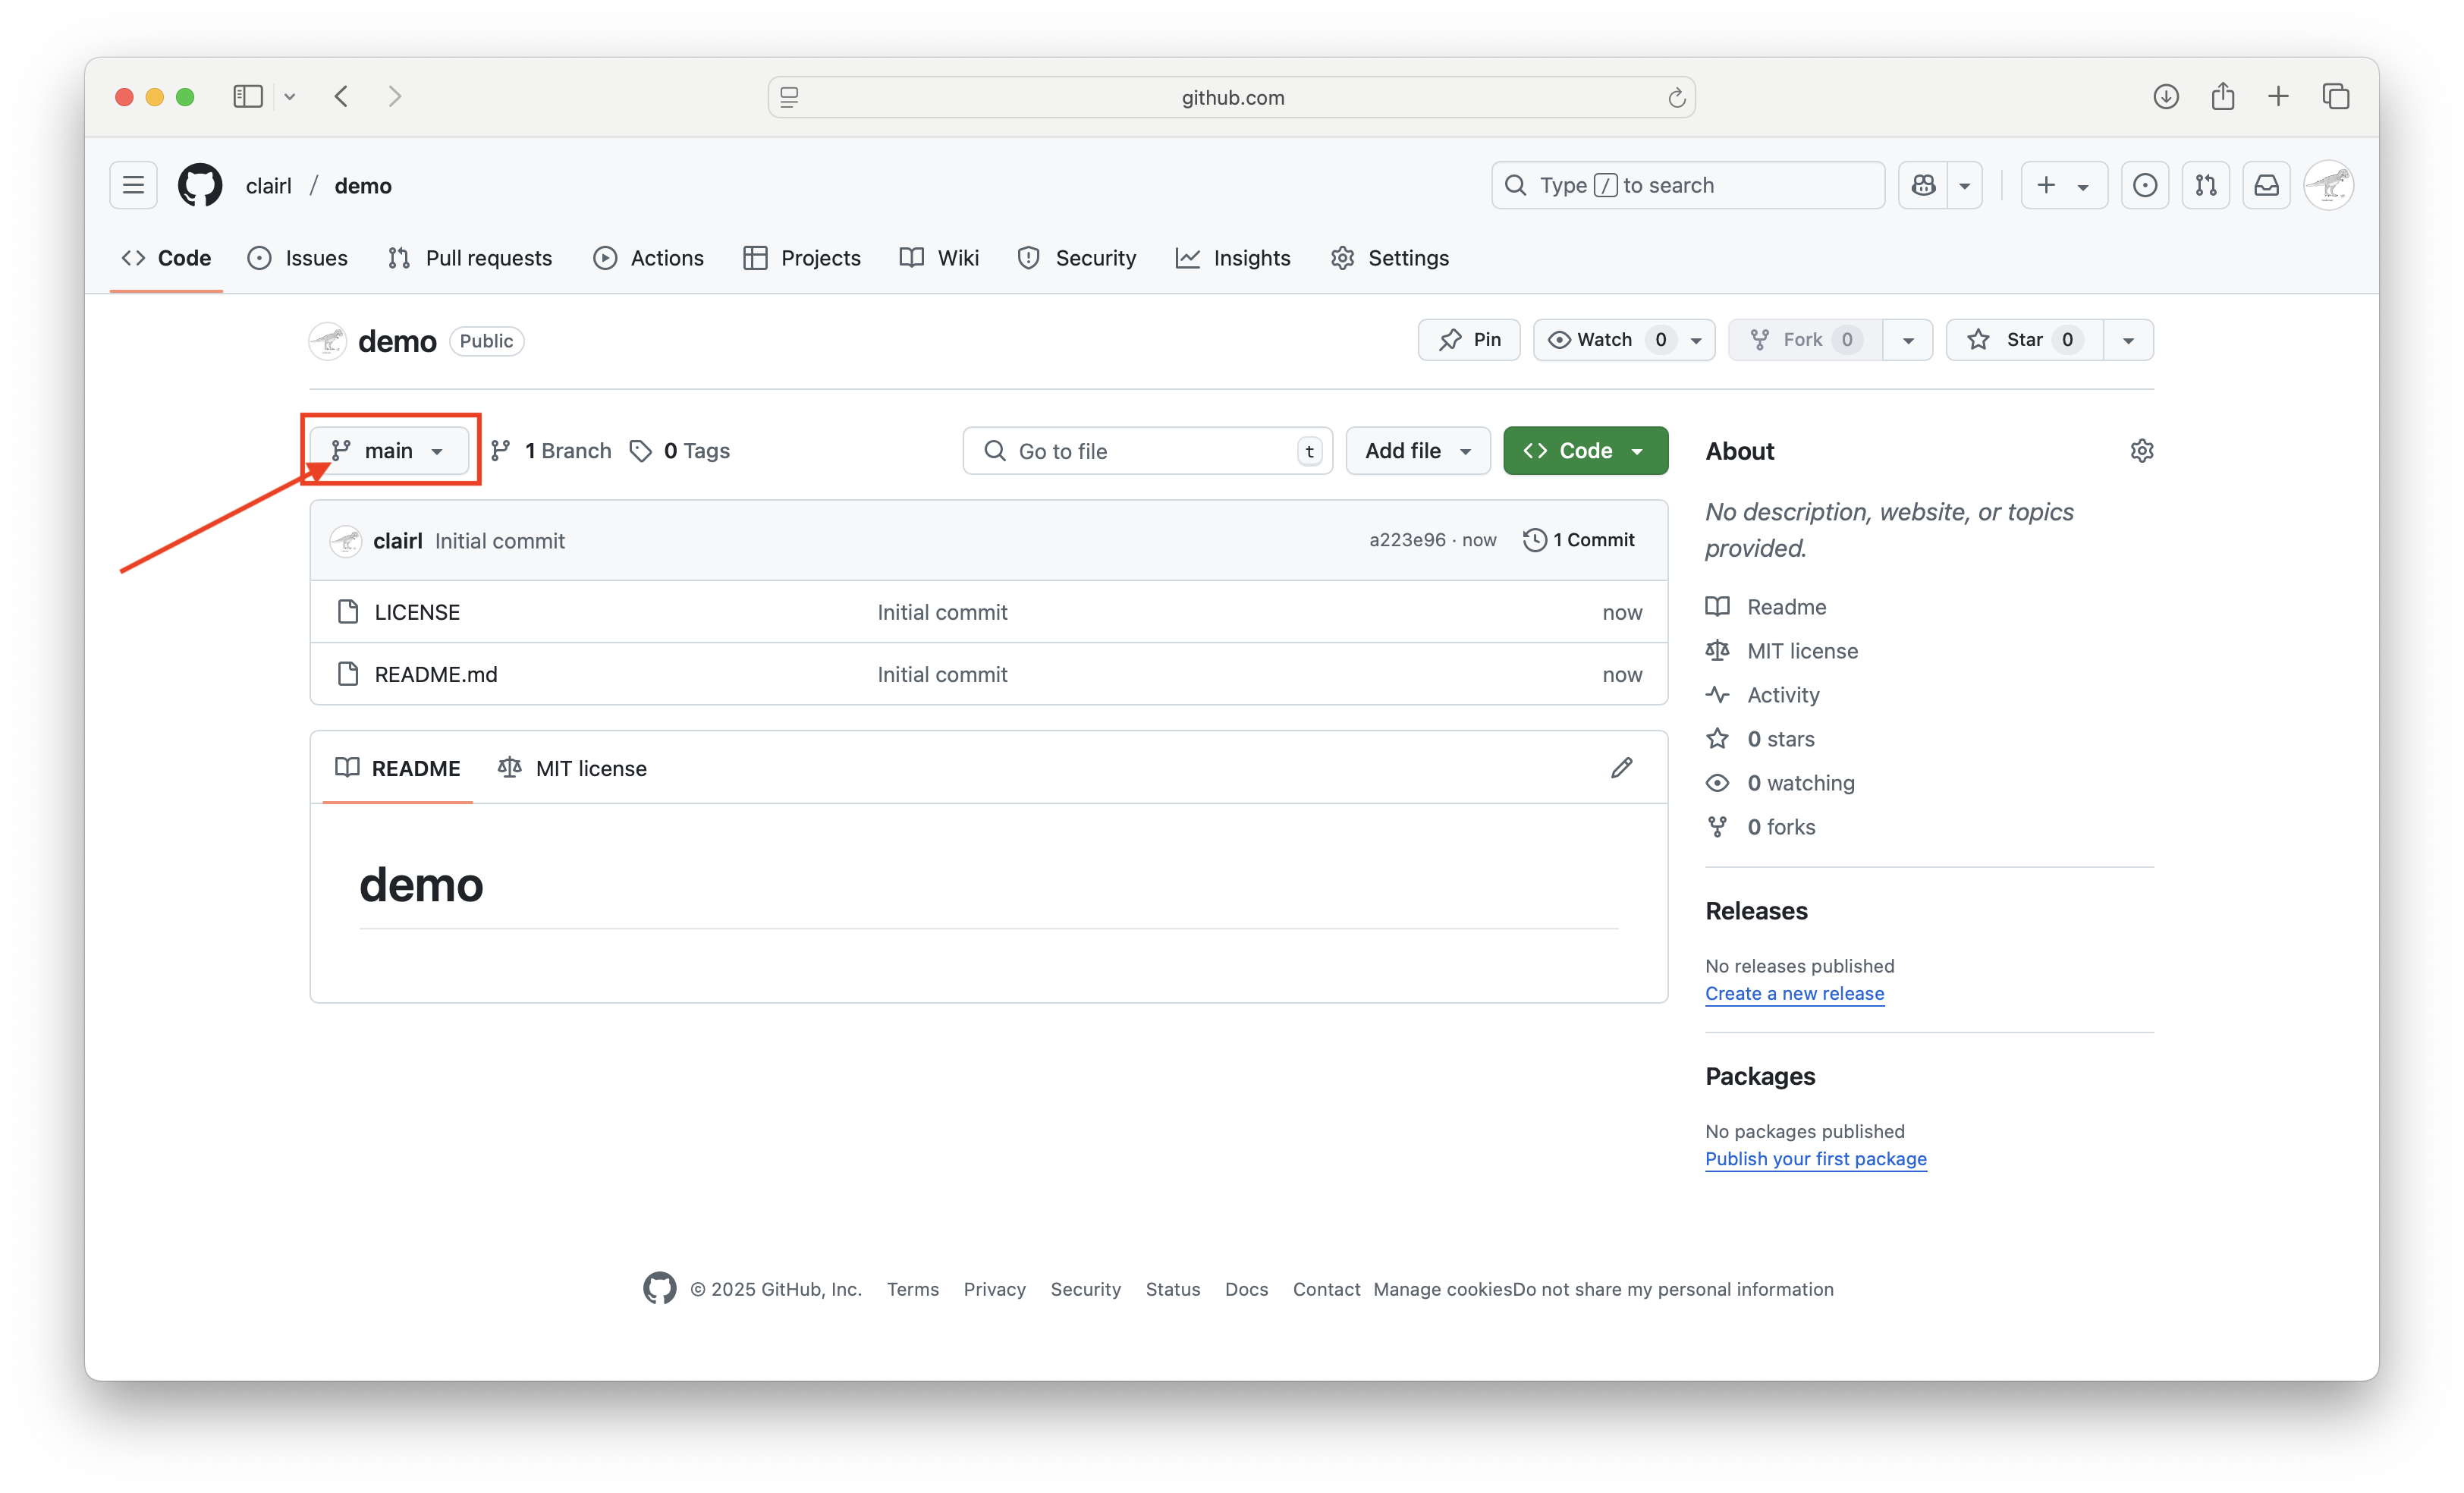
- Git defaults to the
mainbranch
Create Git Repository on GitHub (cont’d)
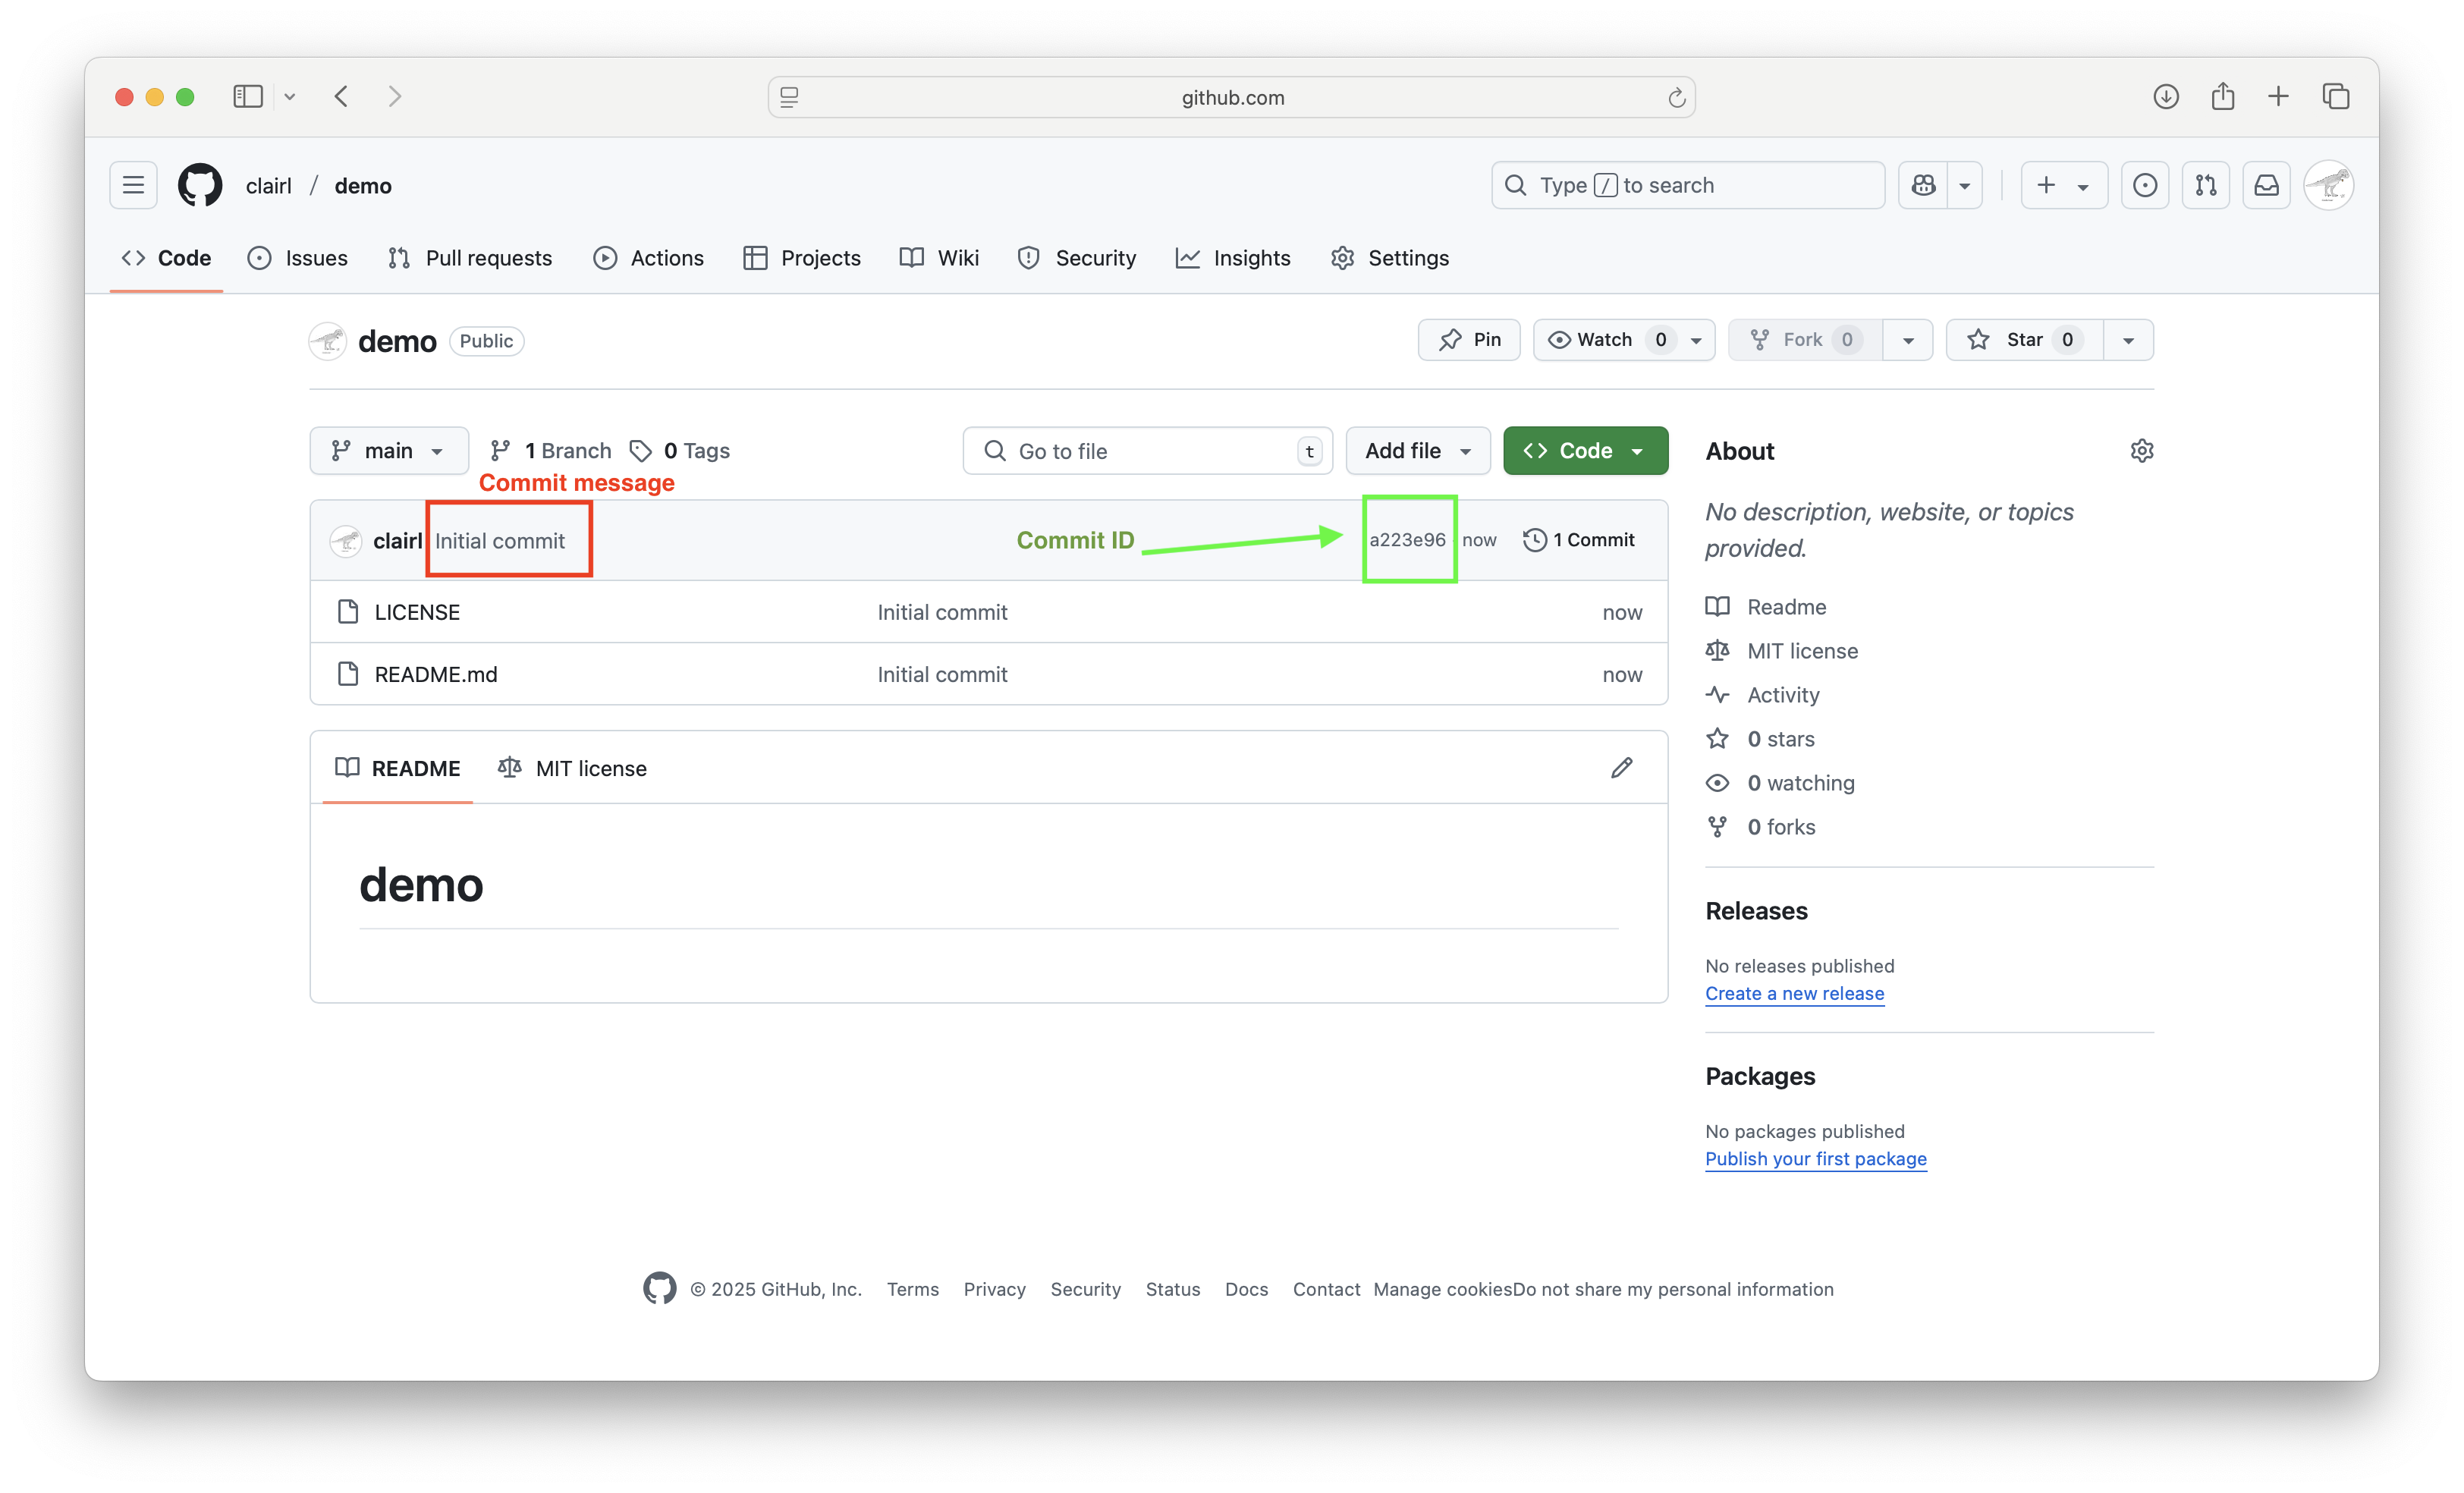
- The commit message and commit ID
Create Git Repository on GitHub (cont’d)
- Two files were created: LICENSE and README.md
- Note the files created have the same Git message
Create Git Repository on GitHub (cont’d)
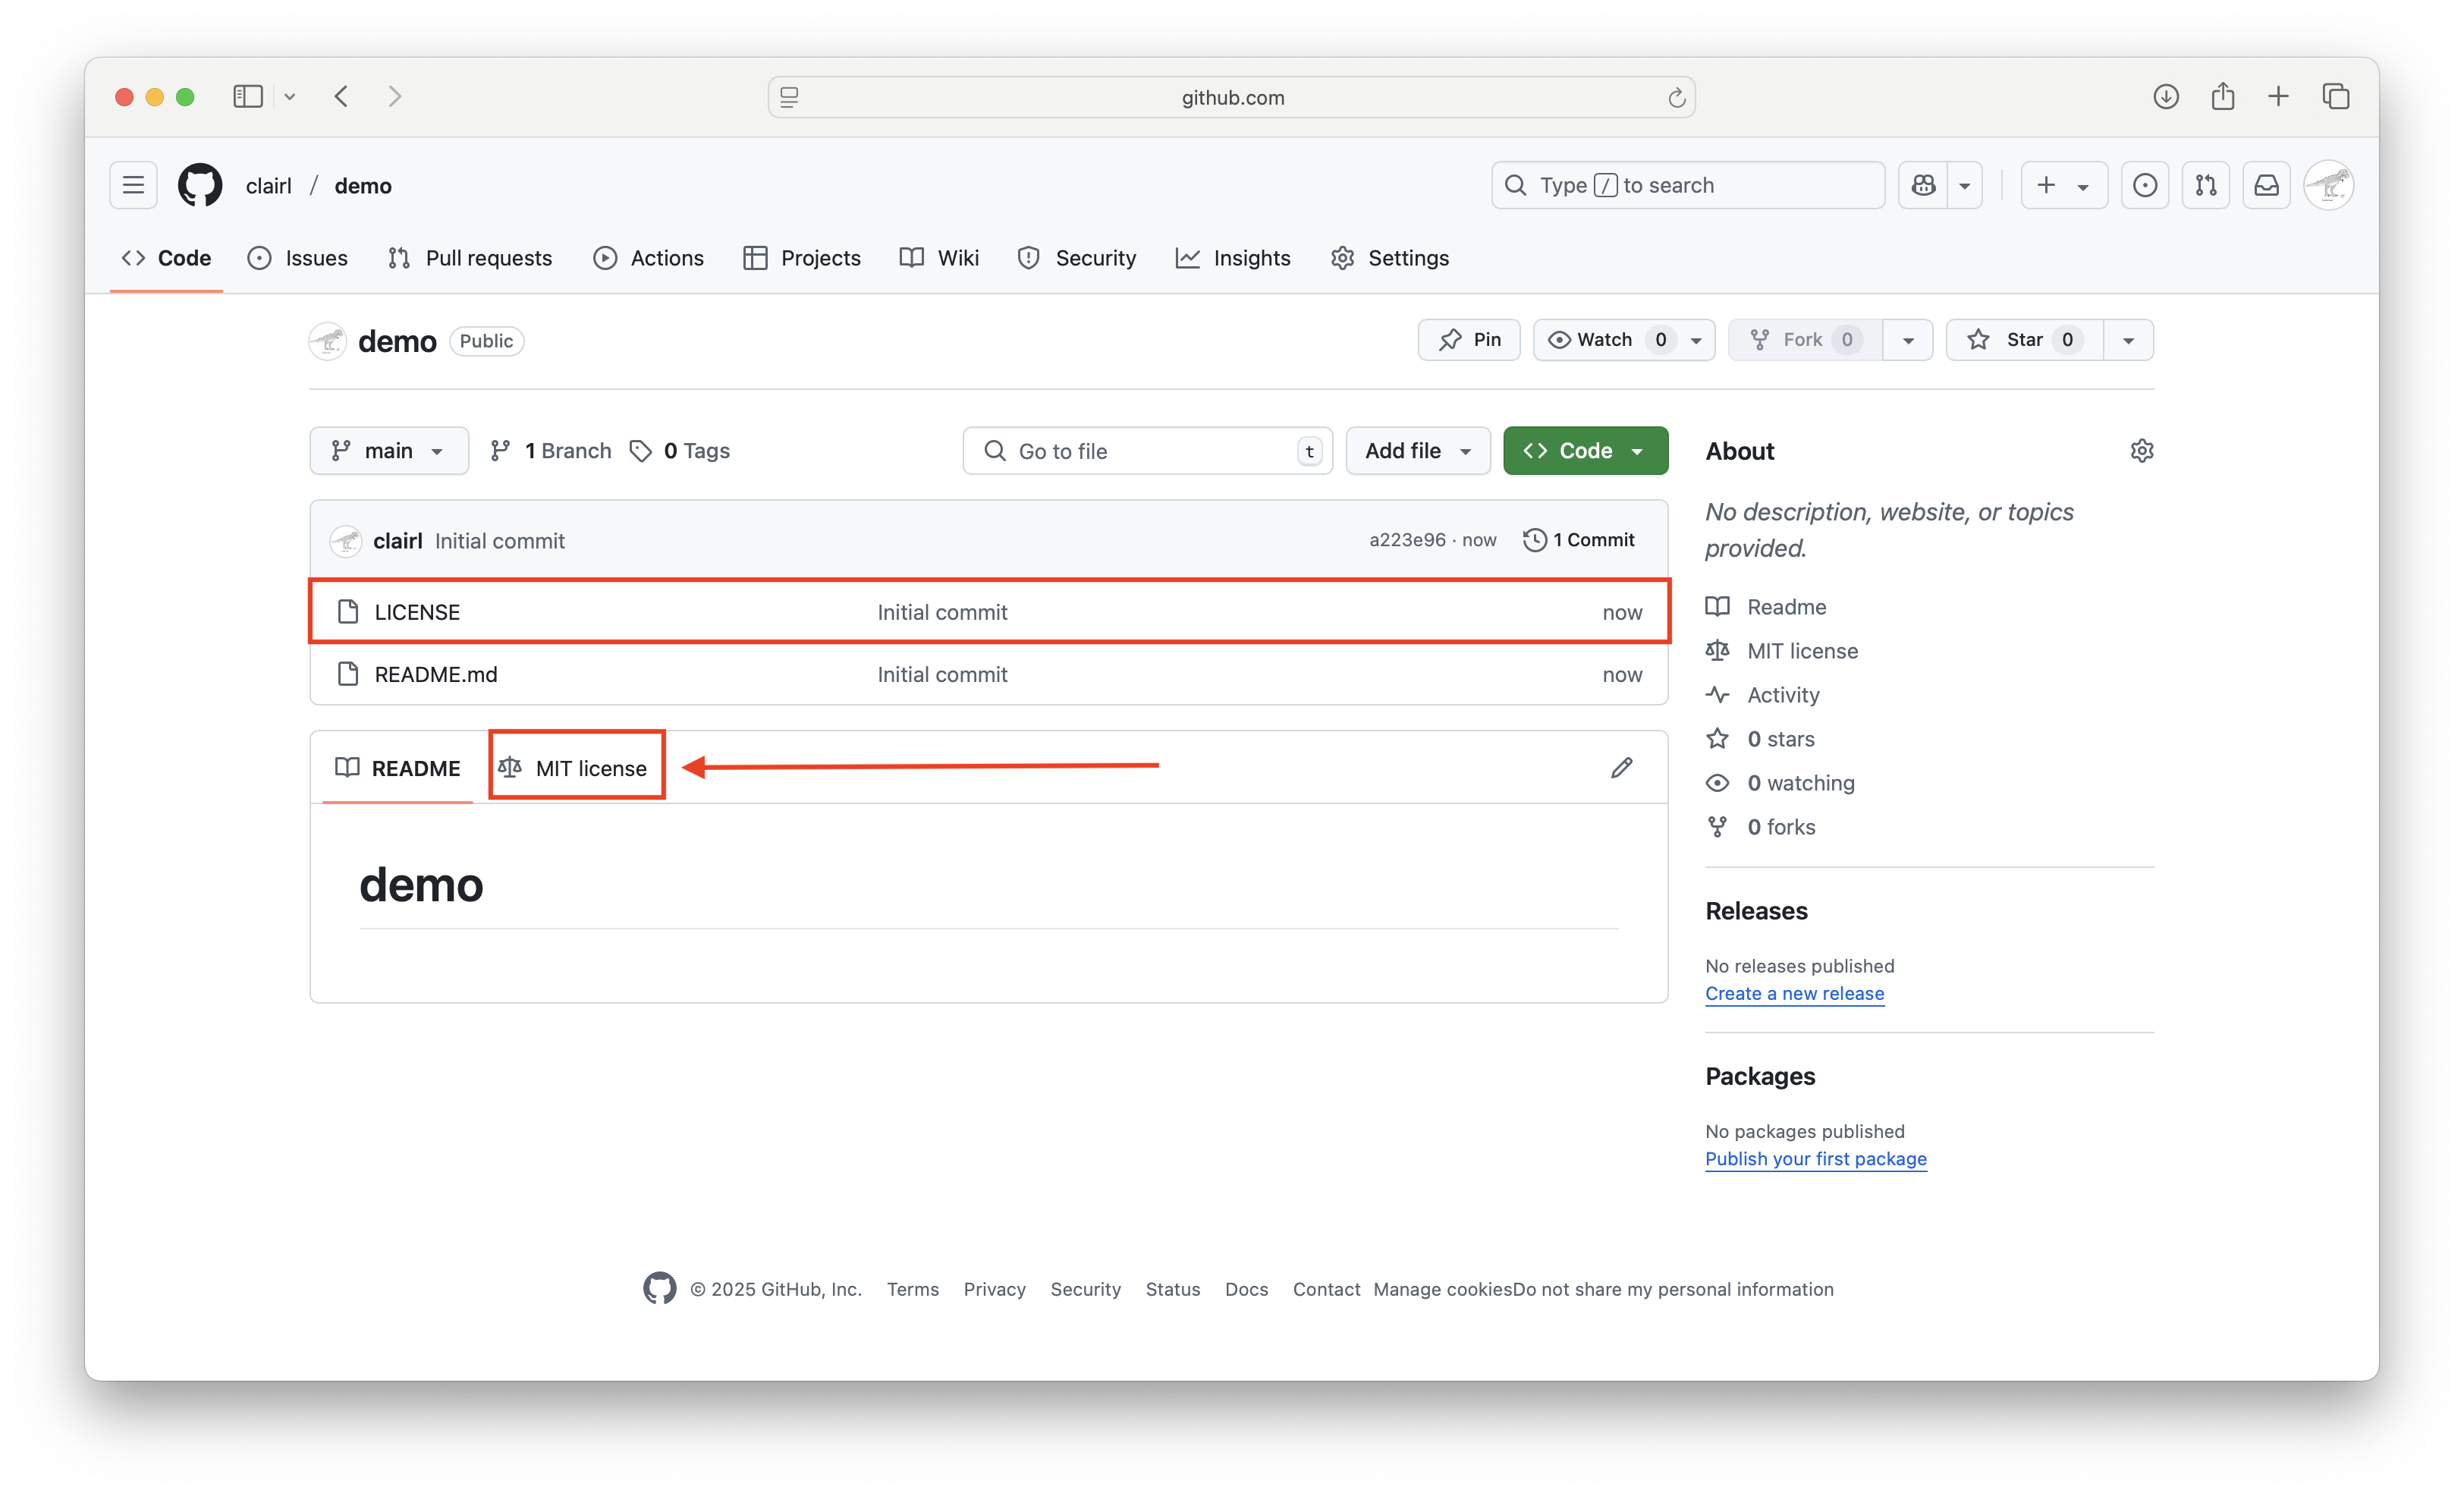
- LICENSE refers to the license chosen when creating the repository
Create Git Repository on GitHub (cont’d)
- README.md is the landing page for your repository
- It is where you describe your repository (more on this later)

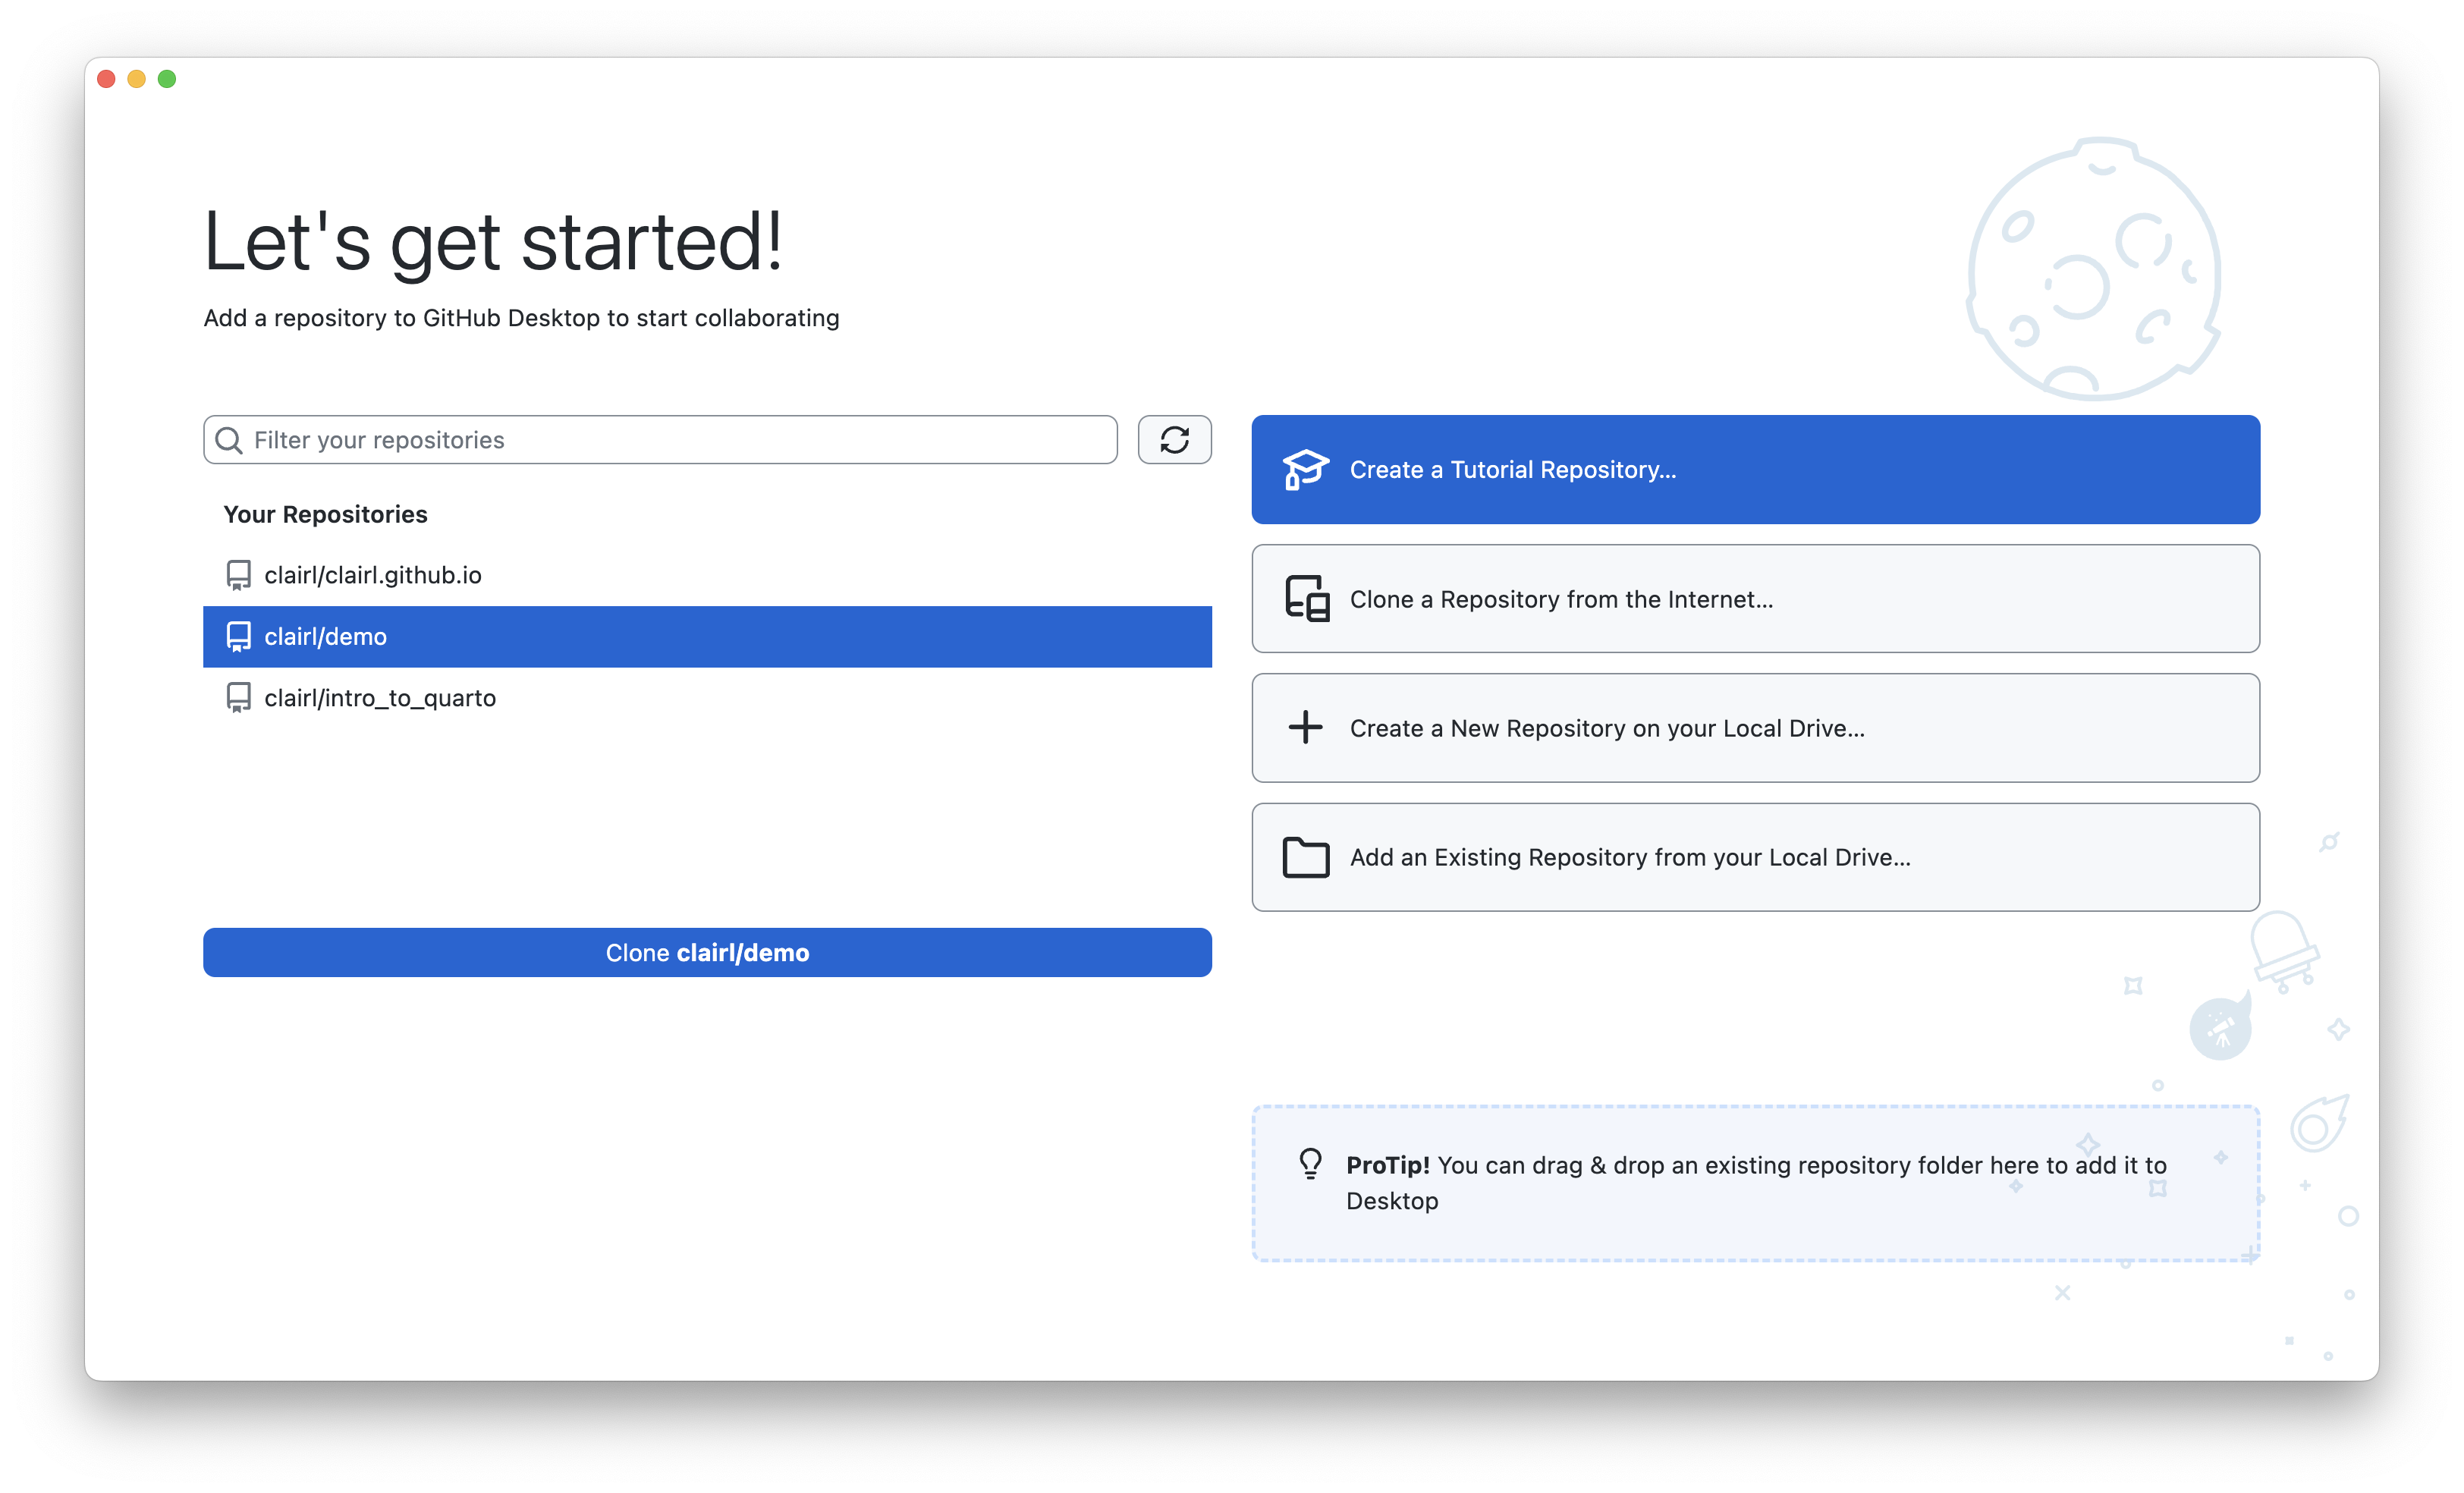
Clone GitHub Repository in GitHub Desktop
- Open GitHub Desktop and log in (if you are currently logged out)
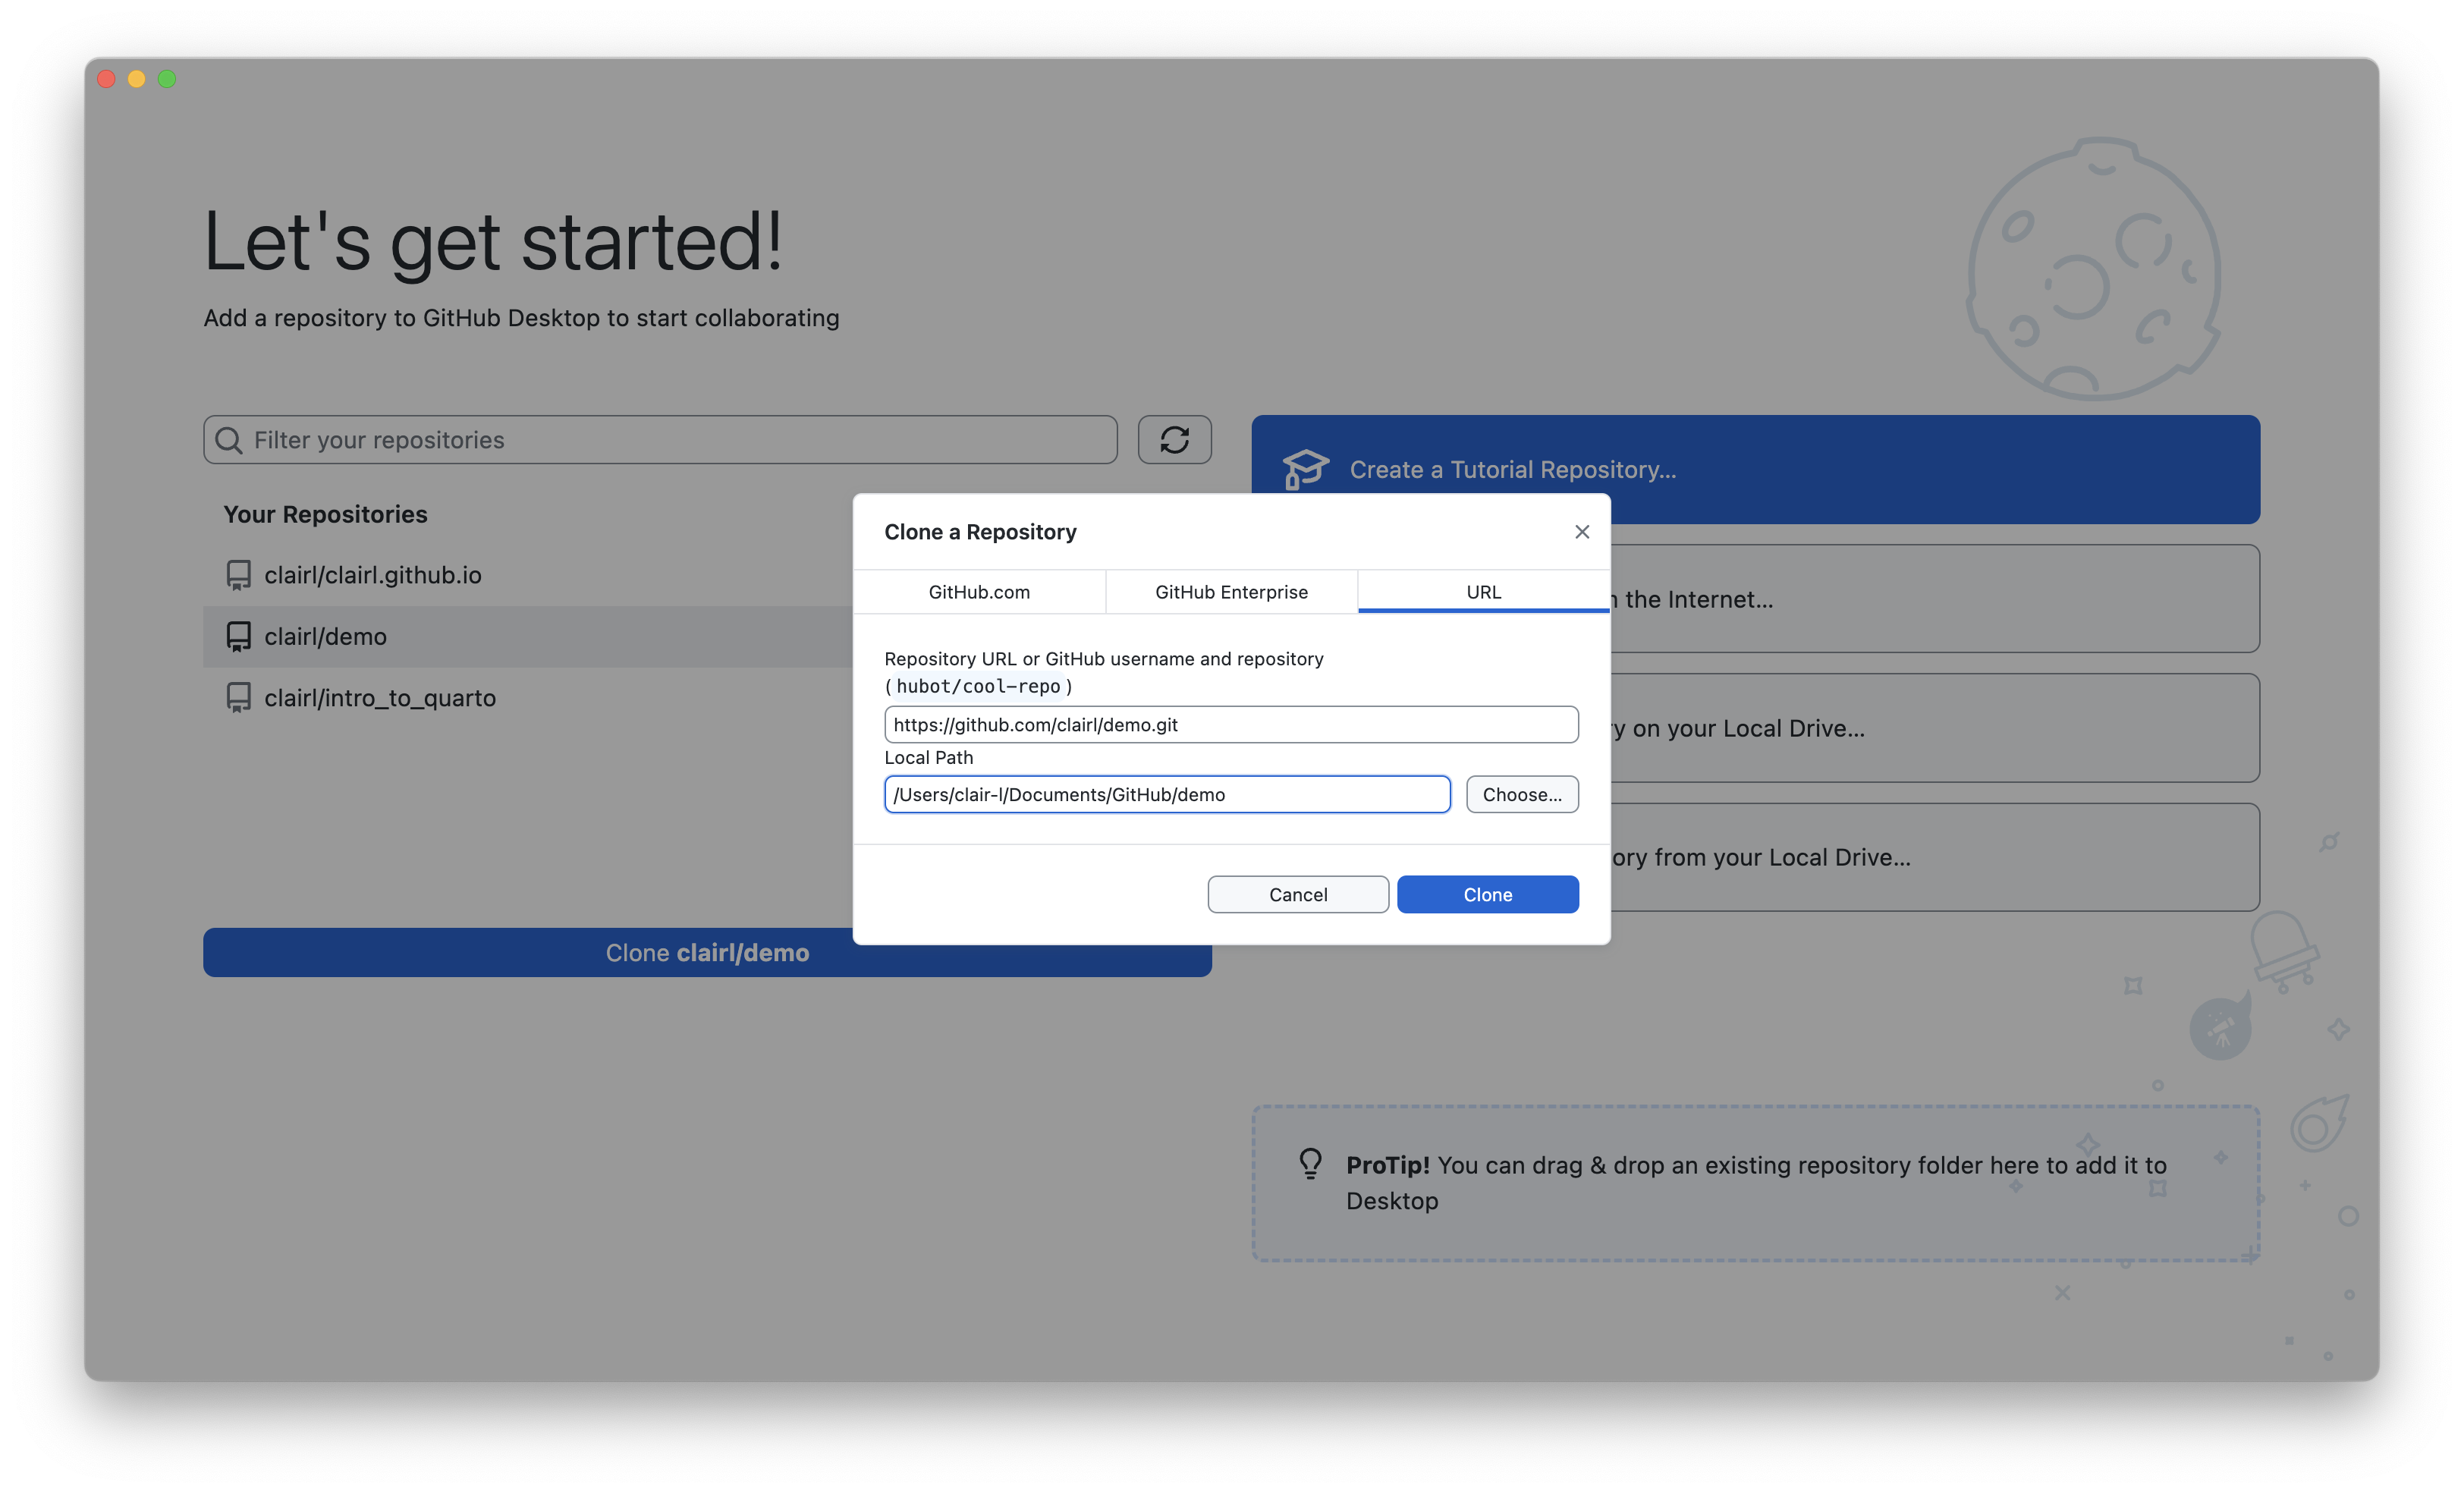
Clone GitHub Repository in GitHub Desktop (cont’d)
- Choose the location for the clone of the GitHub repo on your local computer and click Clone
Clone GitHub Repository in GitHub Desktop (cont’d)
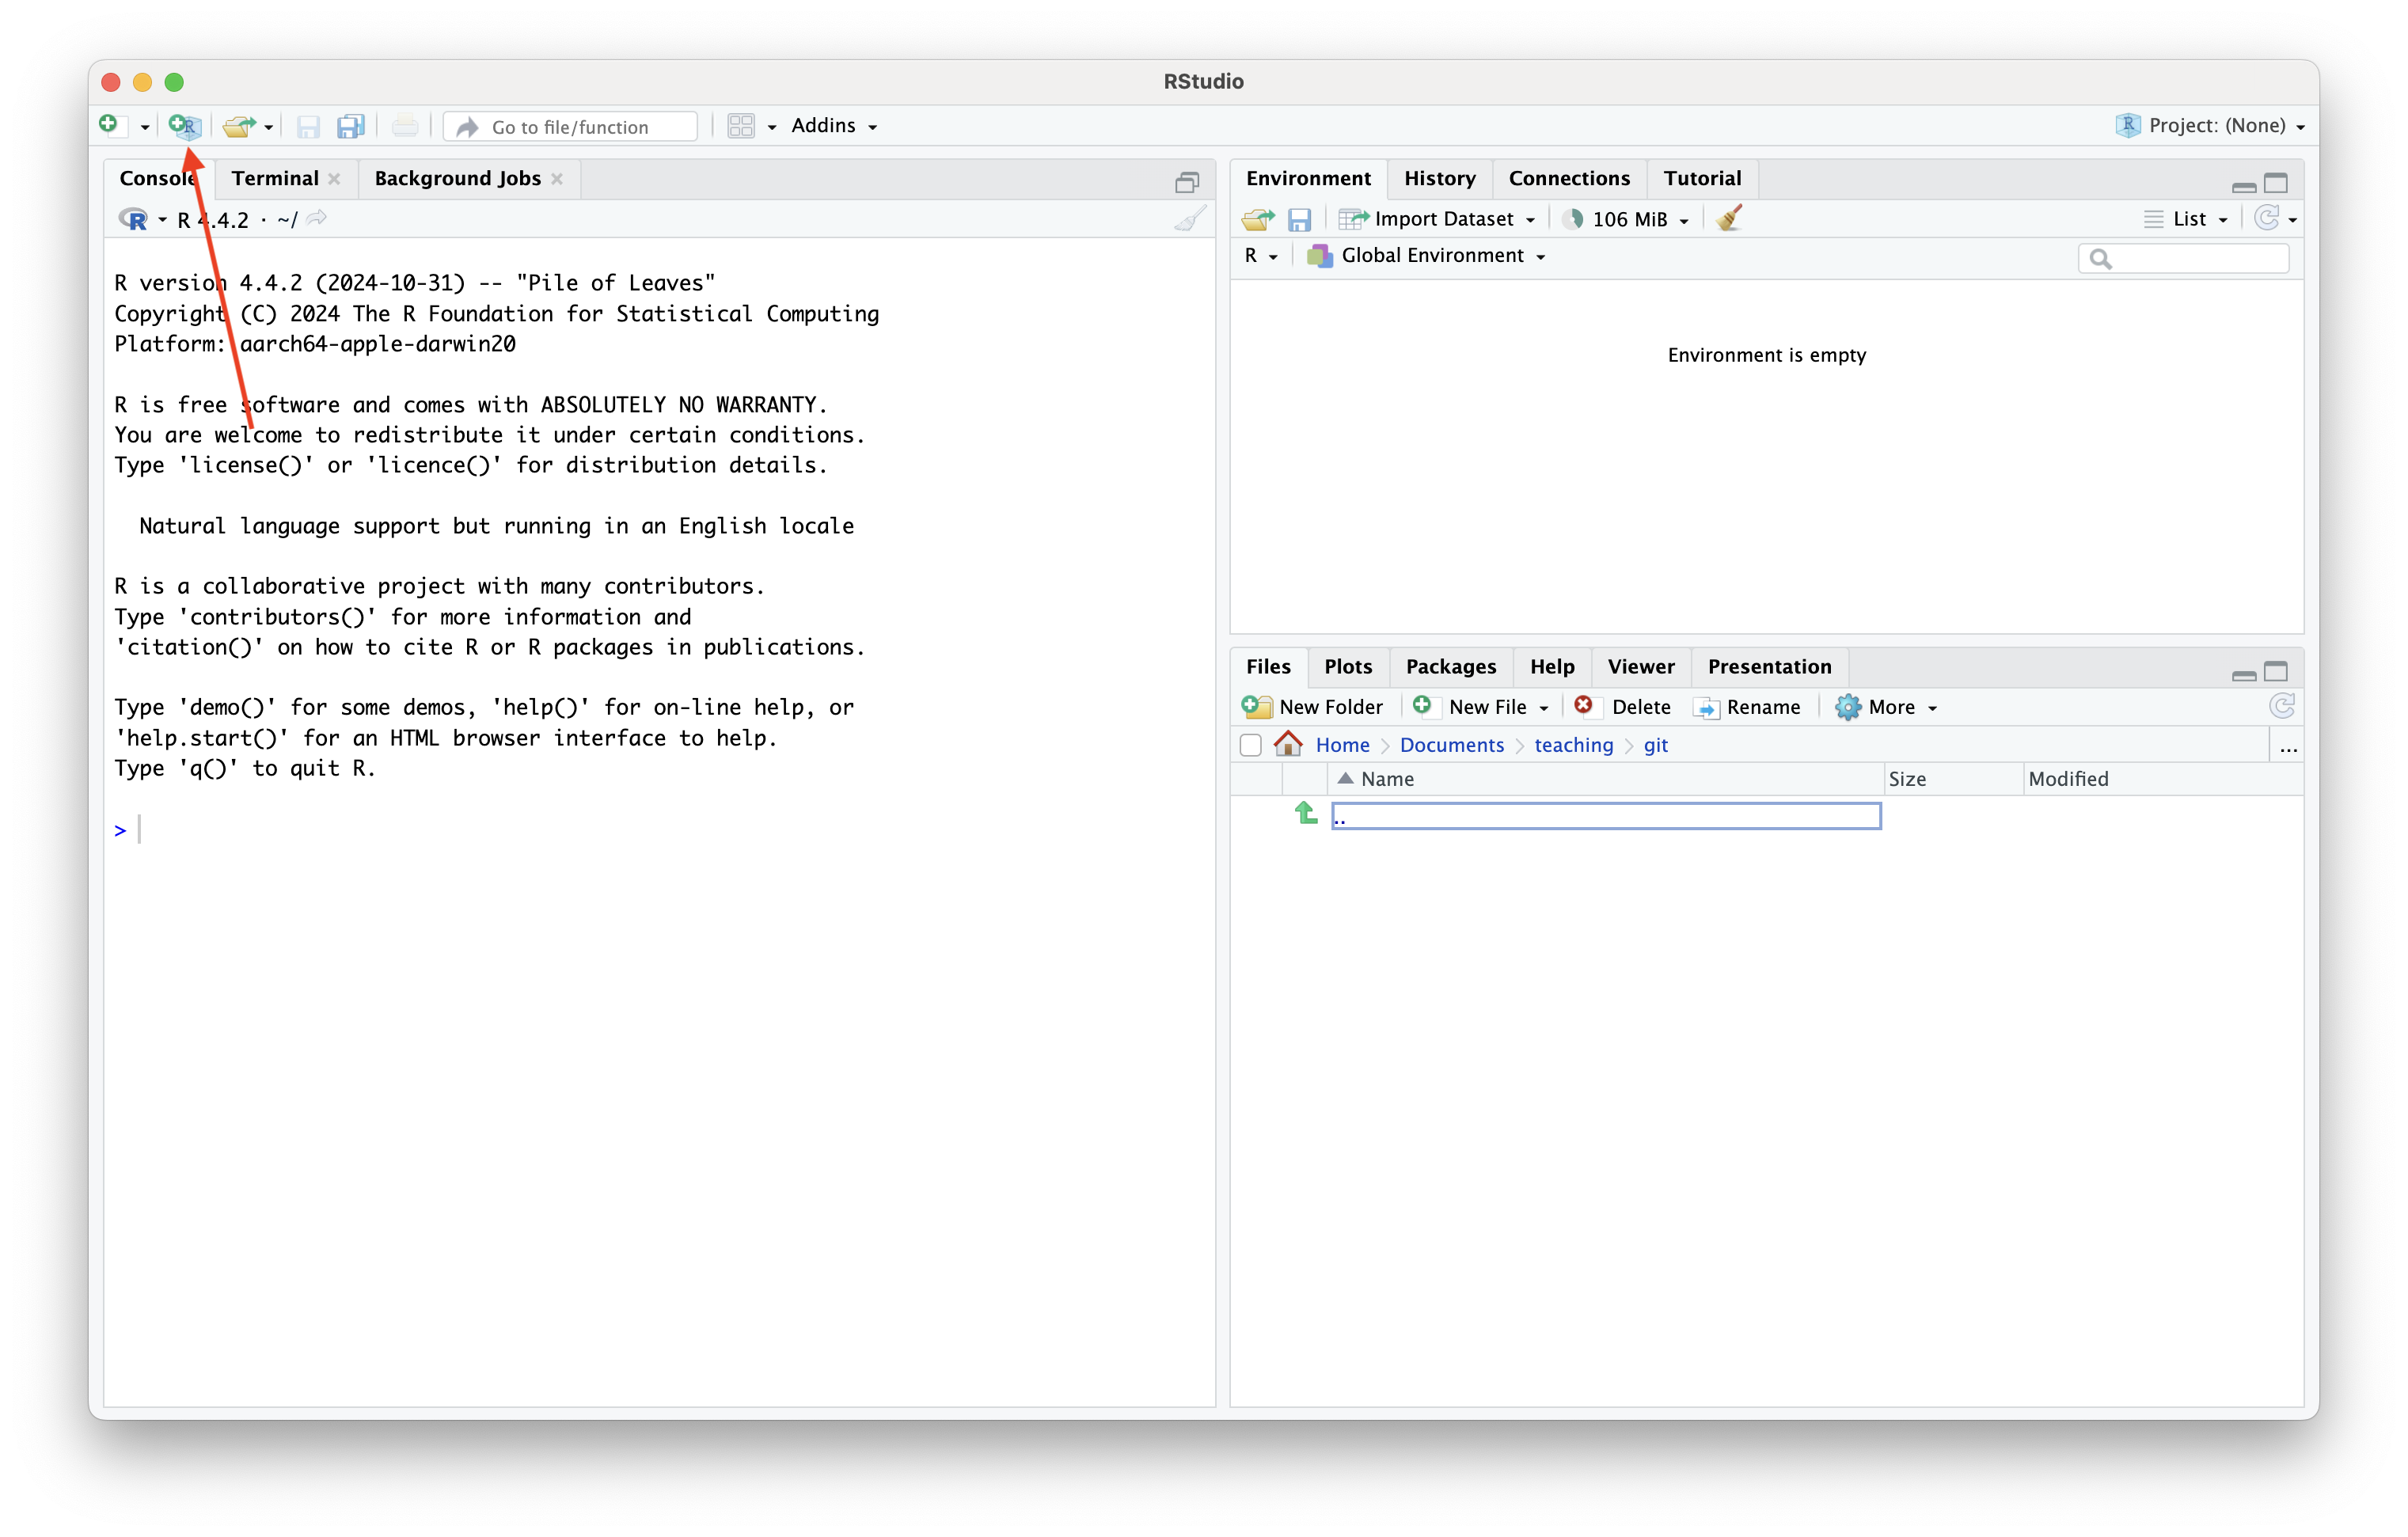
Link GitHub Repository to RStudio
- Open RStudio and create a new project
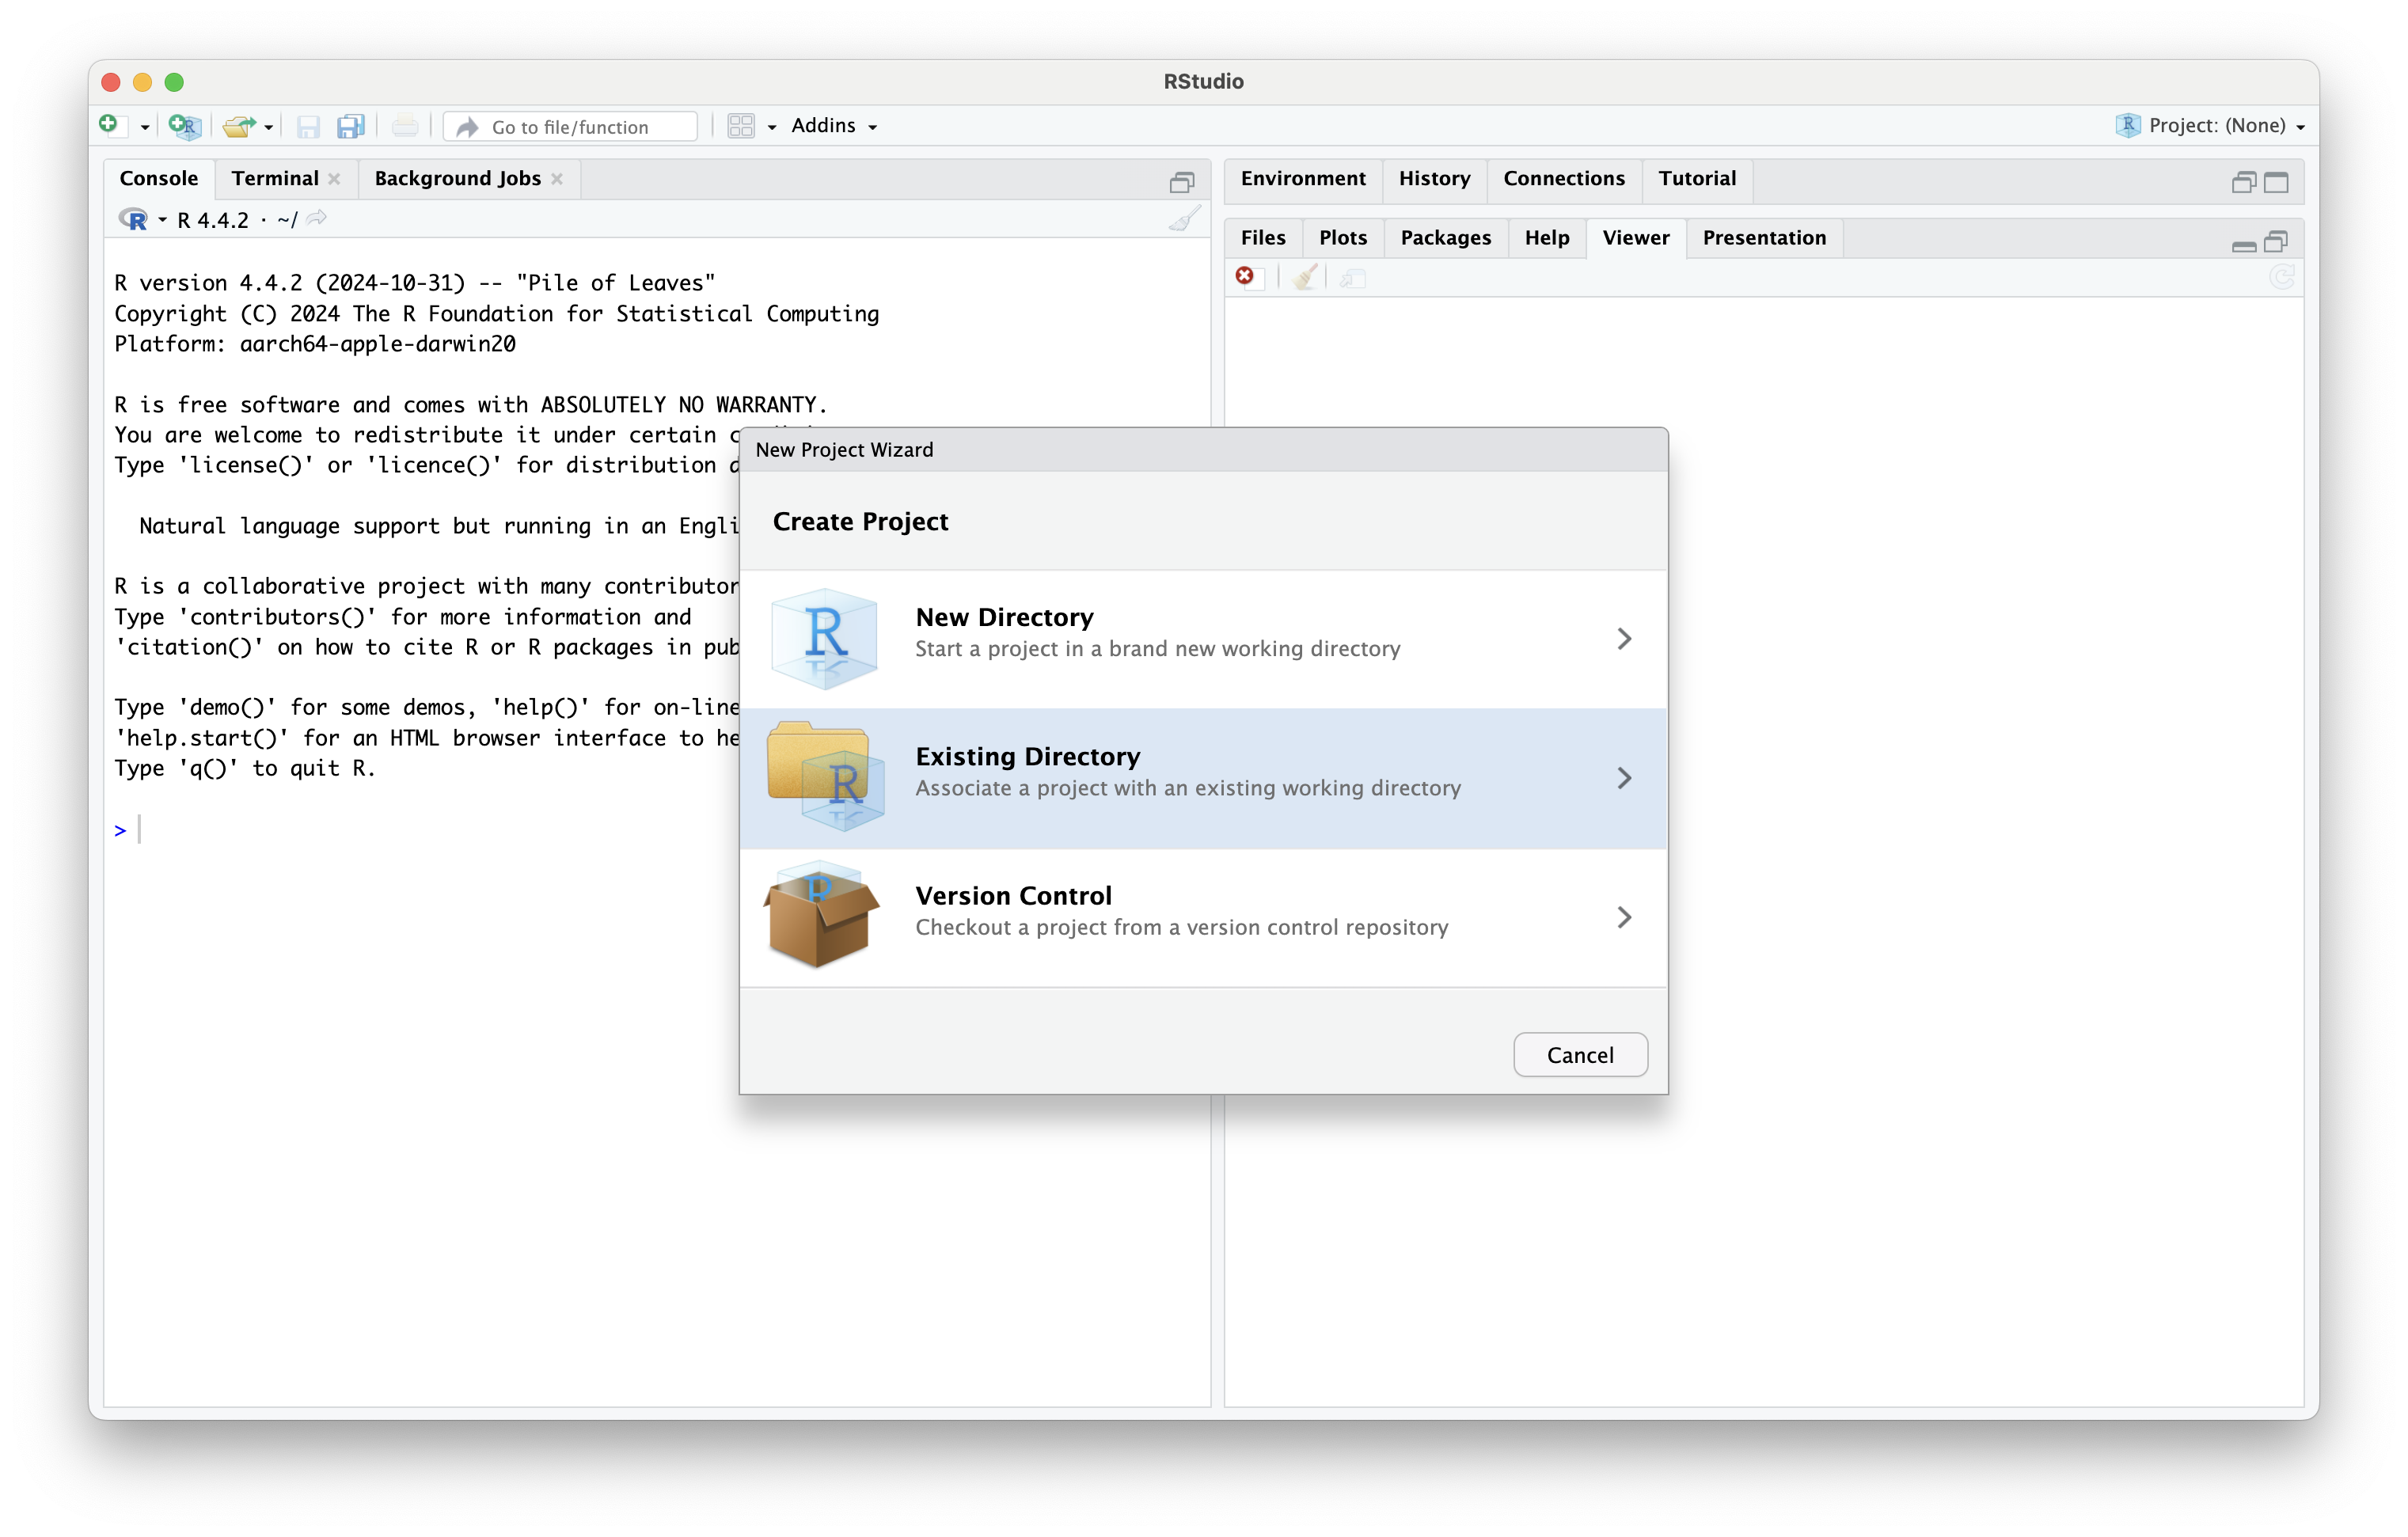
Link GitHub Repository to RStudio (cont’d)
- Choose Existing Directory
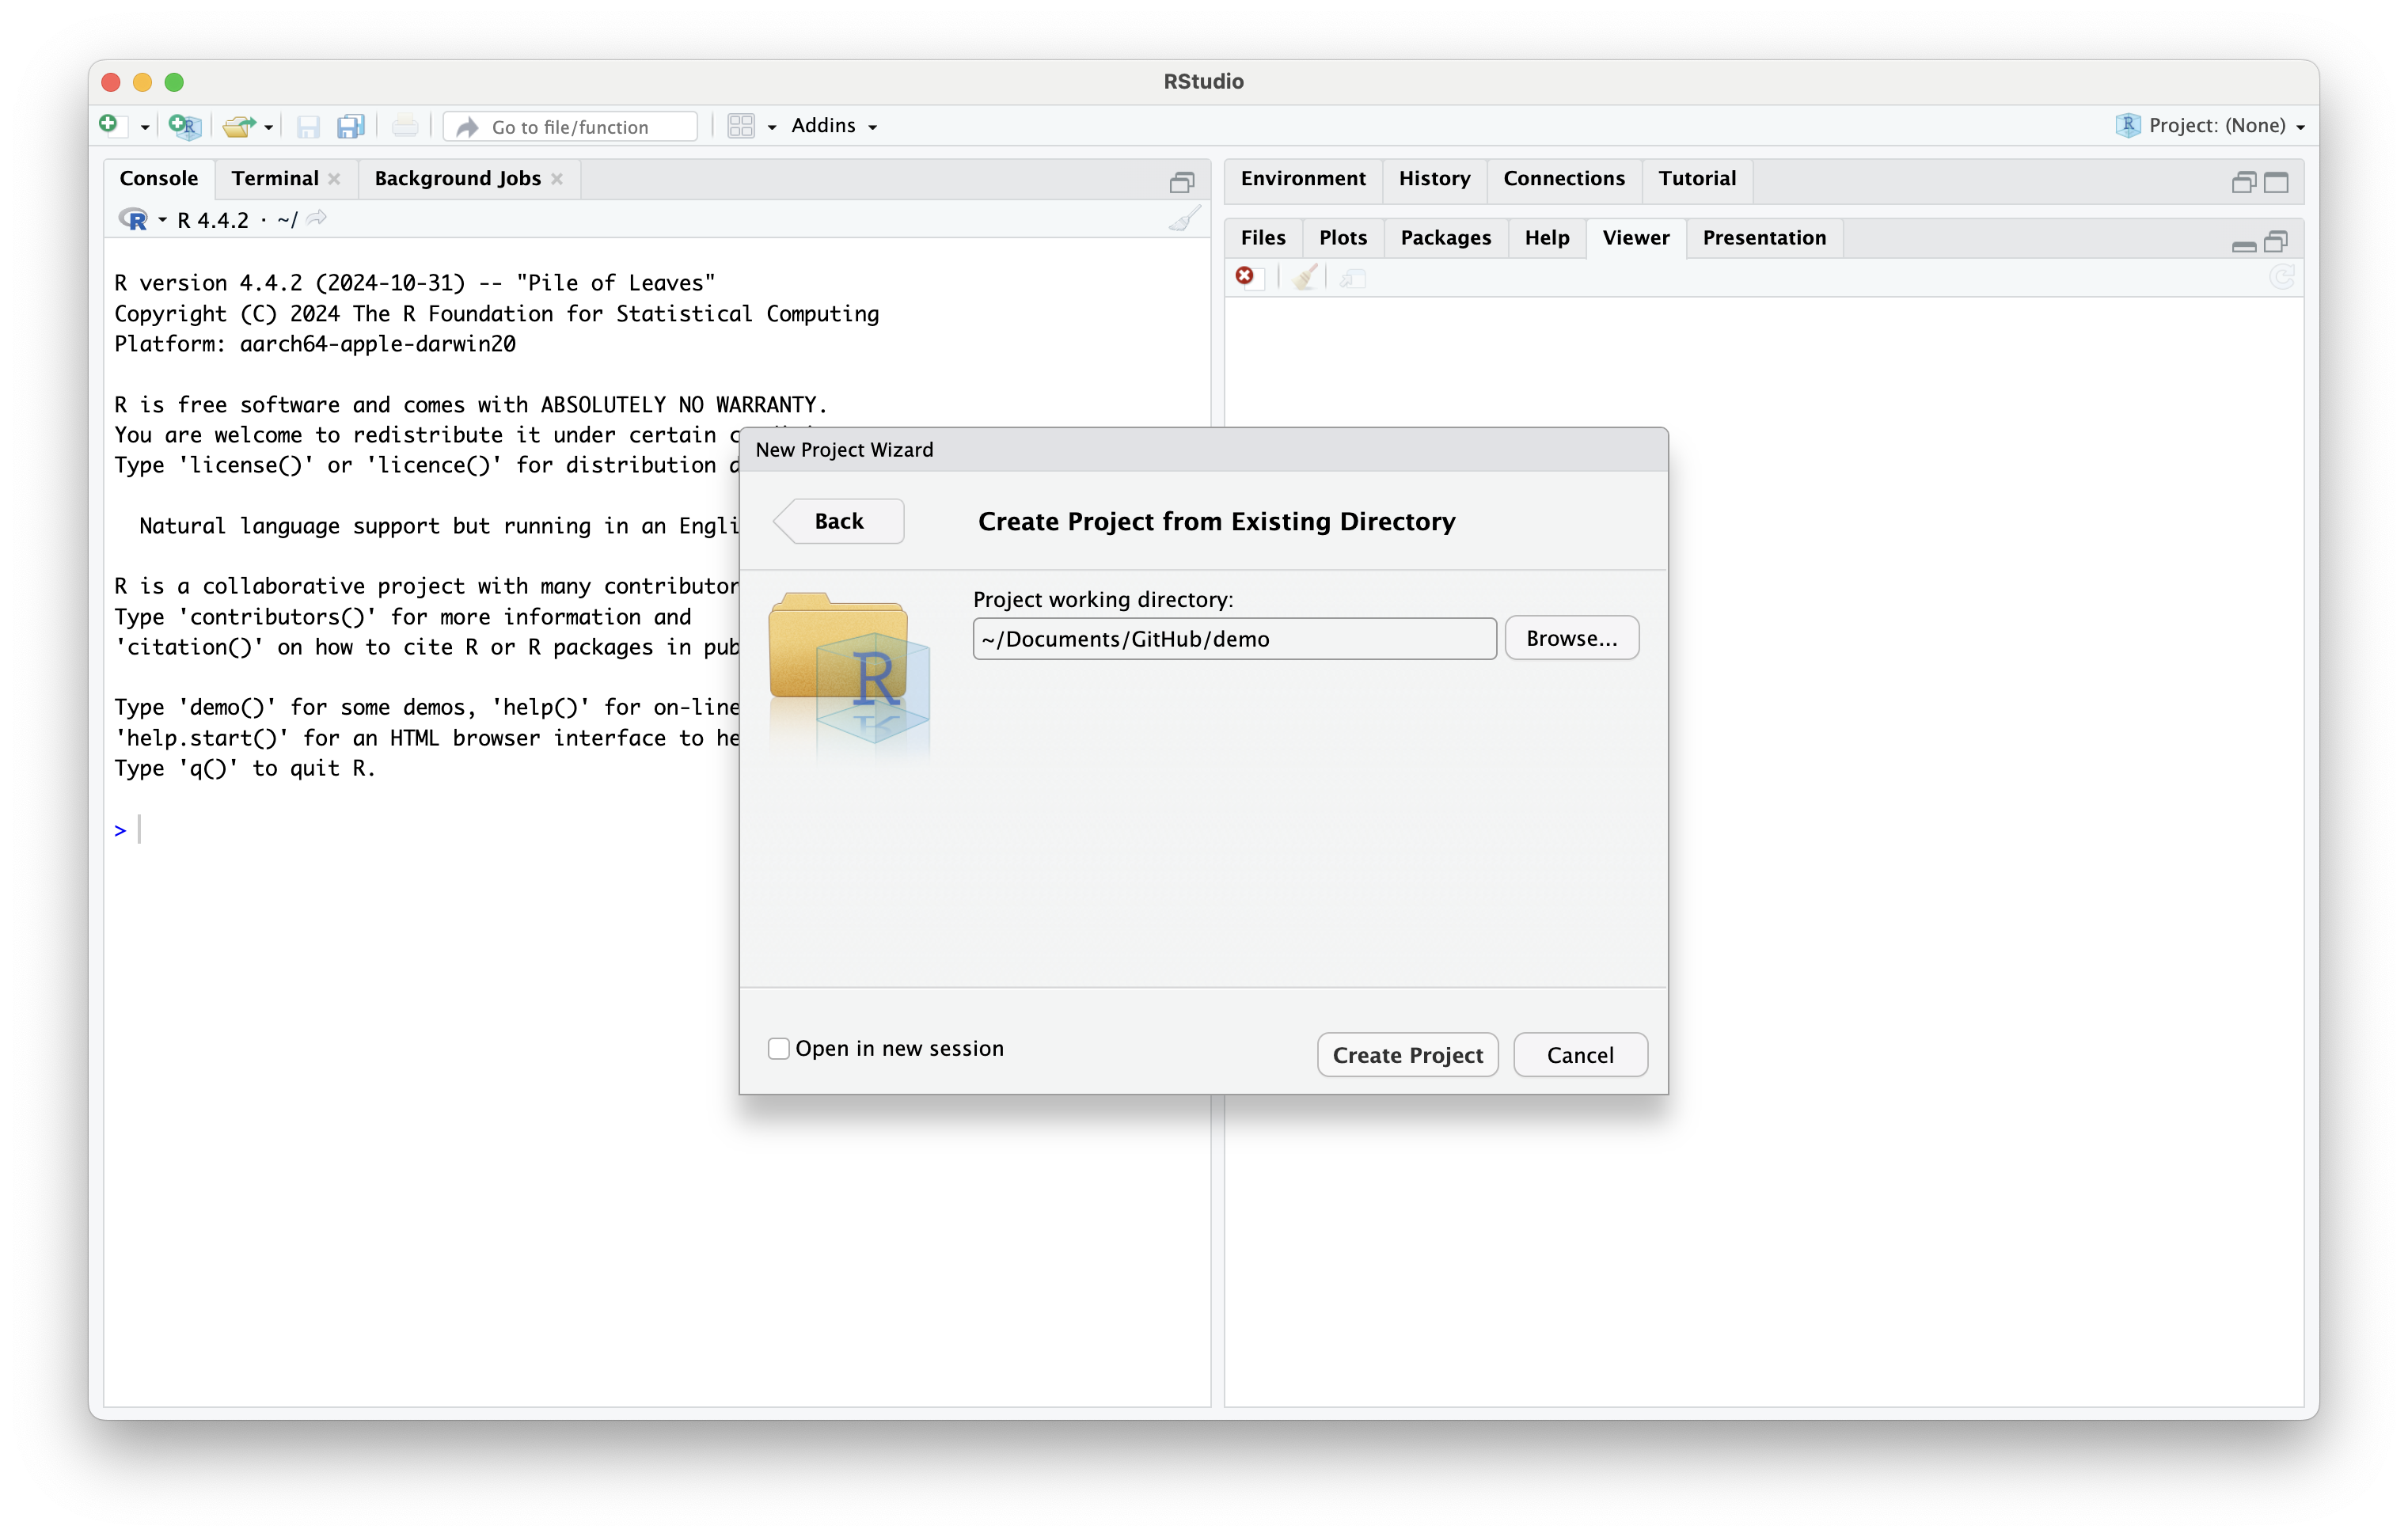
Link GitHub Repository to RStudio (cont’d)
- Choose the location of your GitHub repo on your local machine and click Create Project
Link GitHub Repository to RStudio (cont’d)
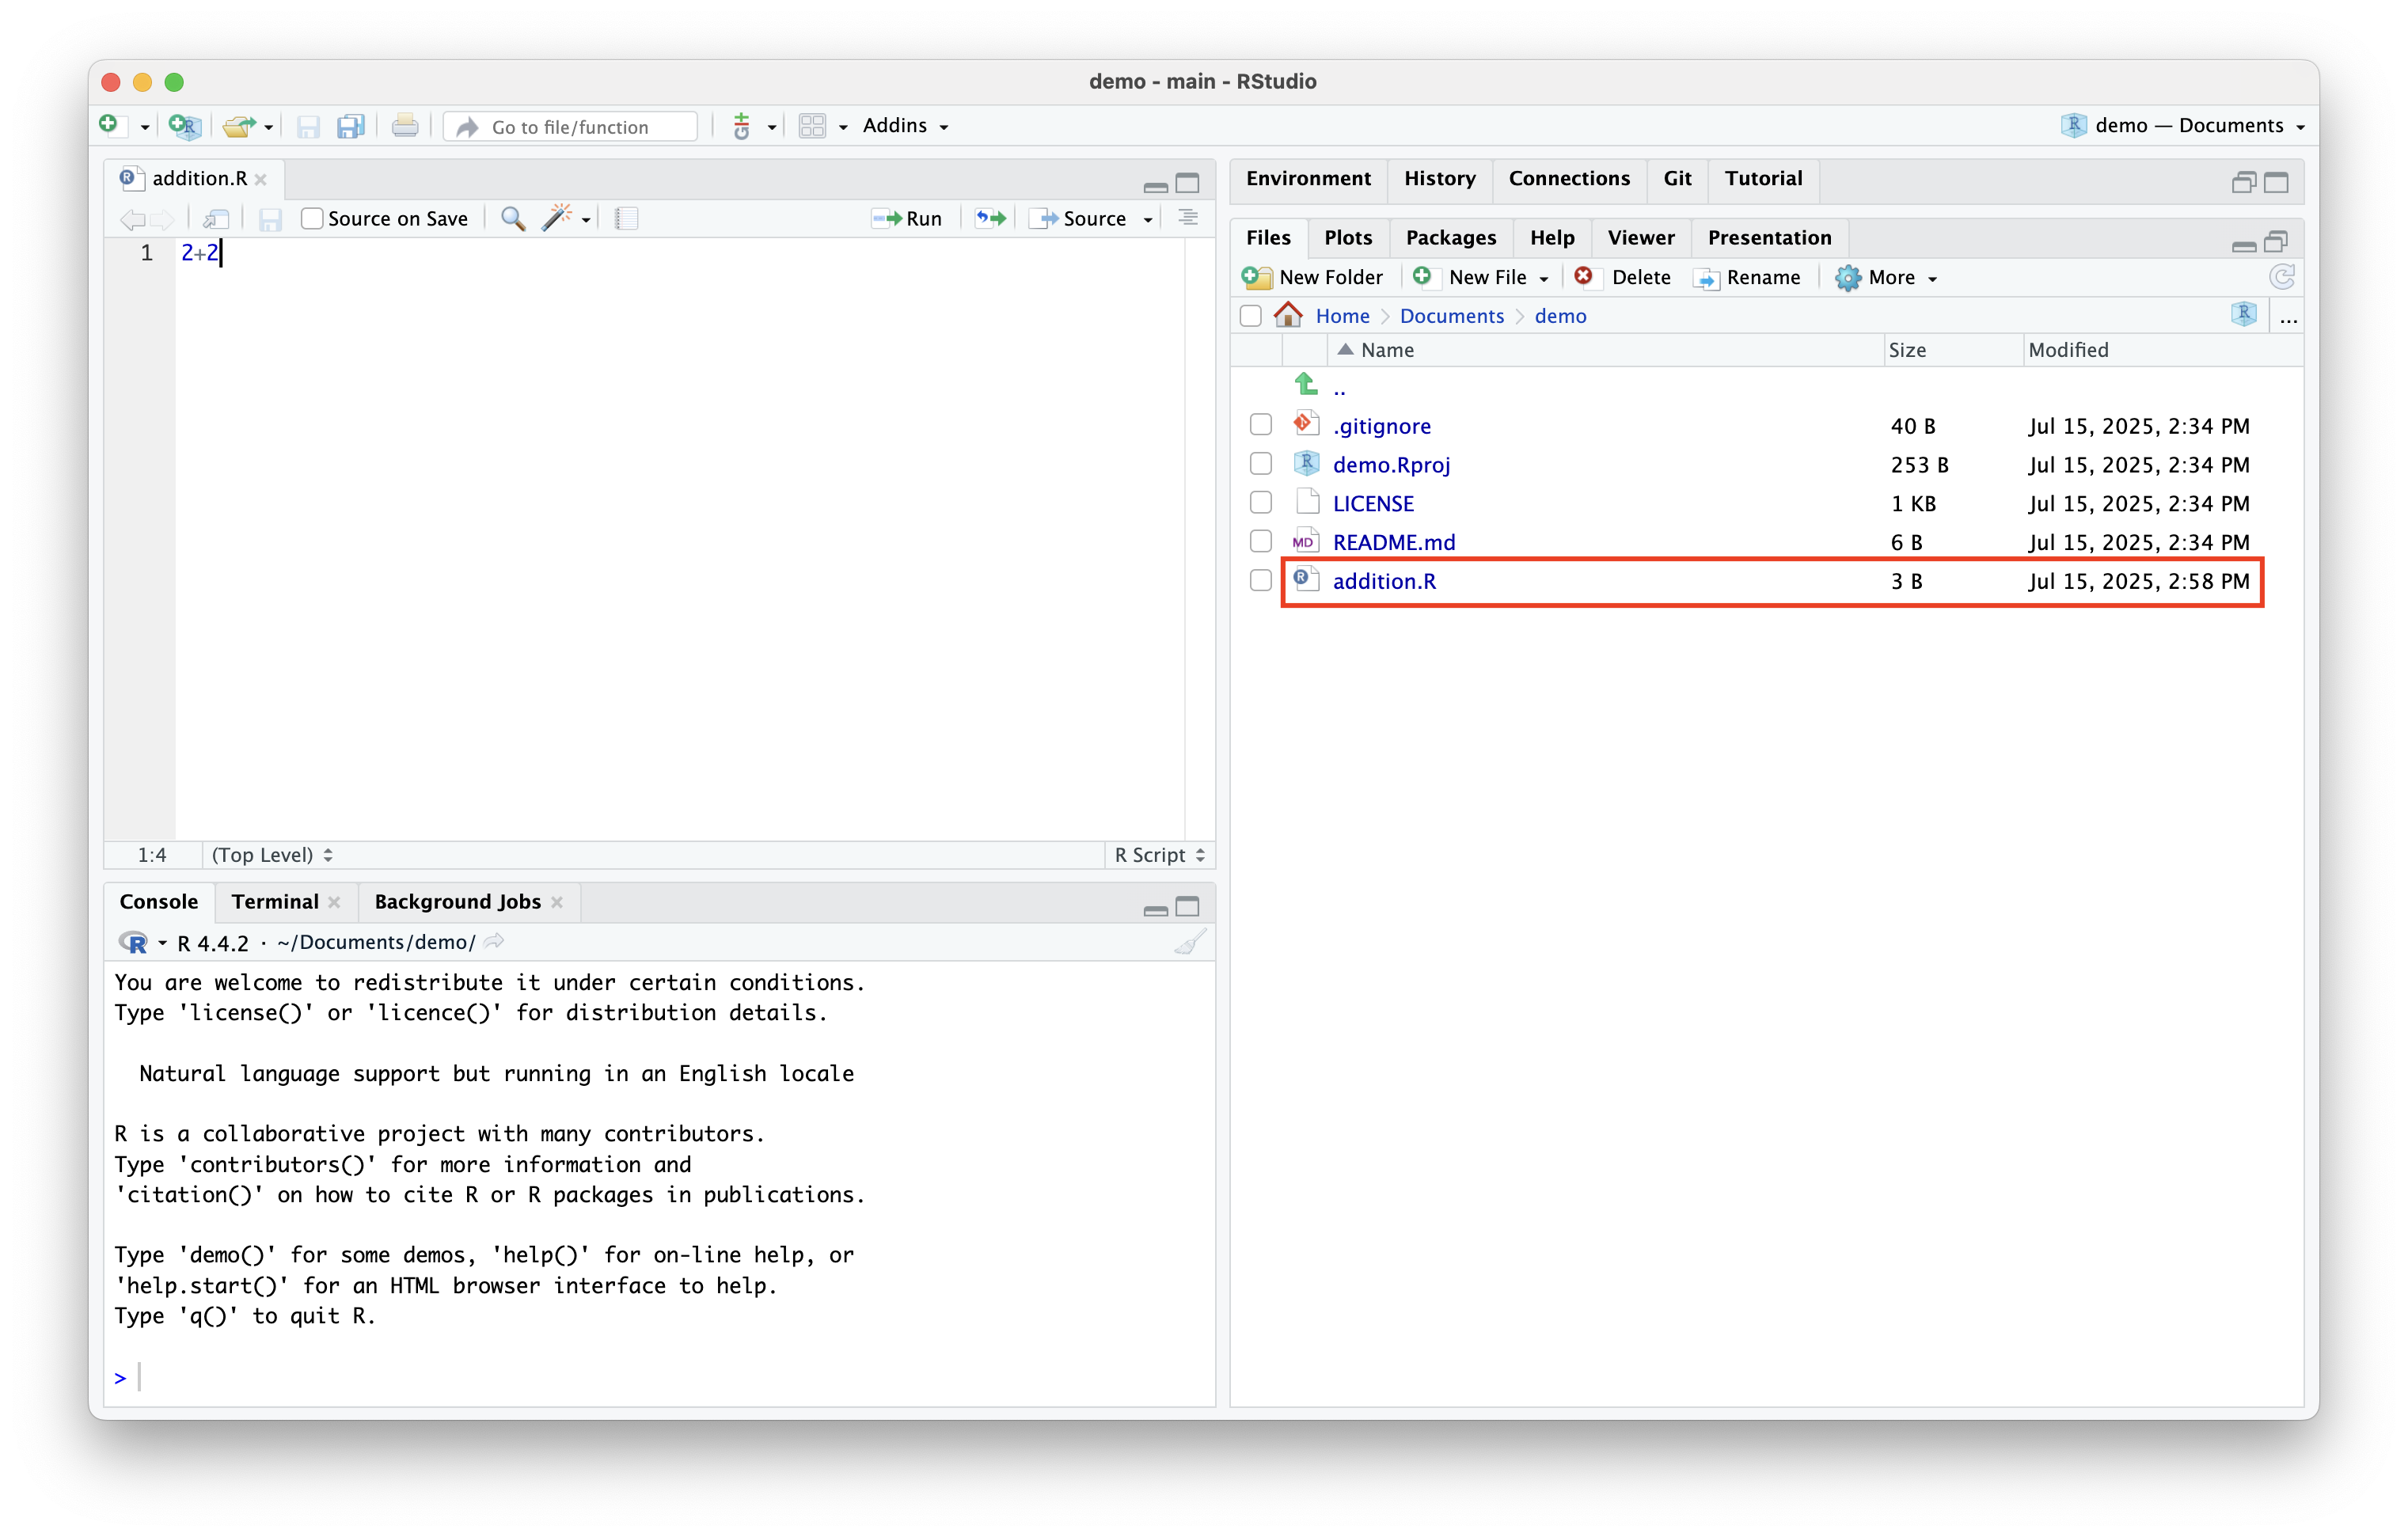
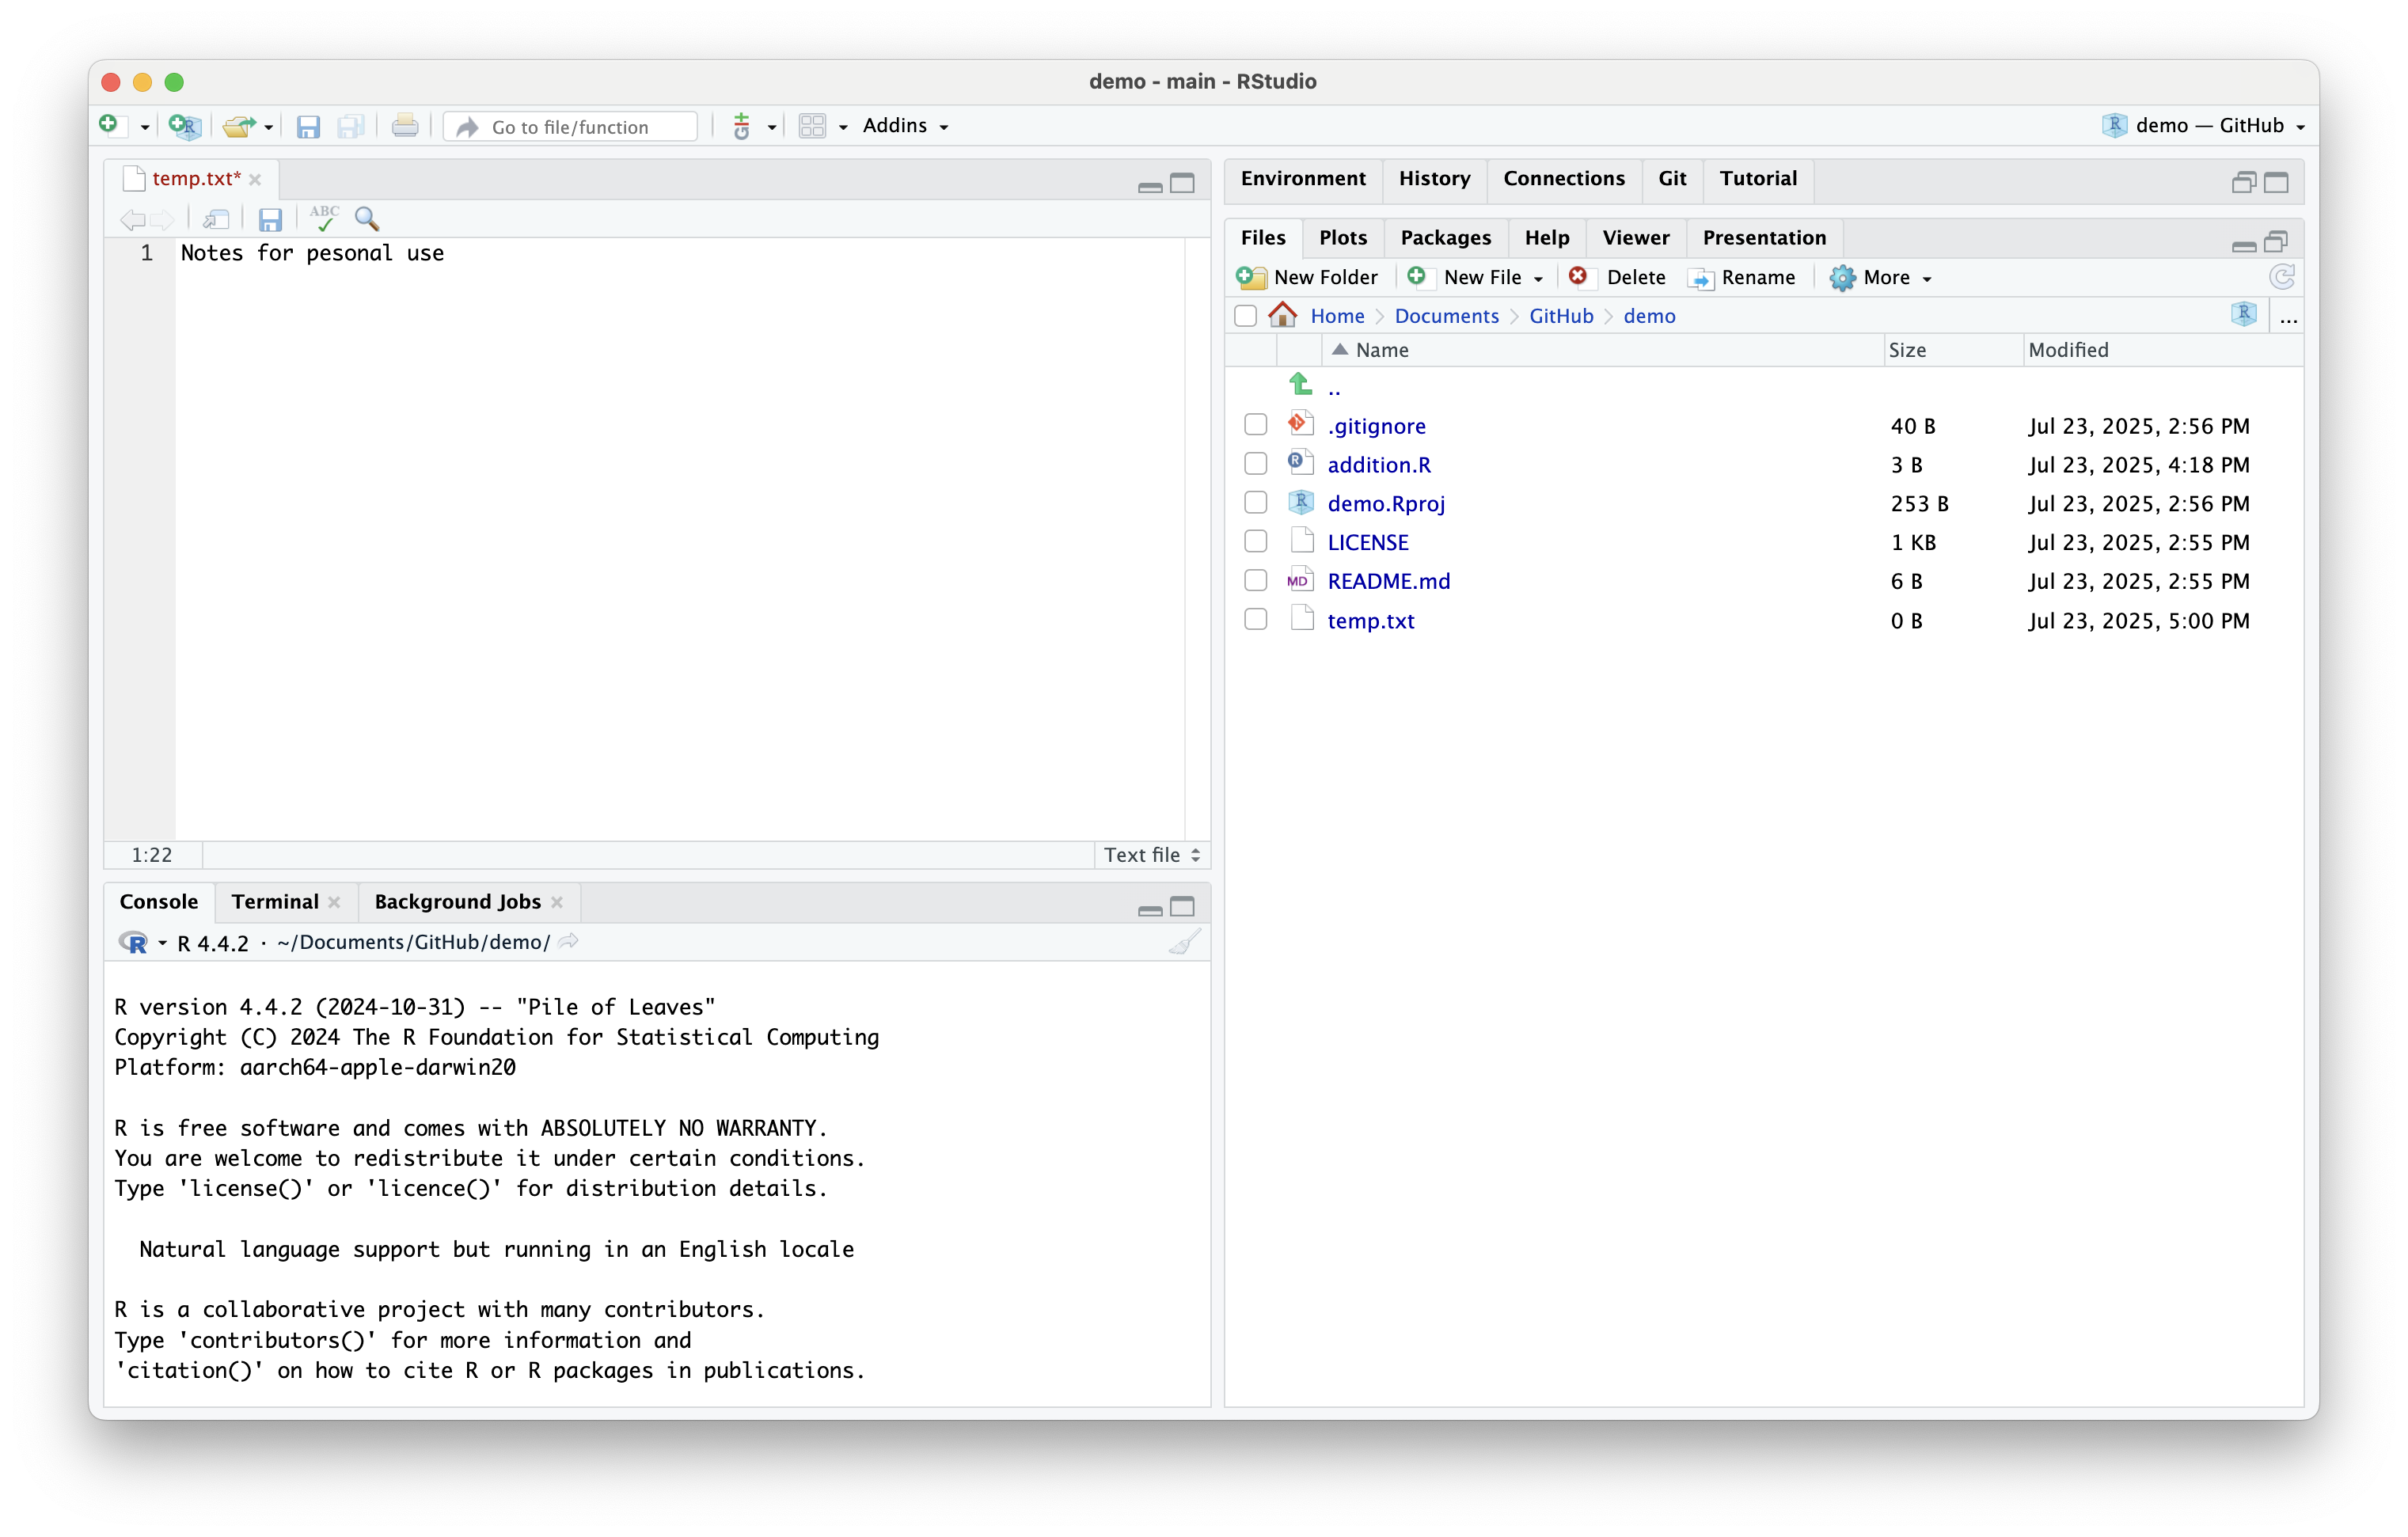
- We are now free to work on our repo files in RStudio
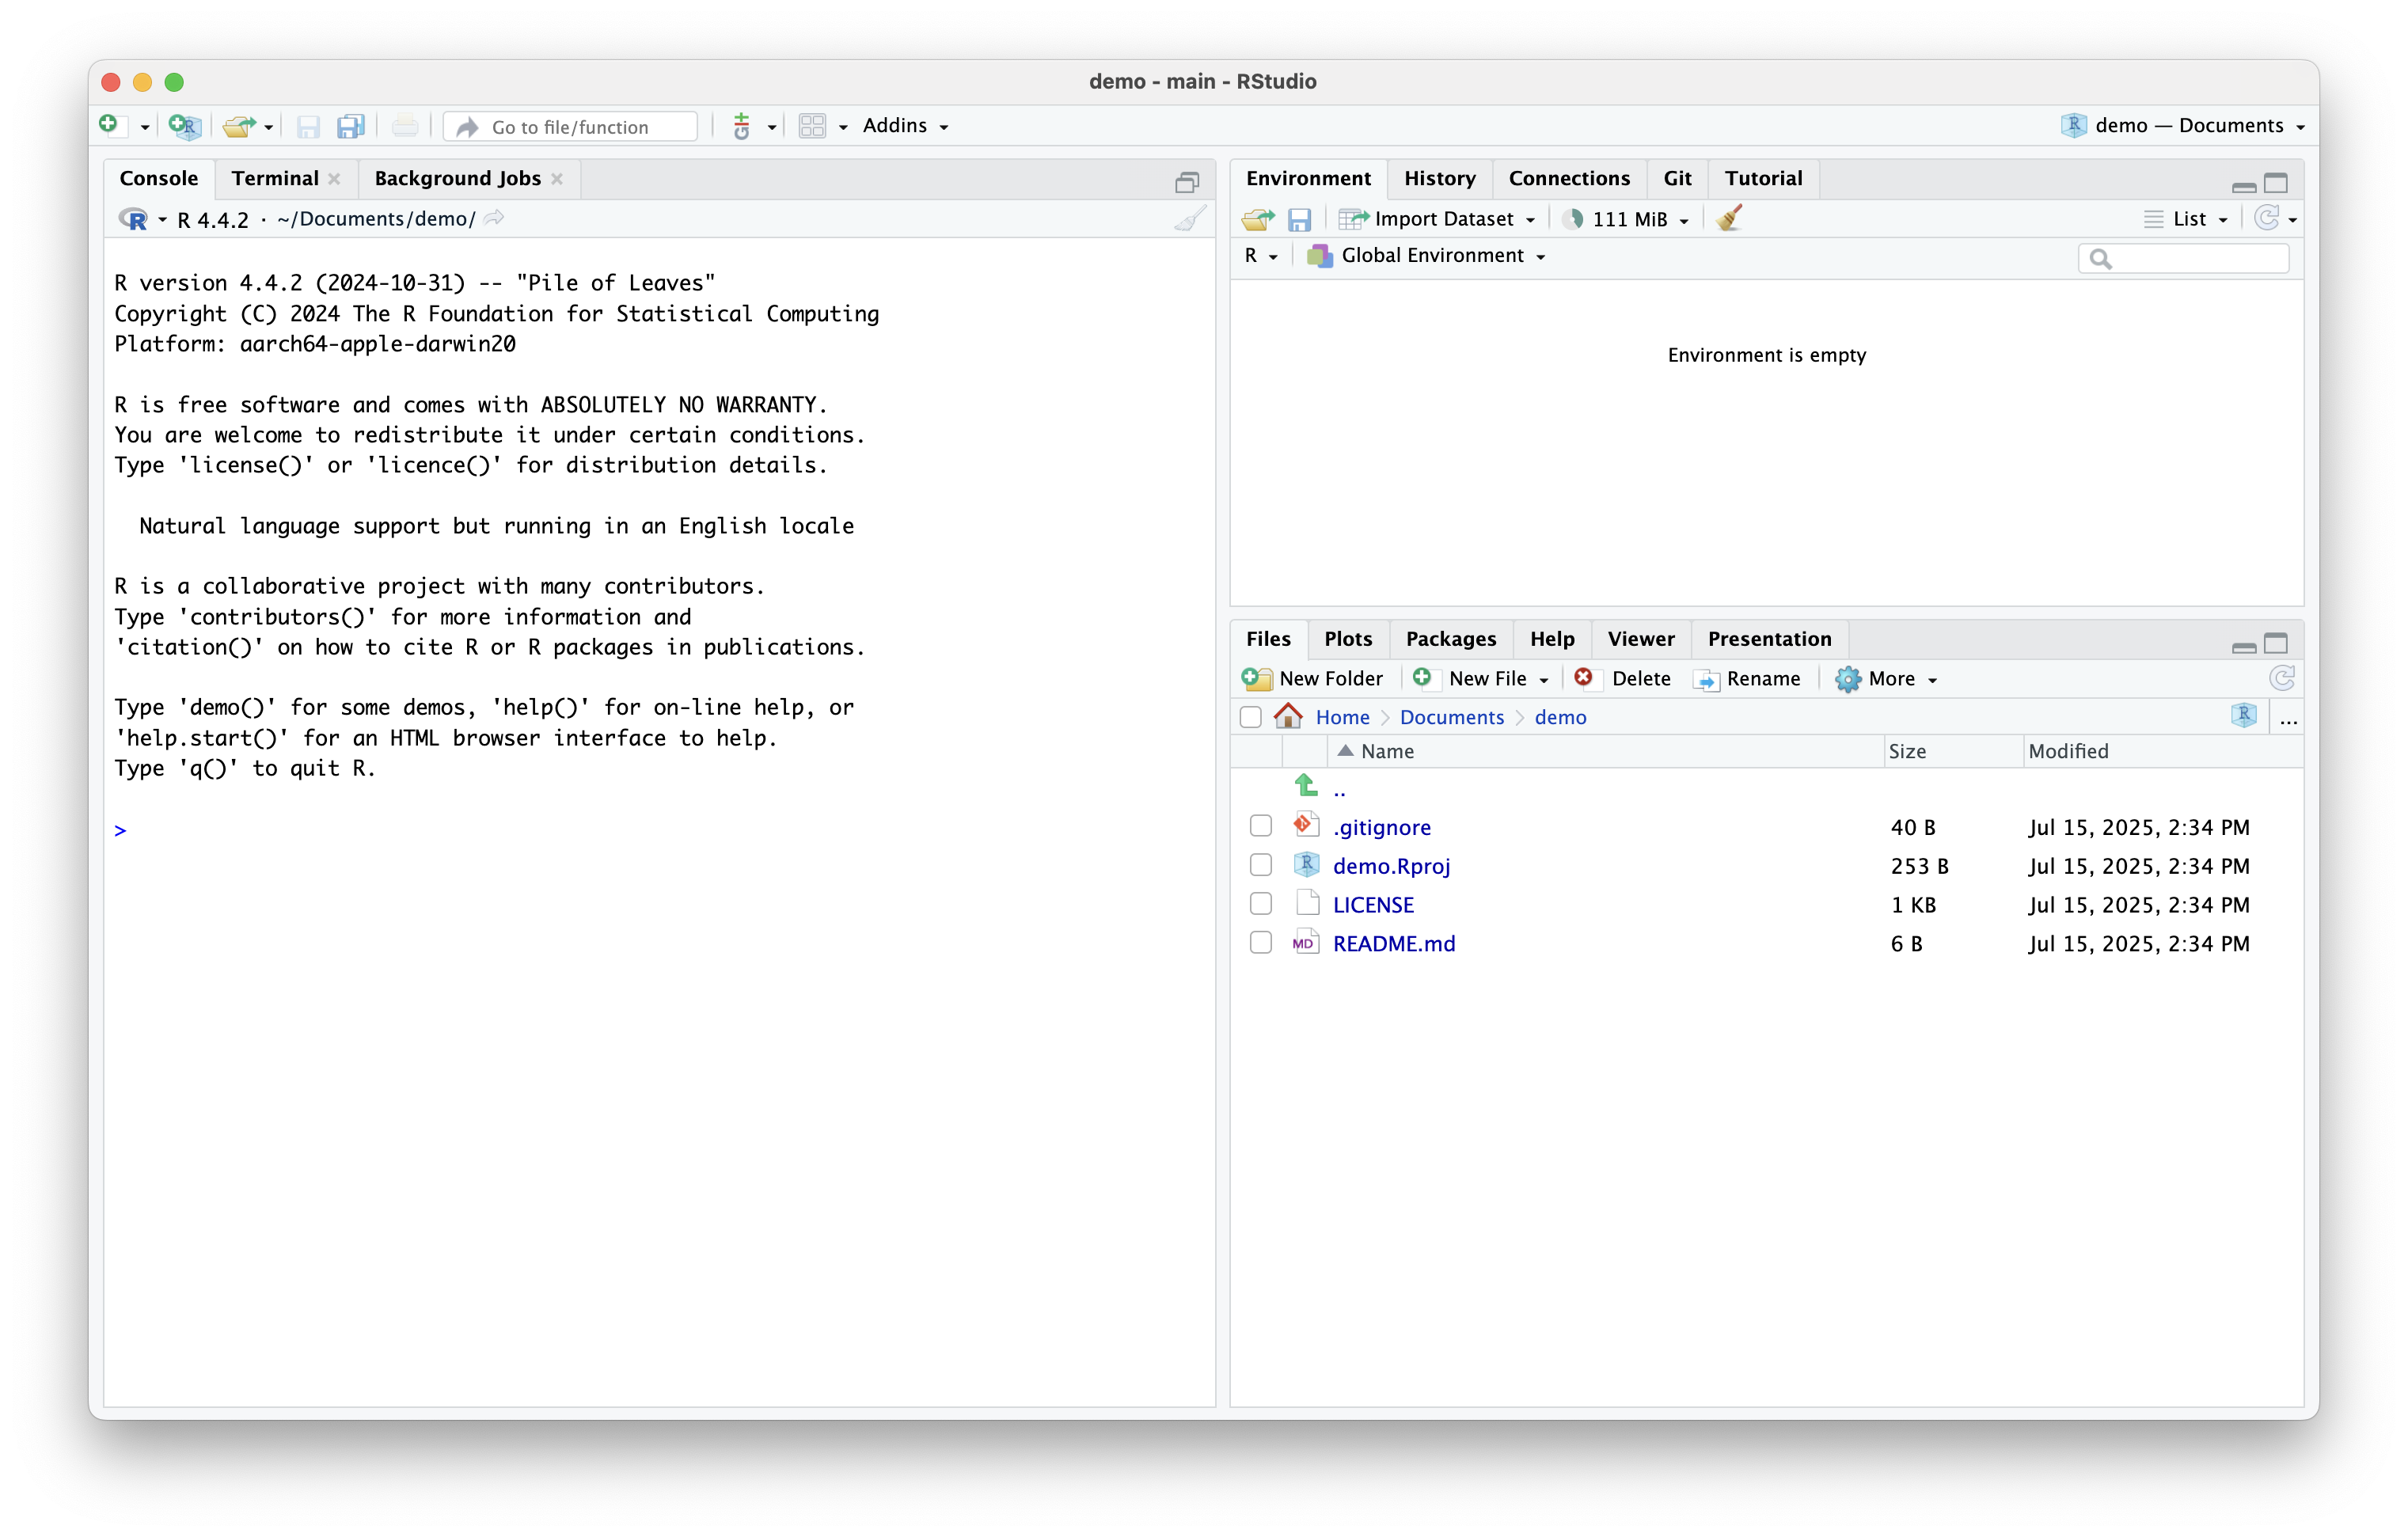
Link GitHub Repository to RStudio (cont’d)
- Note the two new files created:
.gitignoreanddemo.Rproj

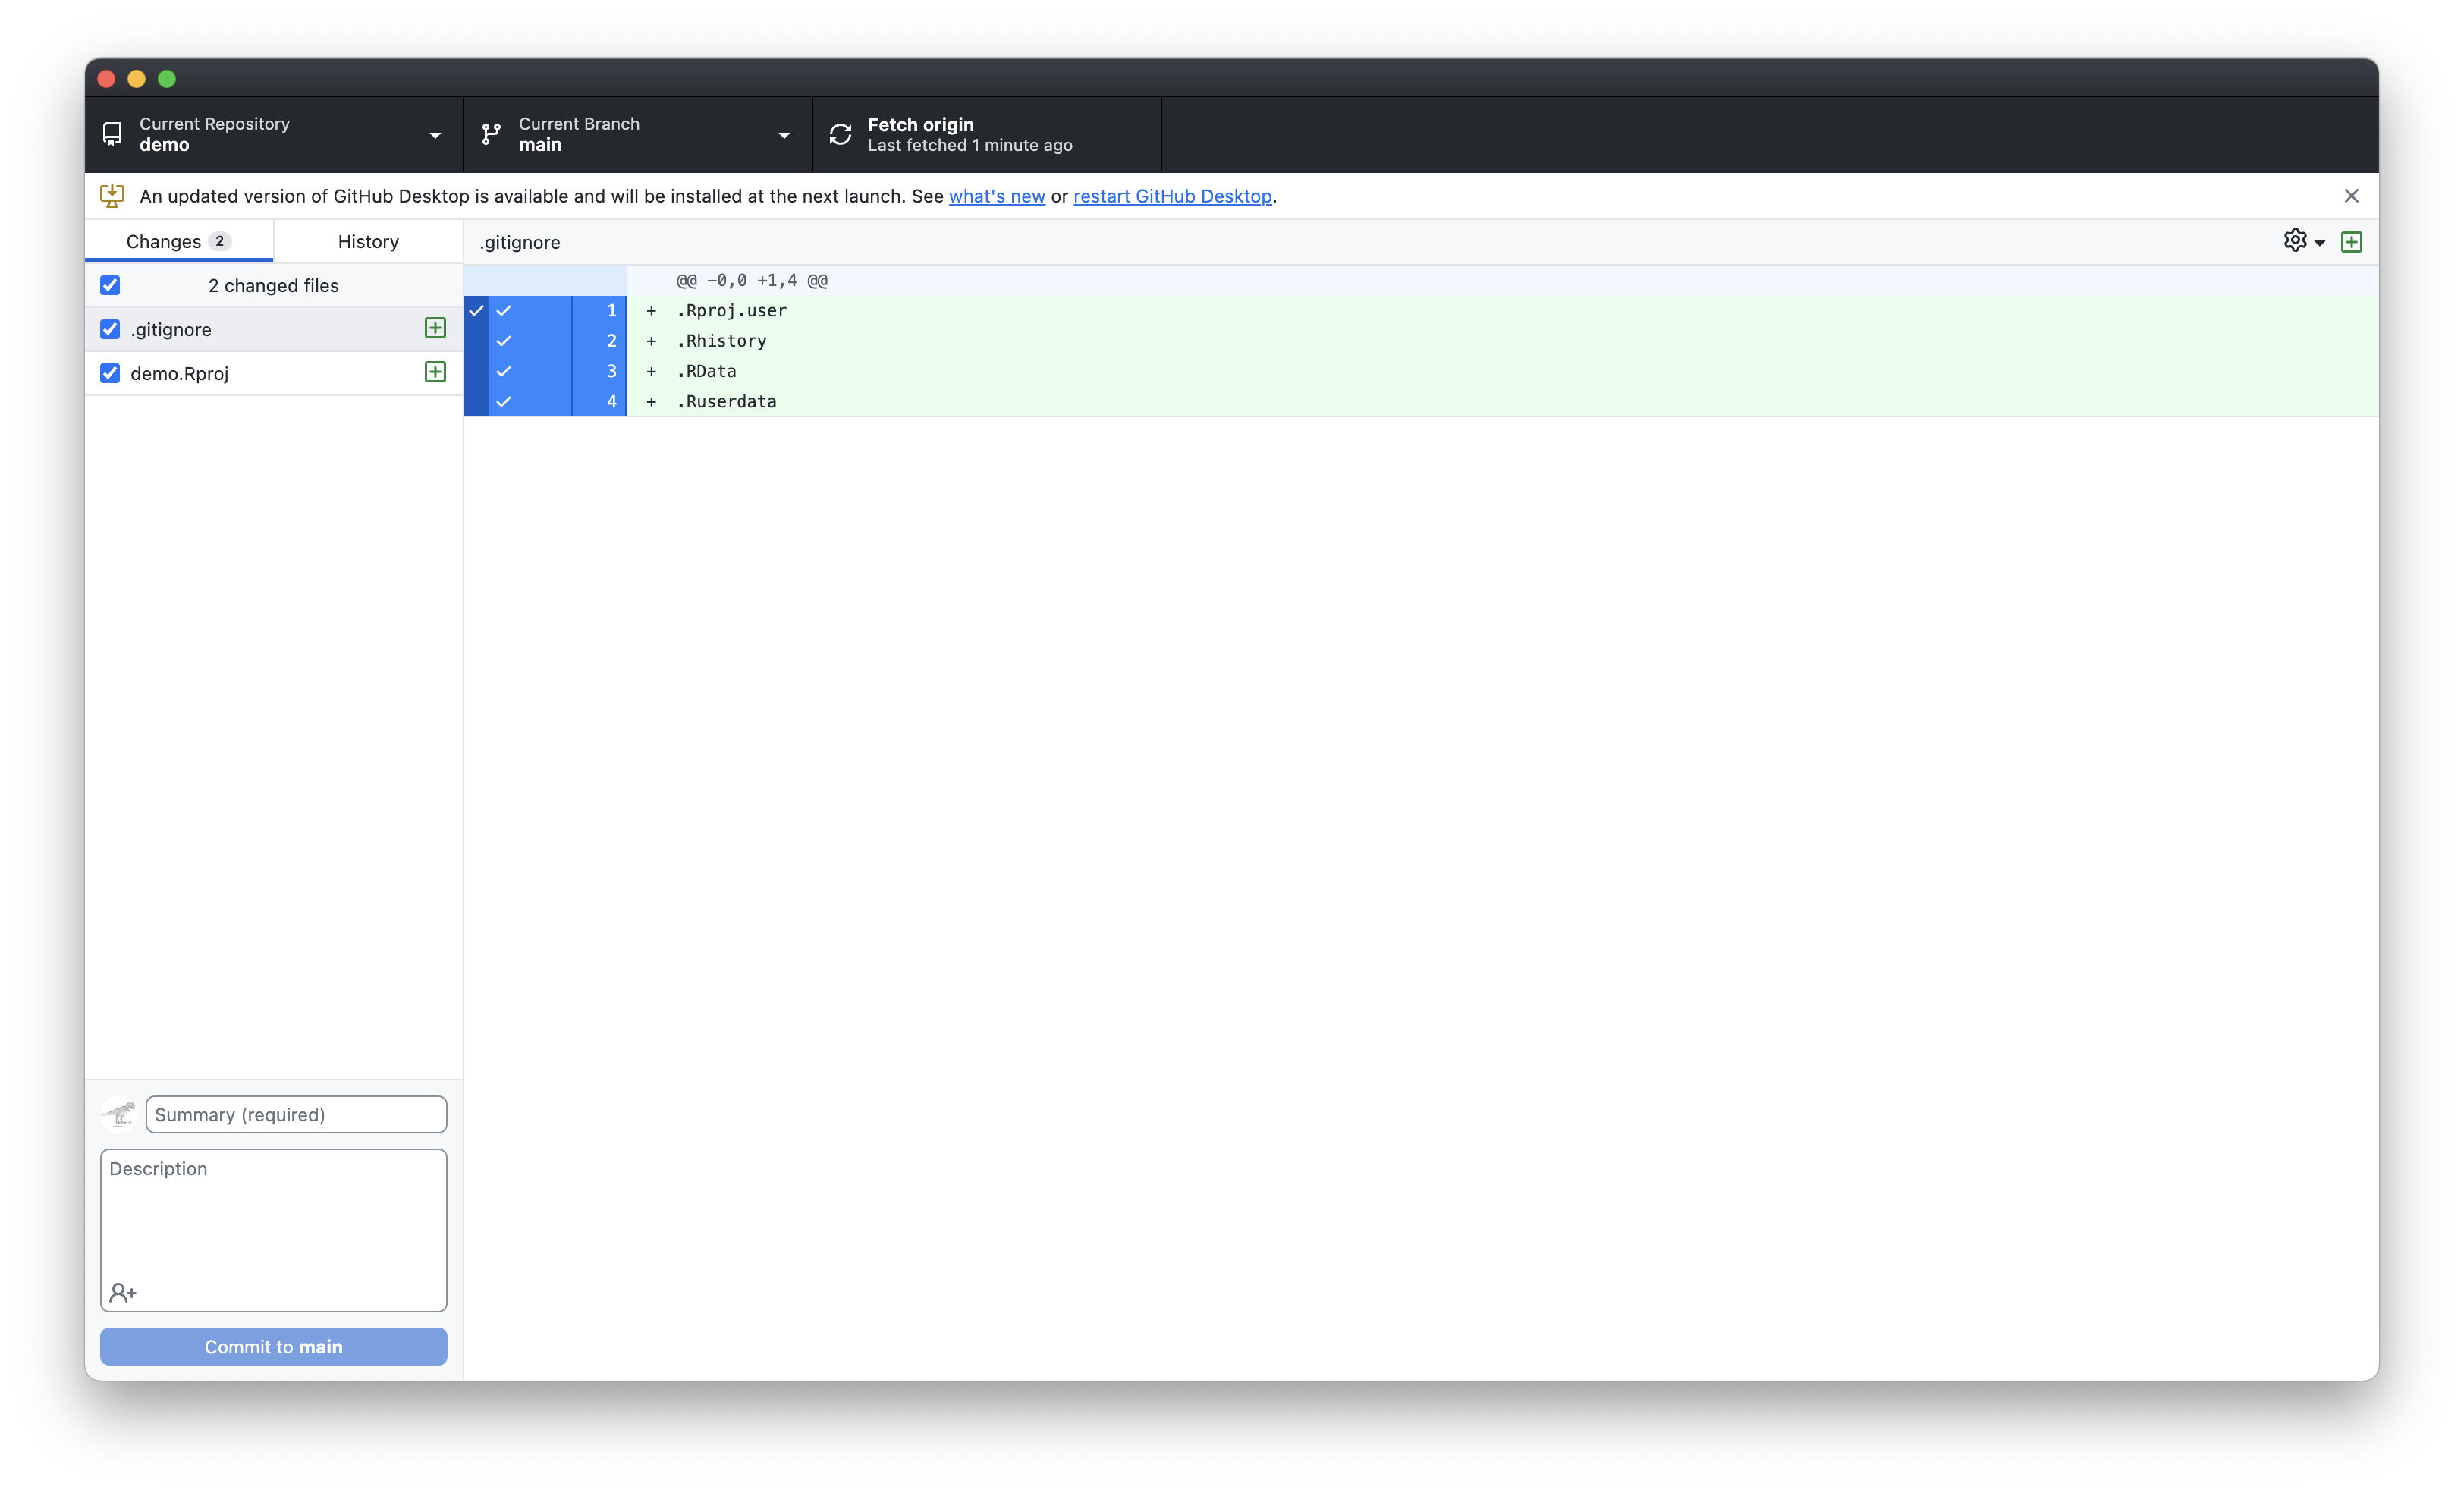
Link GitHub Repository to RStudio (cont’d)
- Check Github Desktop
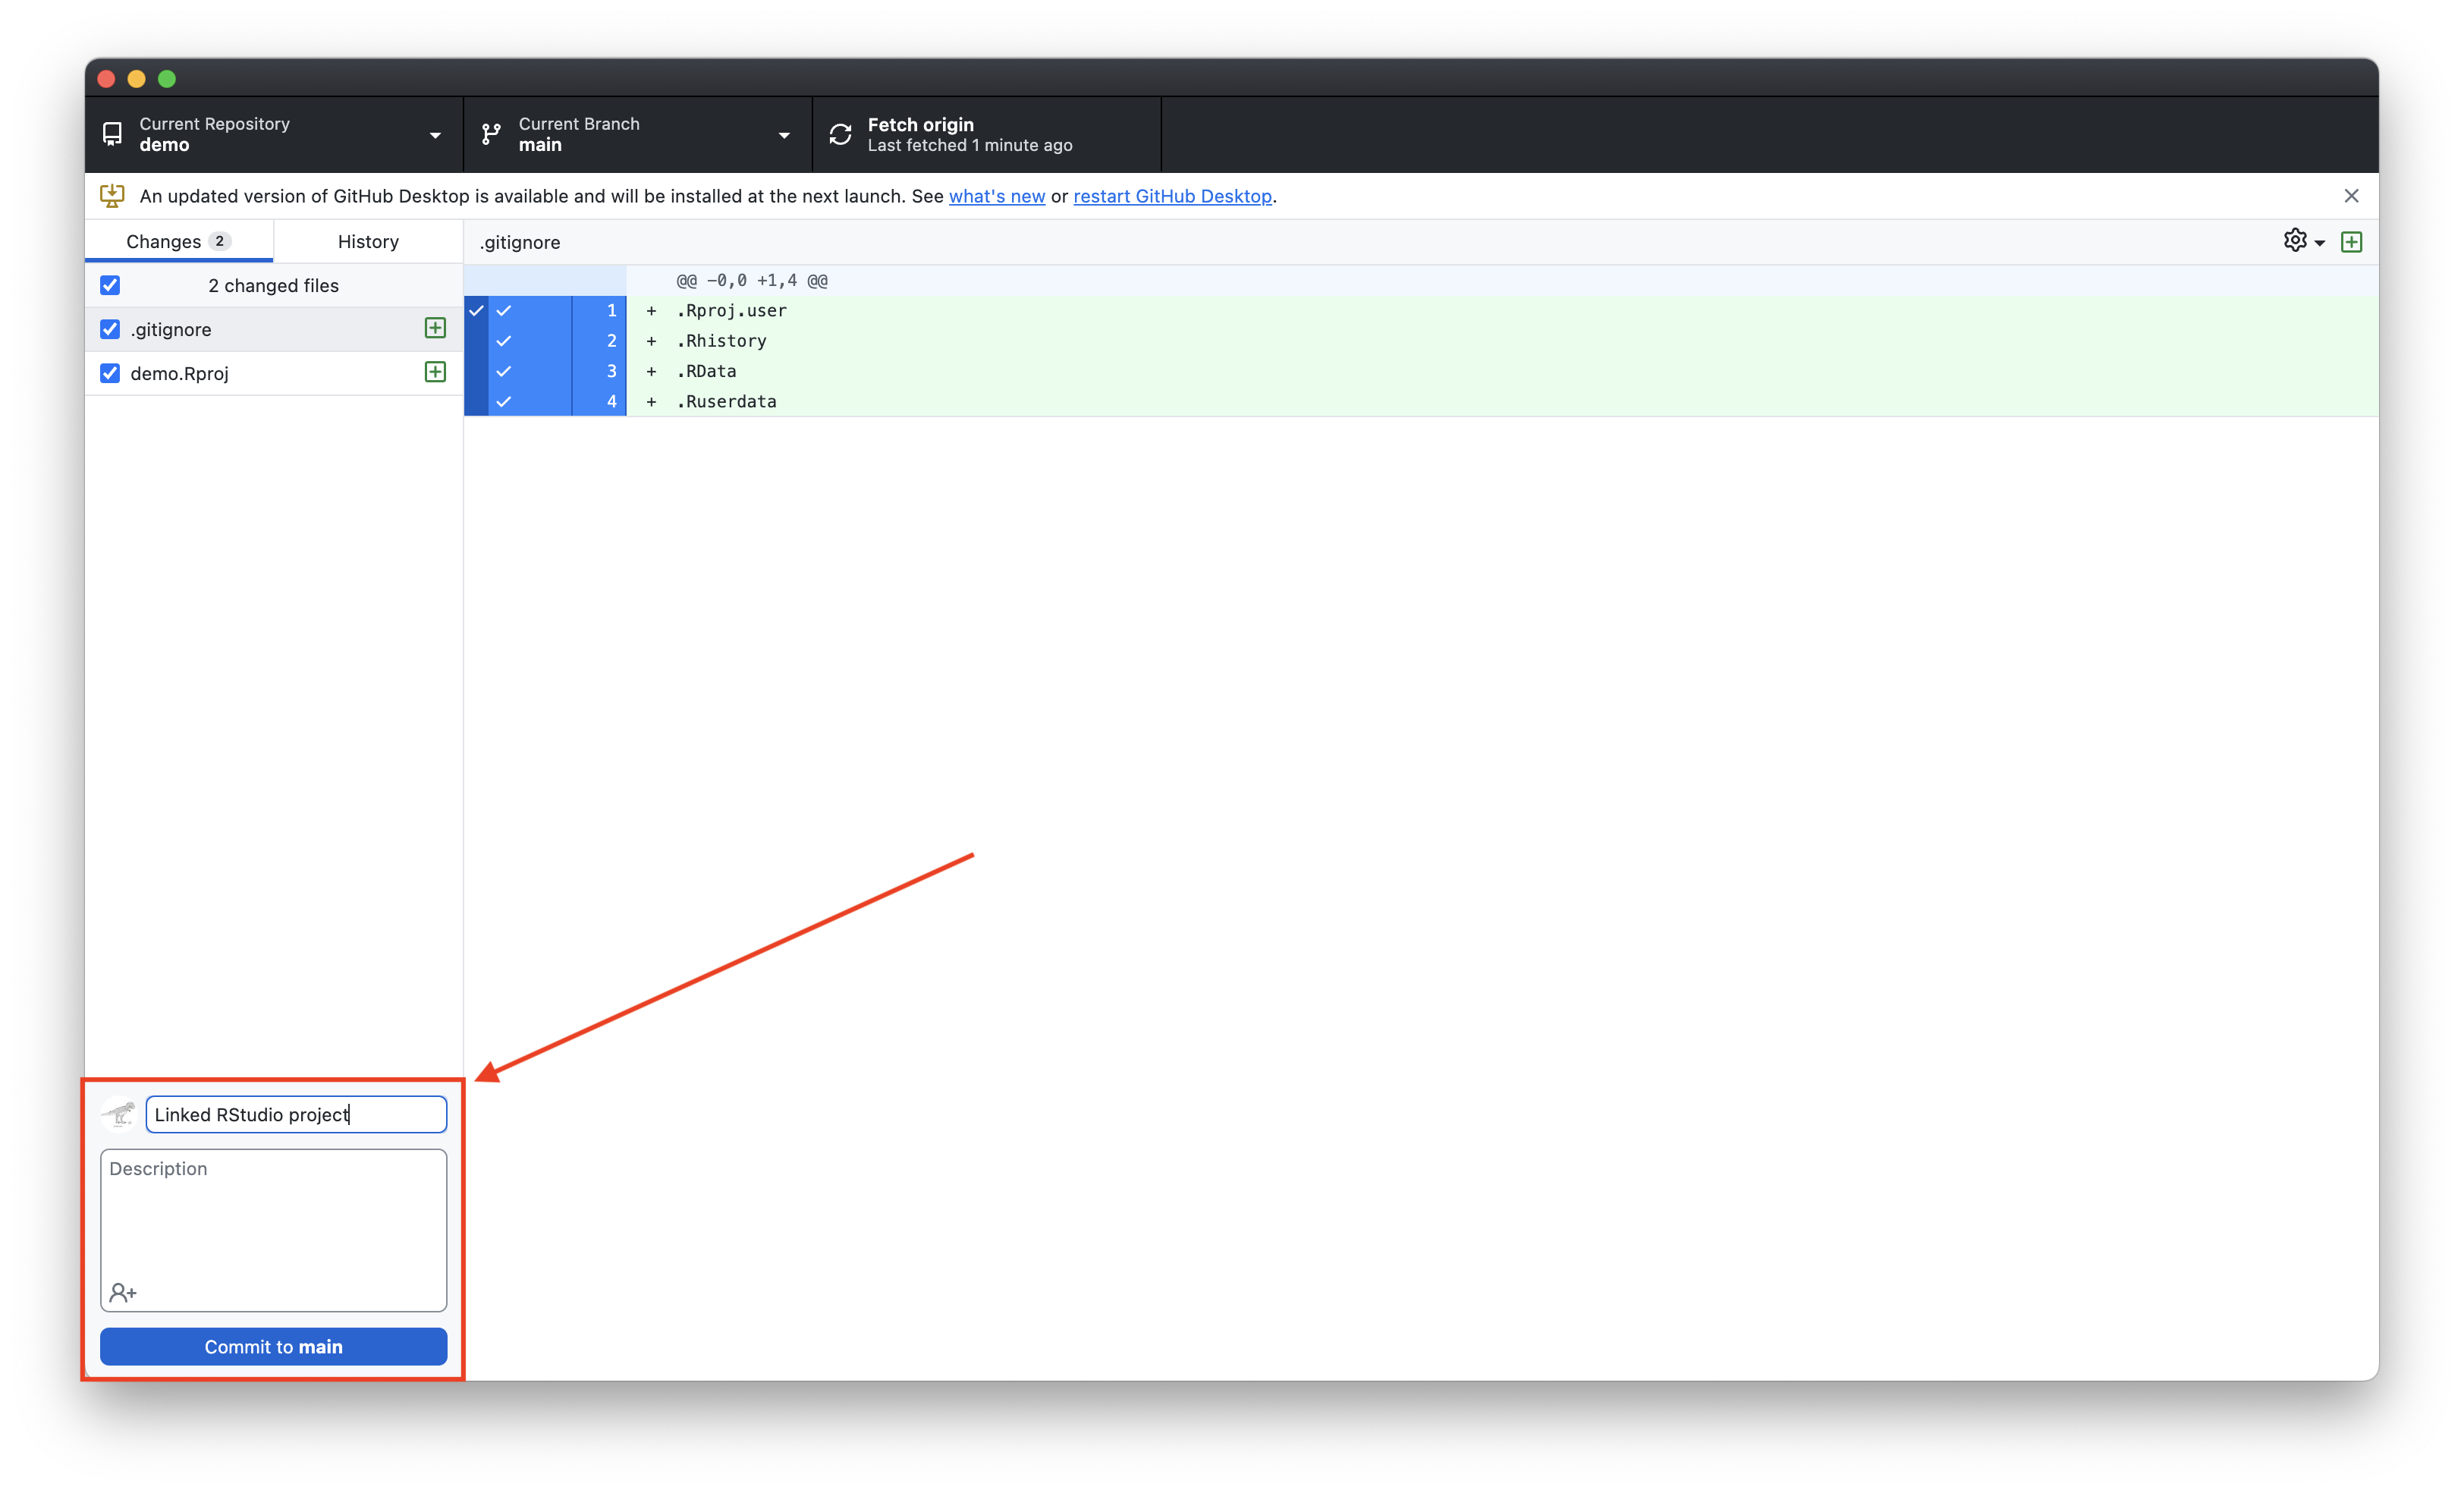
Link GitHub Repository to RStudio (cont’d)
- Add comment for the commit, e.g., “Linked RStudio project”
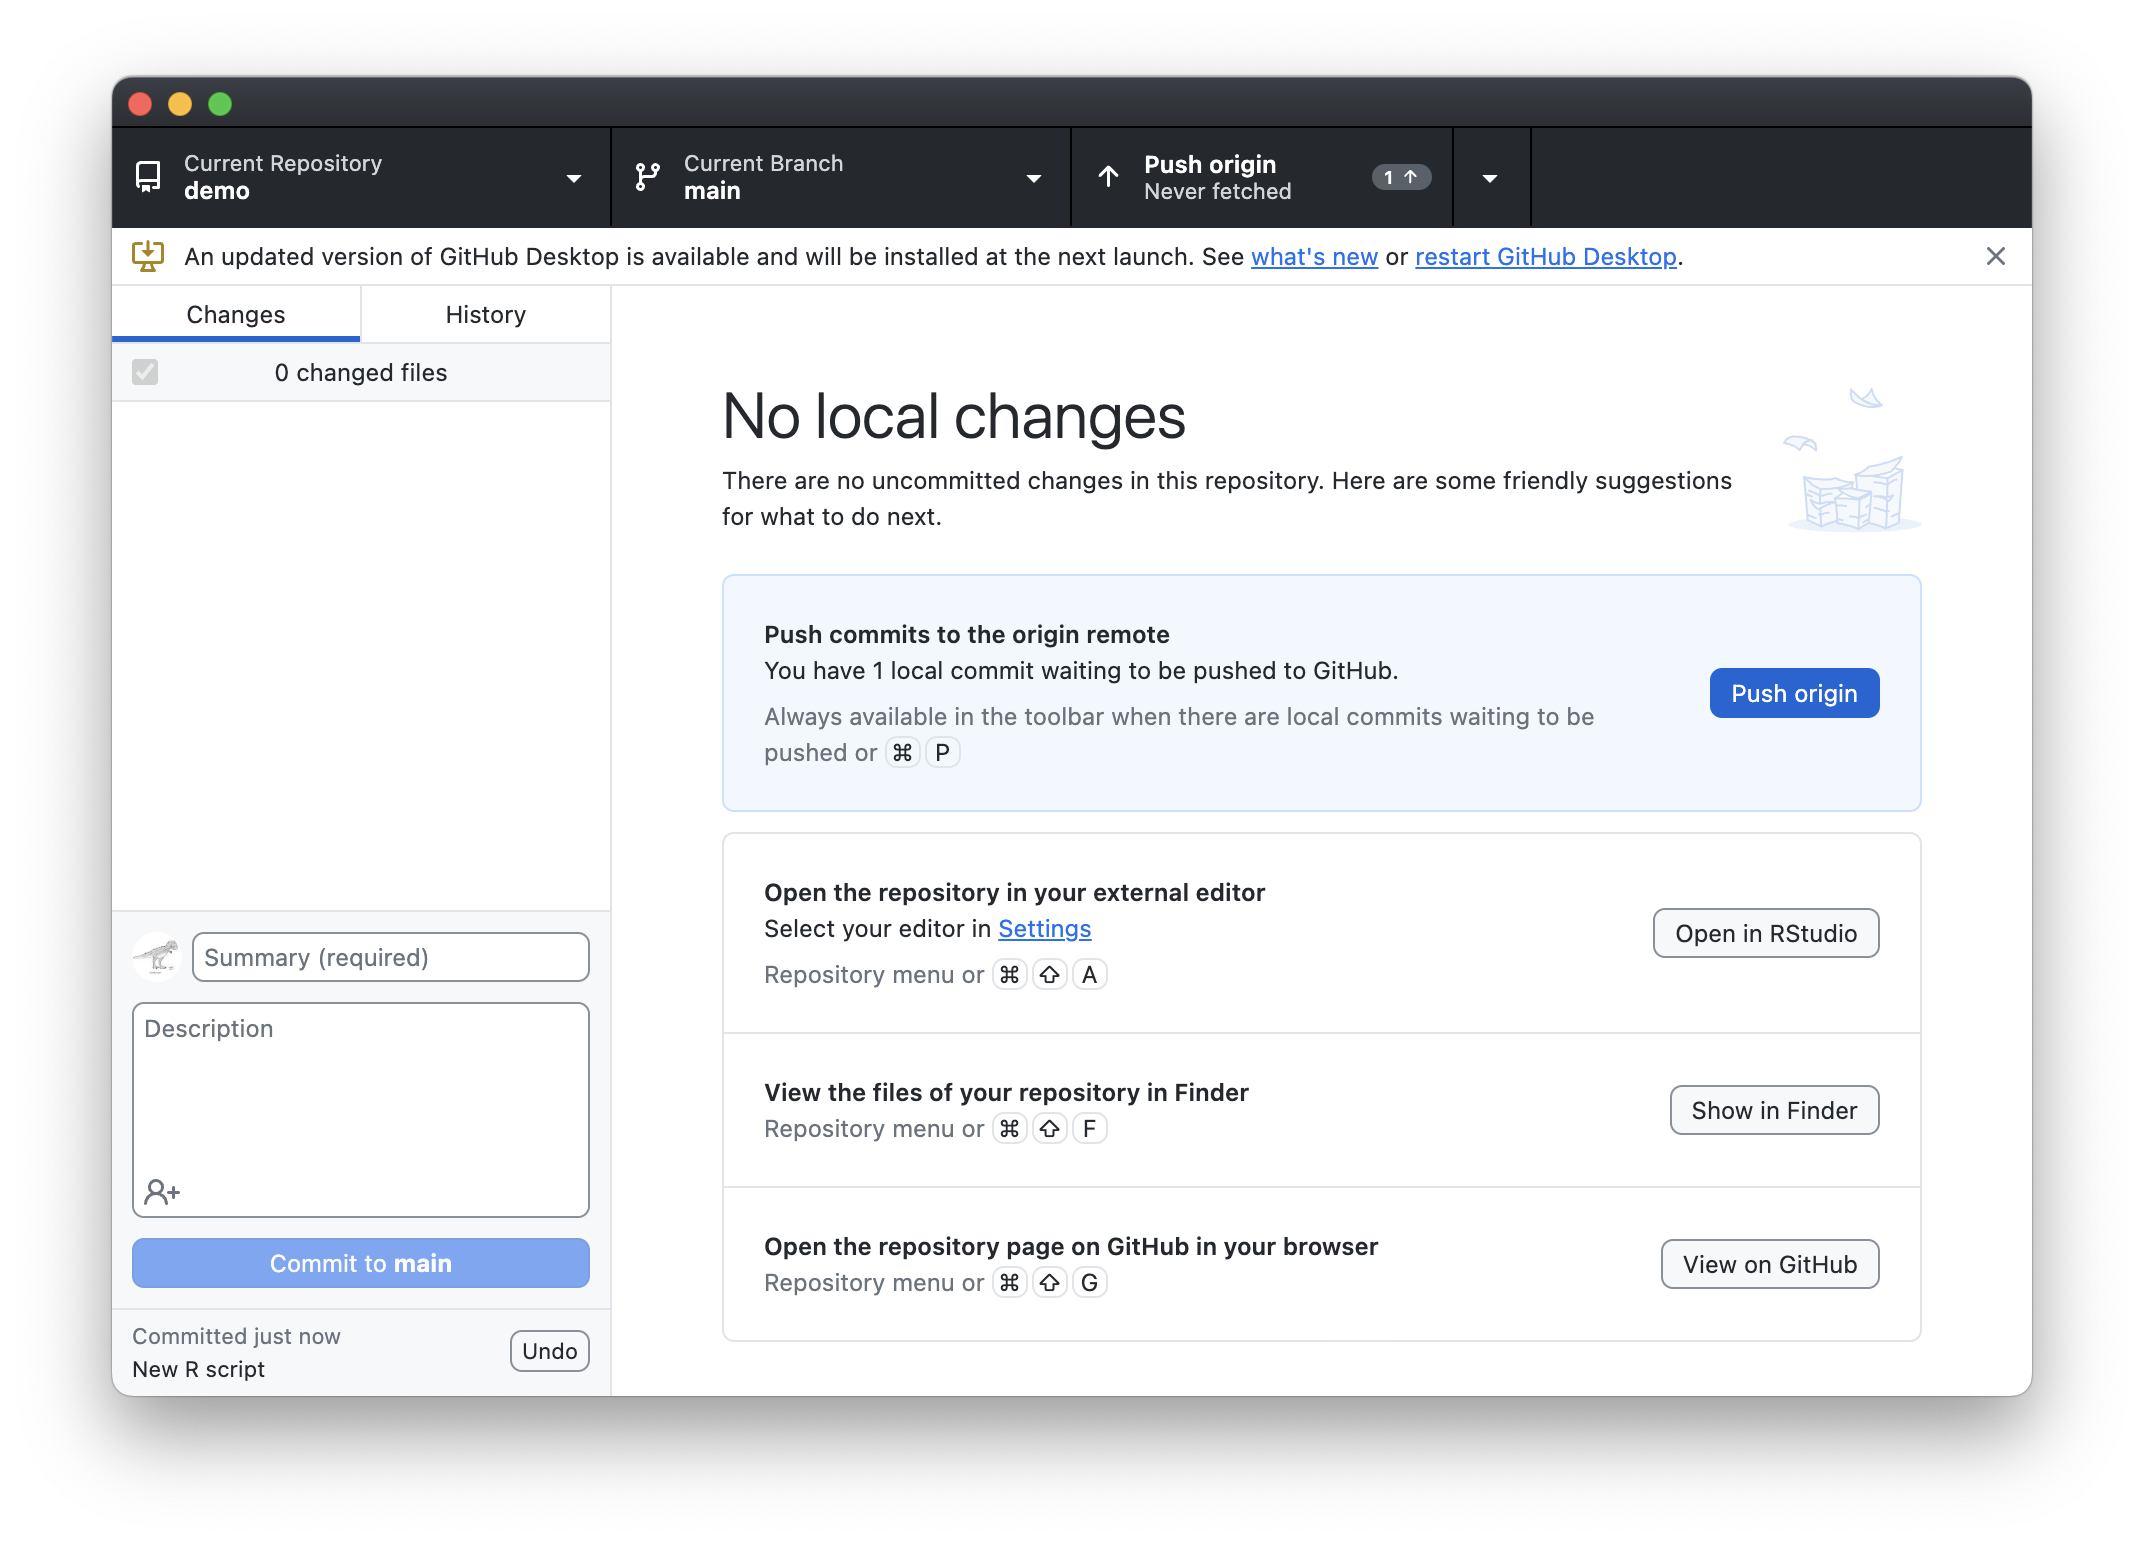
Push to Origin
- Origin refers to the origin repo, which is the repository hosted on GitHub.com
- Press Push origin to update files on GitHub.com
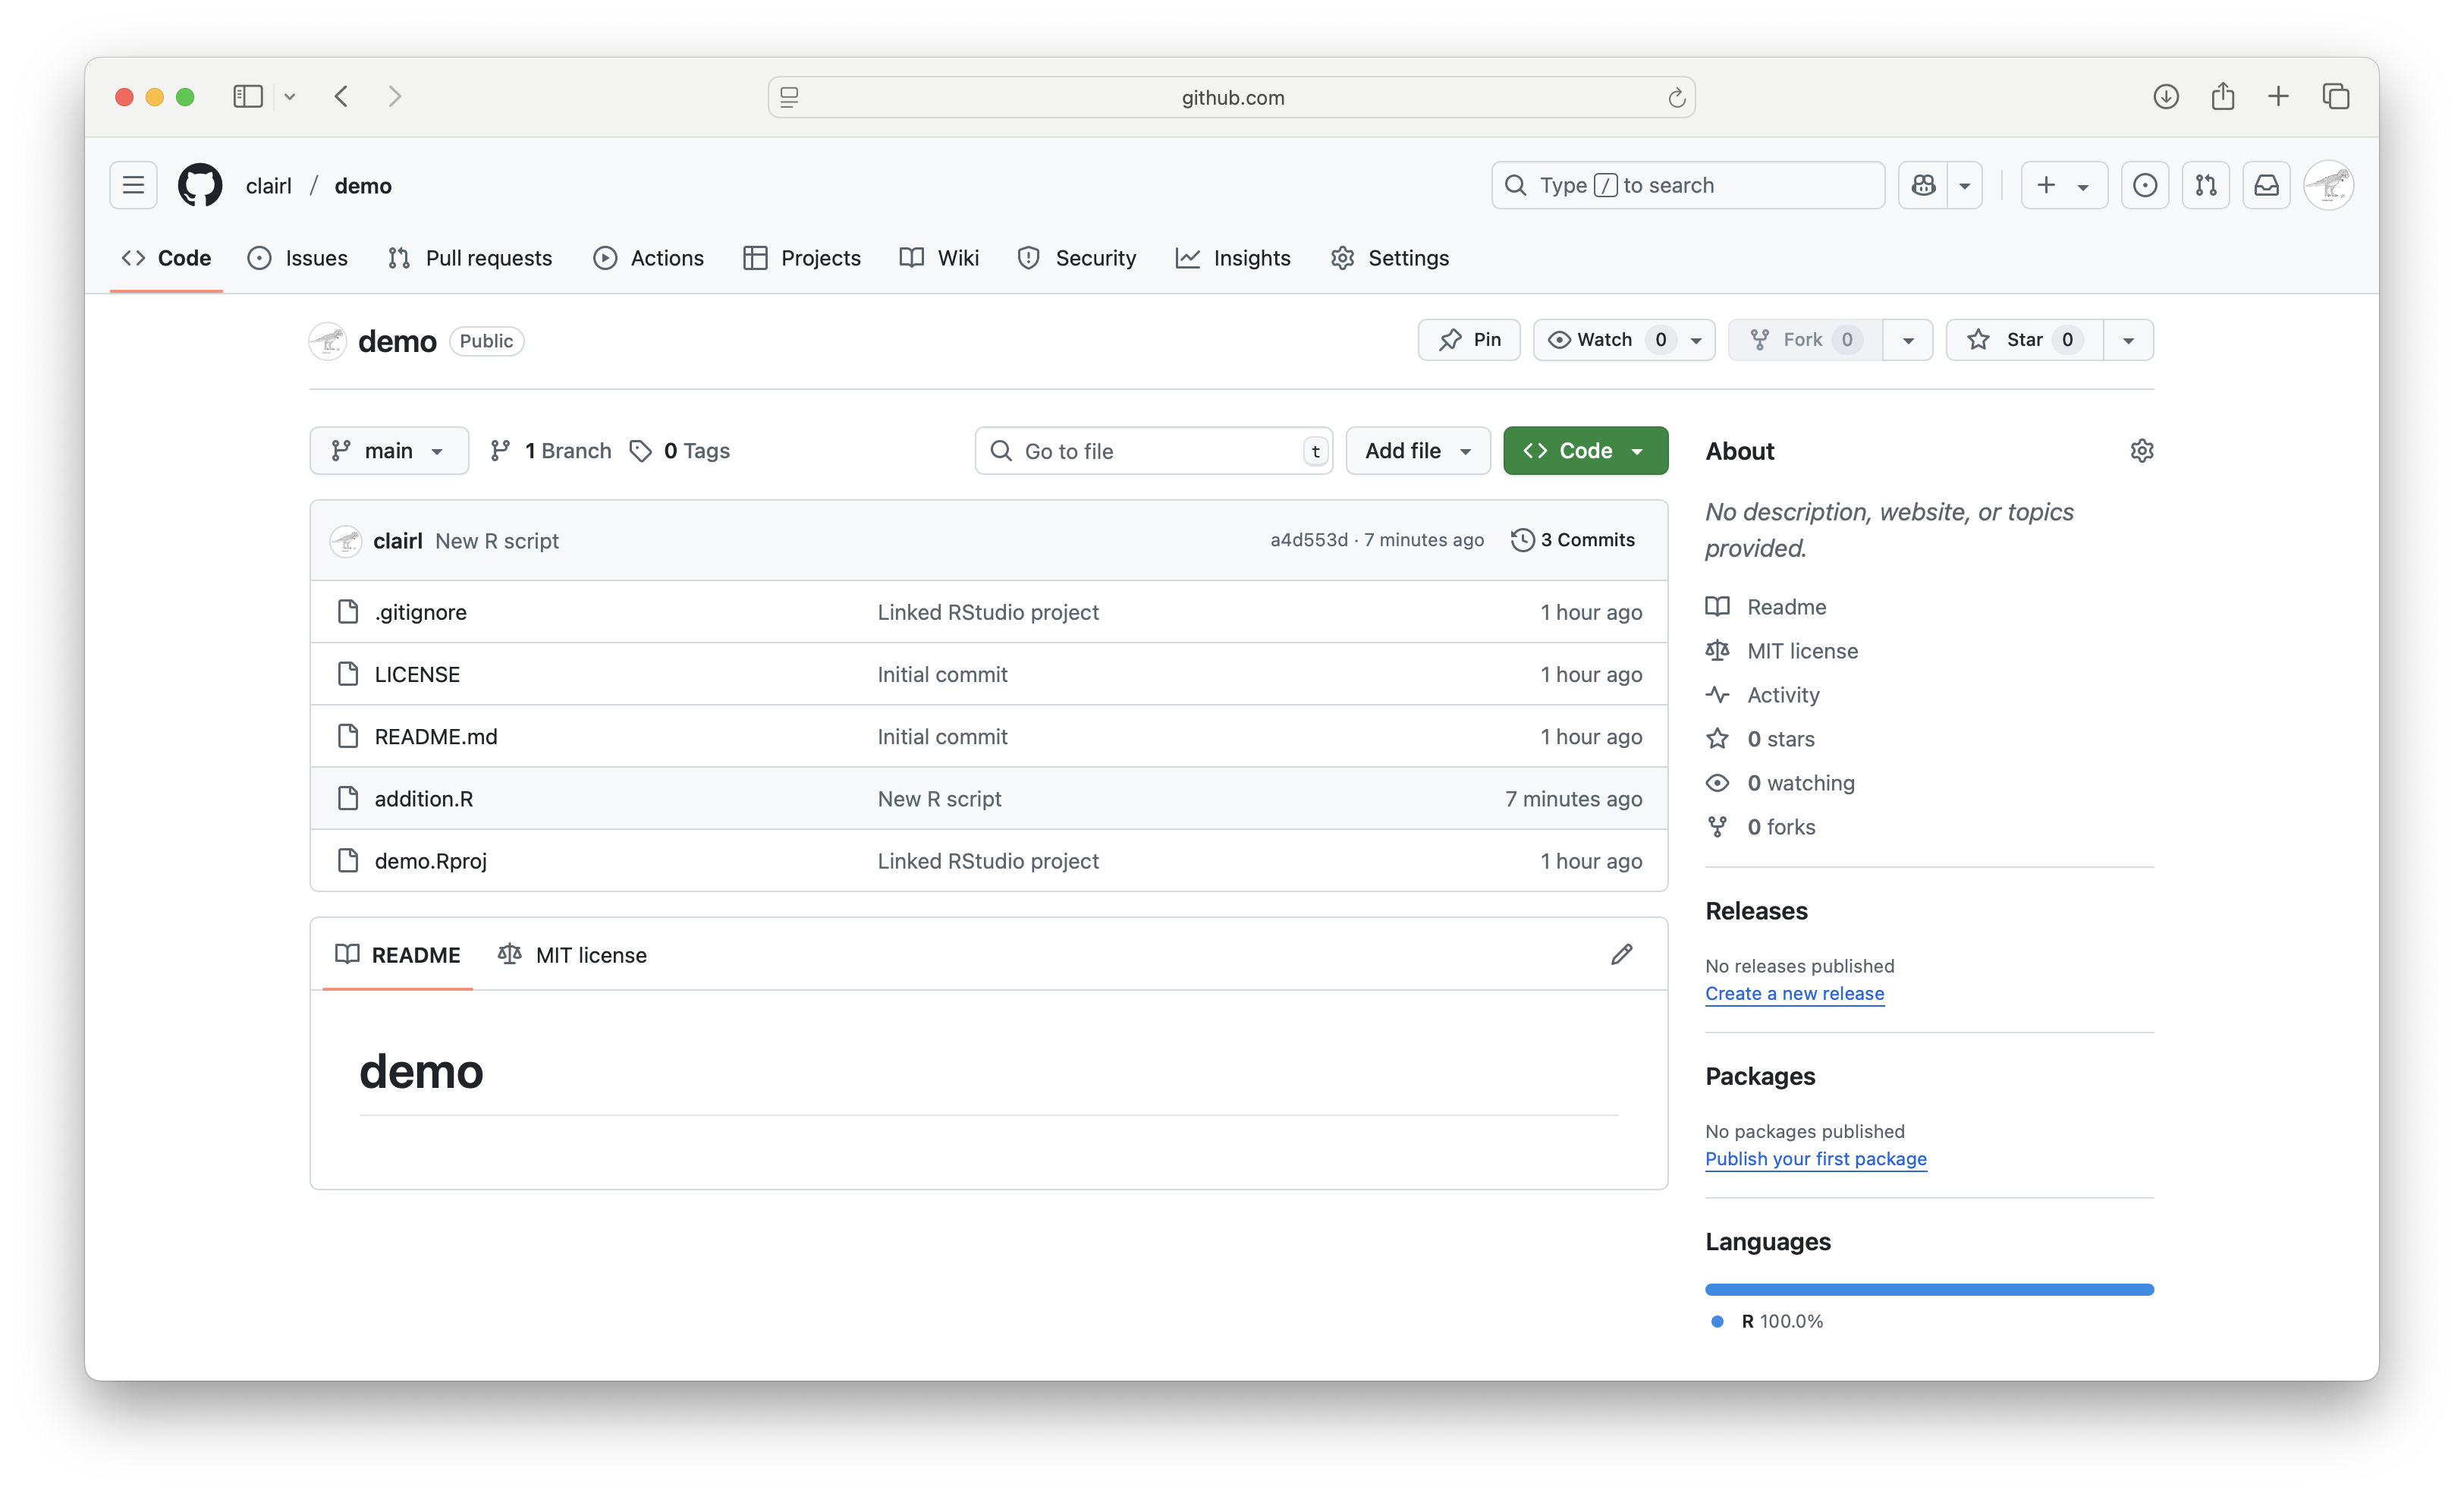
Push to Origin (cont’d)
.gitignoreanddemo.Rprojare now on GitHub.com
- Note the different commit messages and commit ID

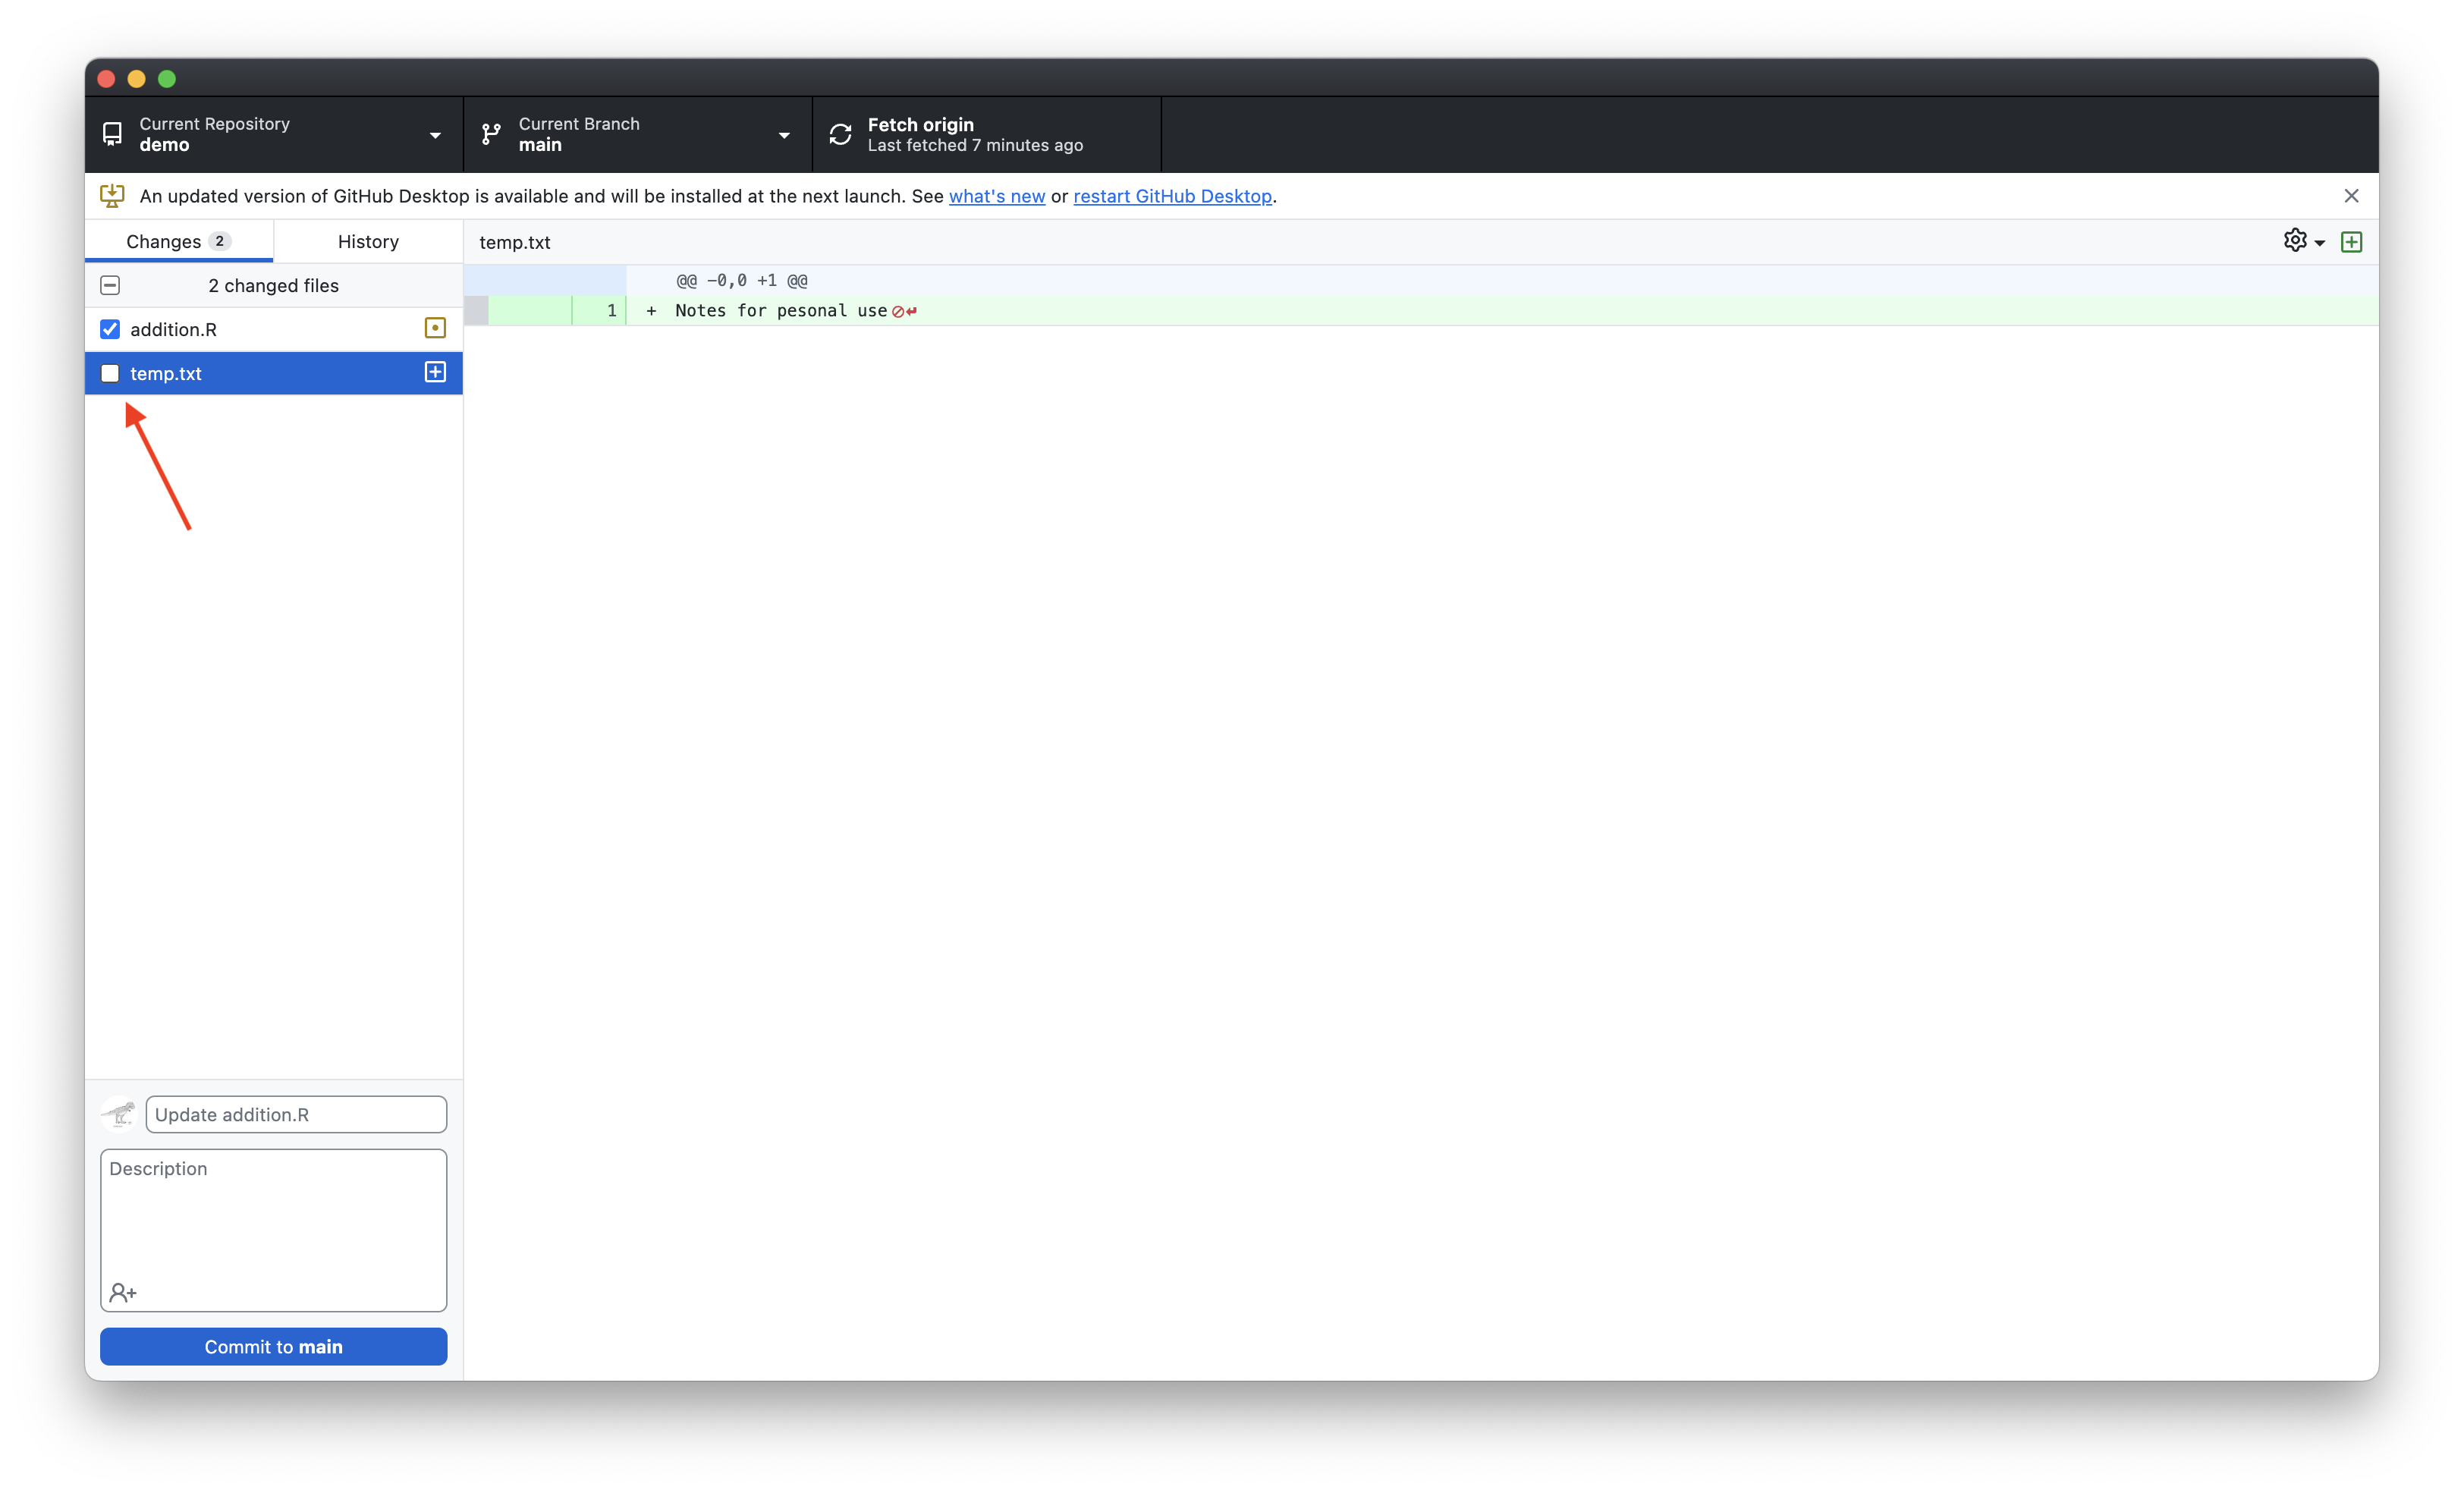
Local Changes (cont’d)
Review files and Commit (cont’d)
addition.Ris a new file, which is why we see green plus sign
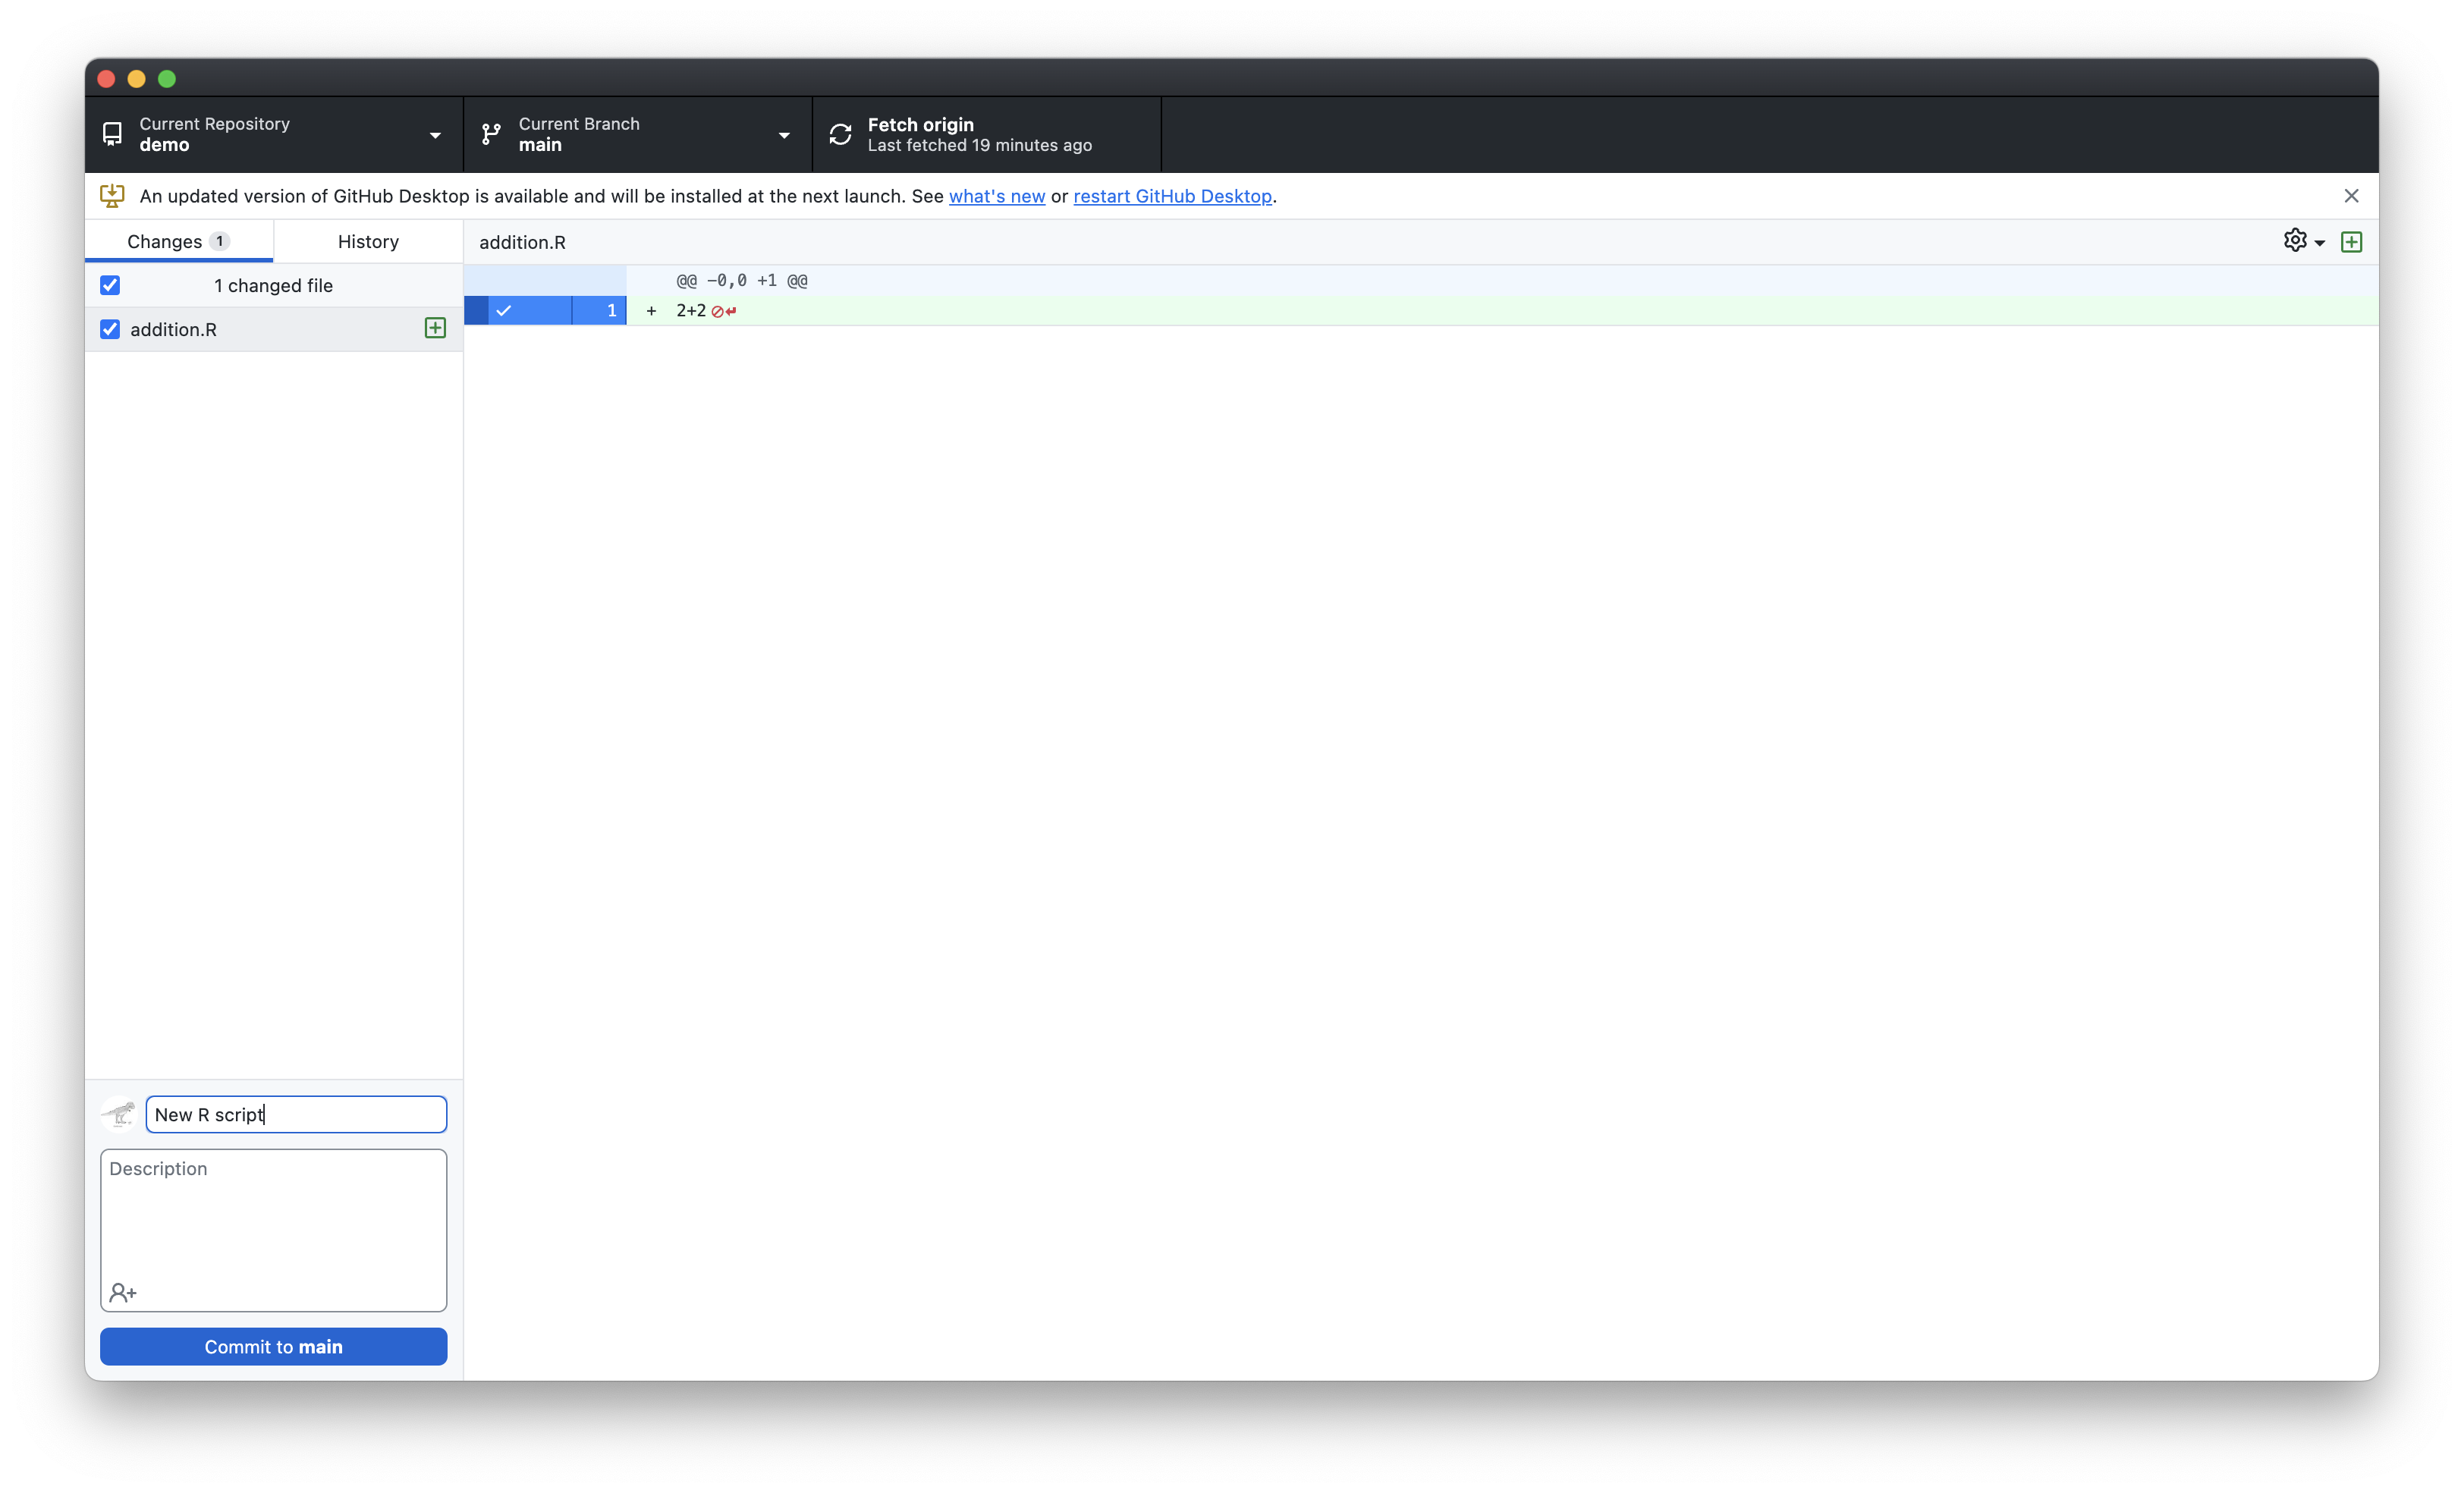
Review Files and Commit (cont’d)
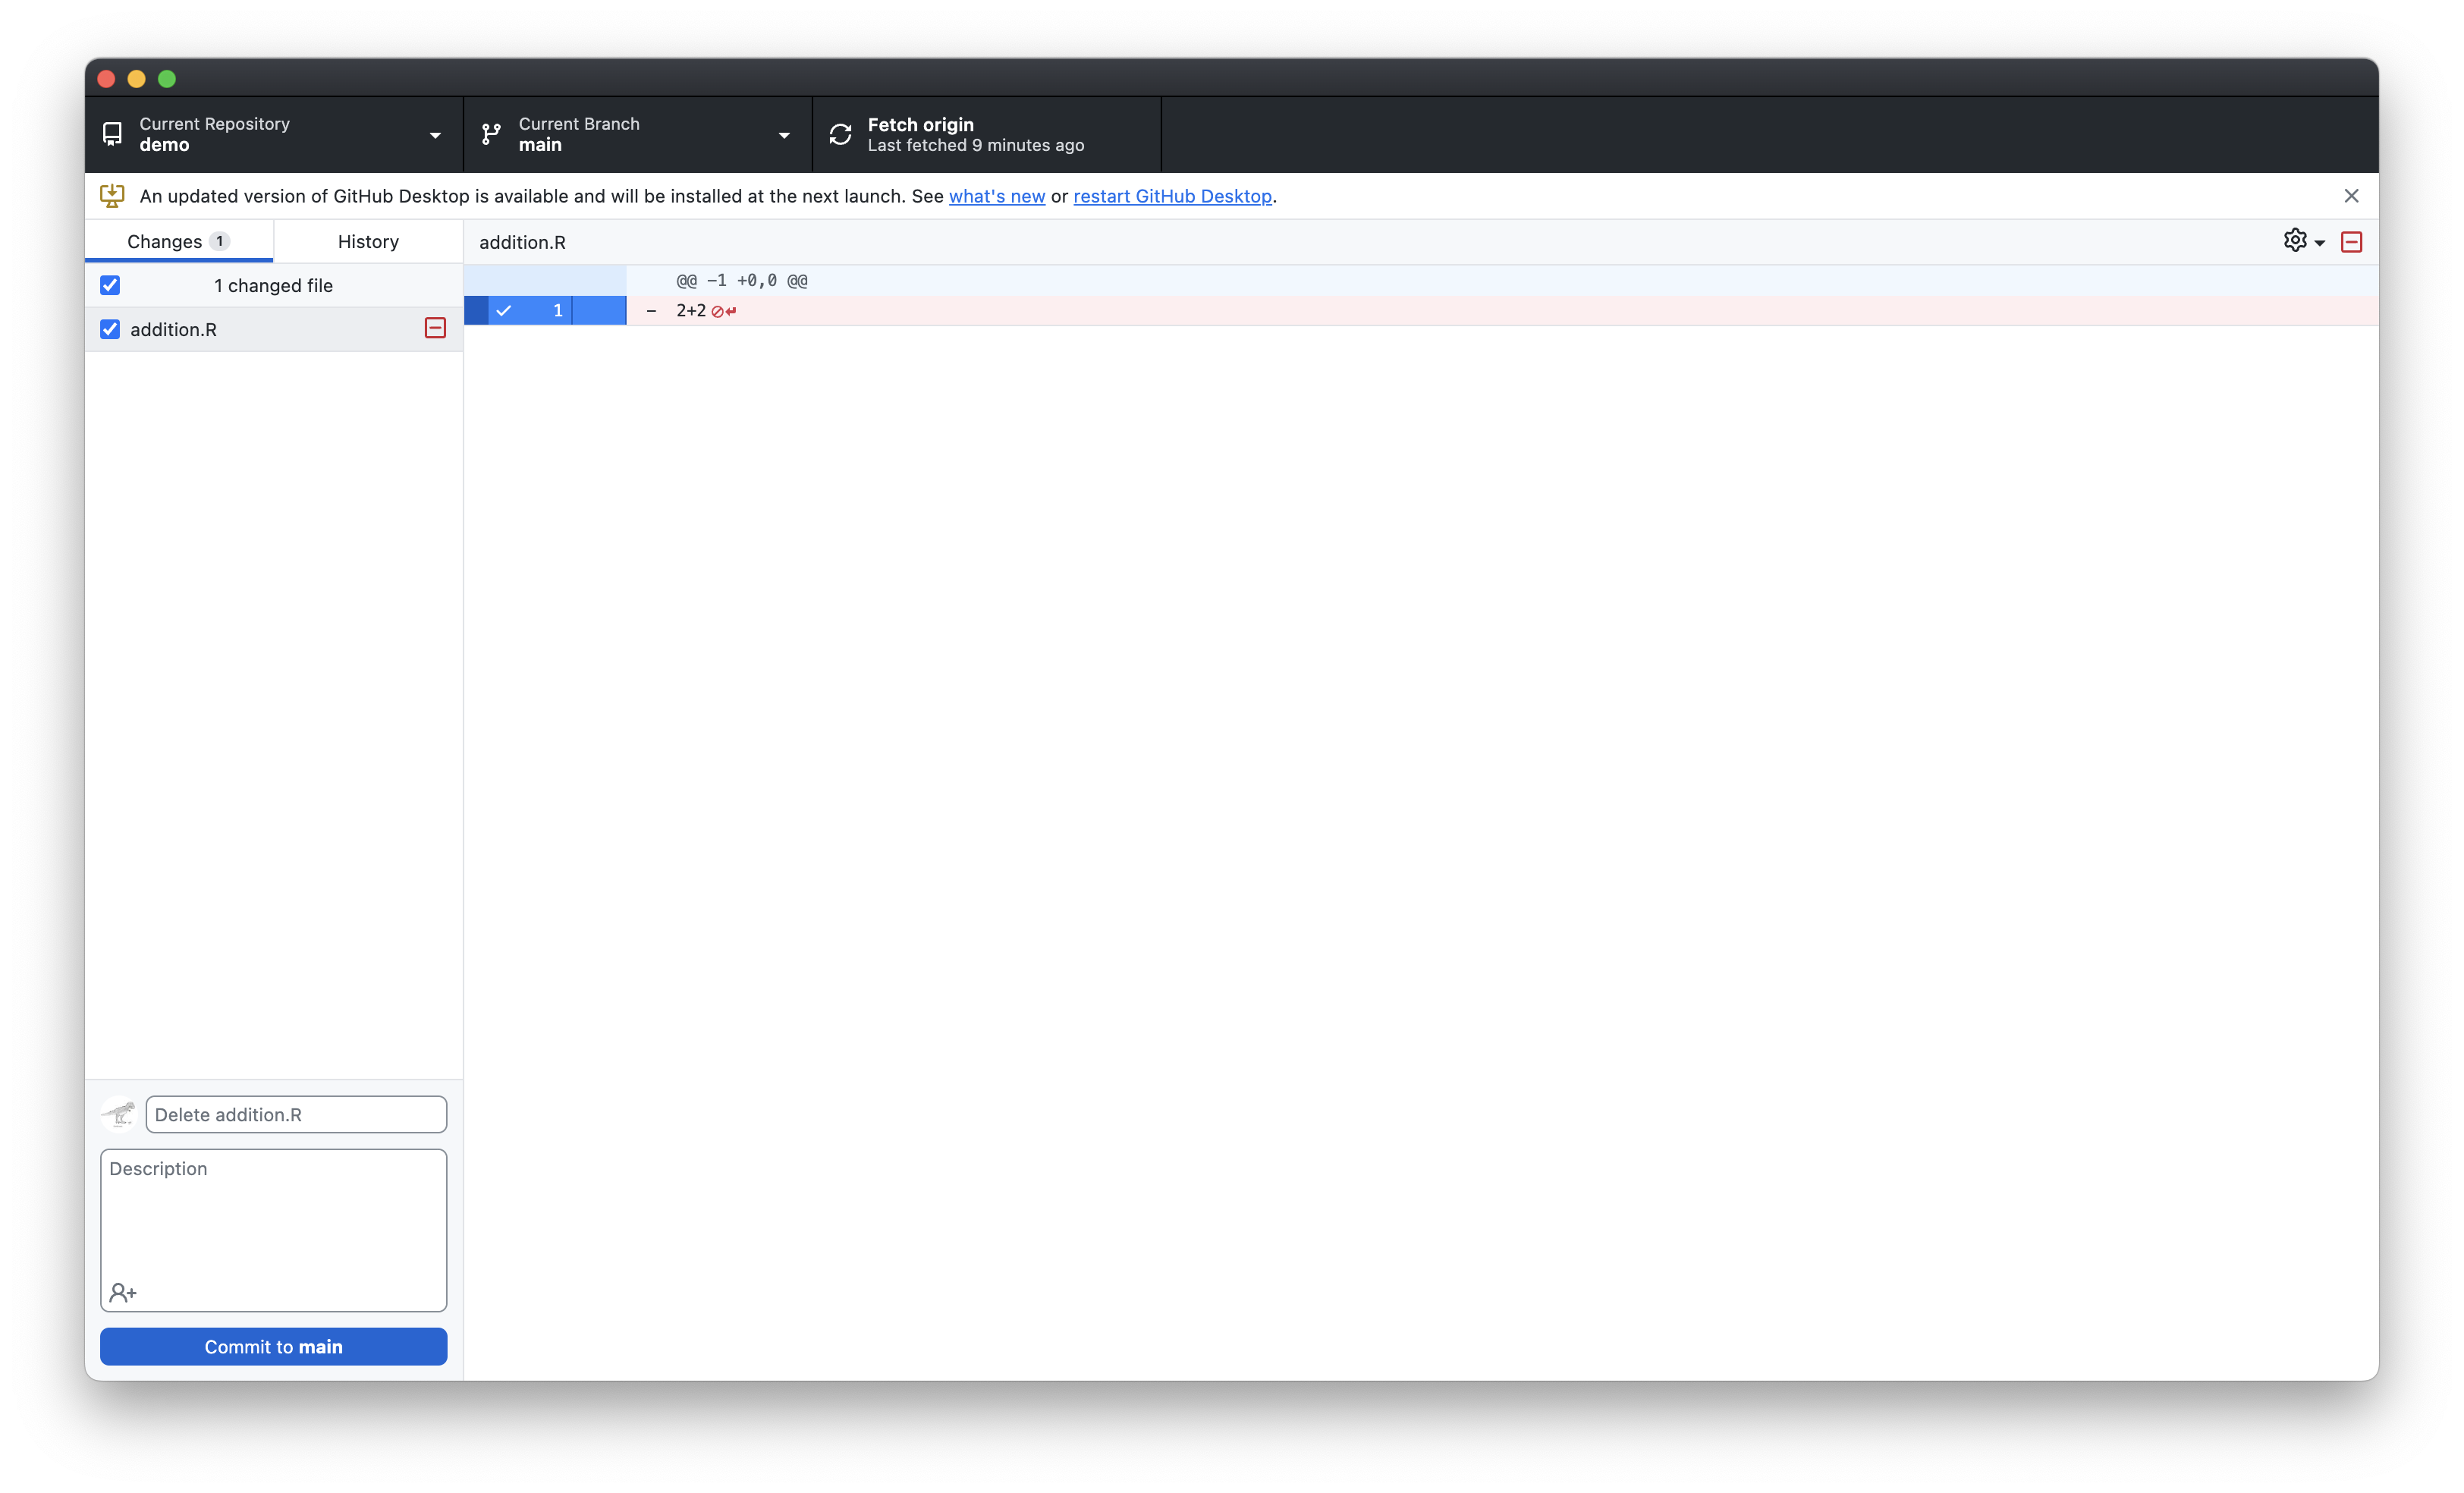
Revert Commits (cont’d)

Revert Commits (cont’d)
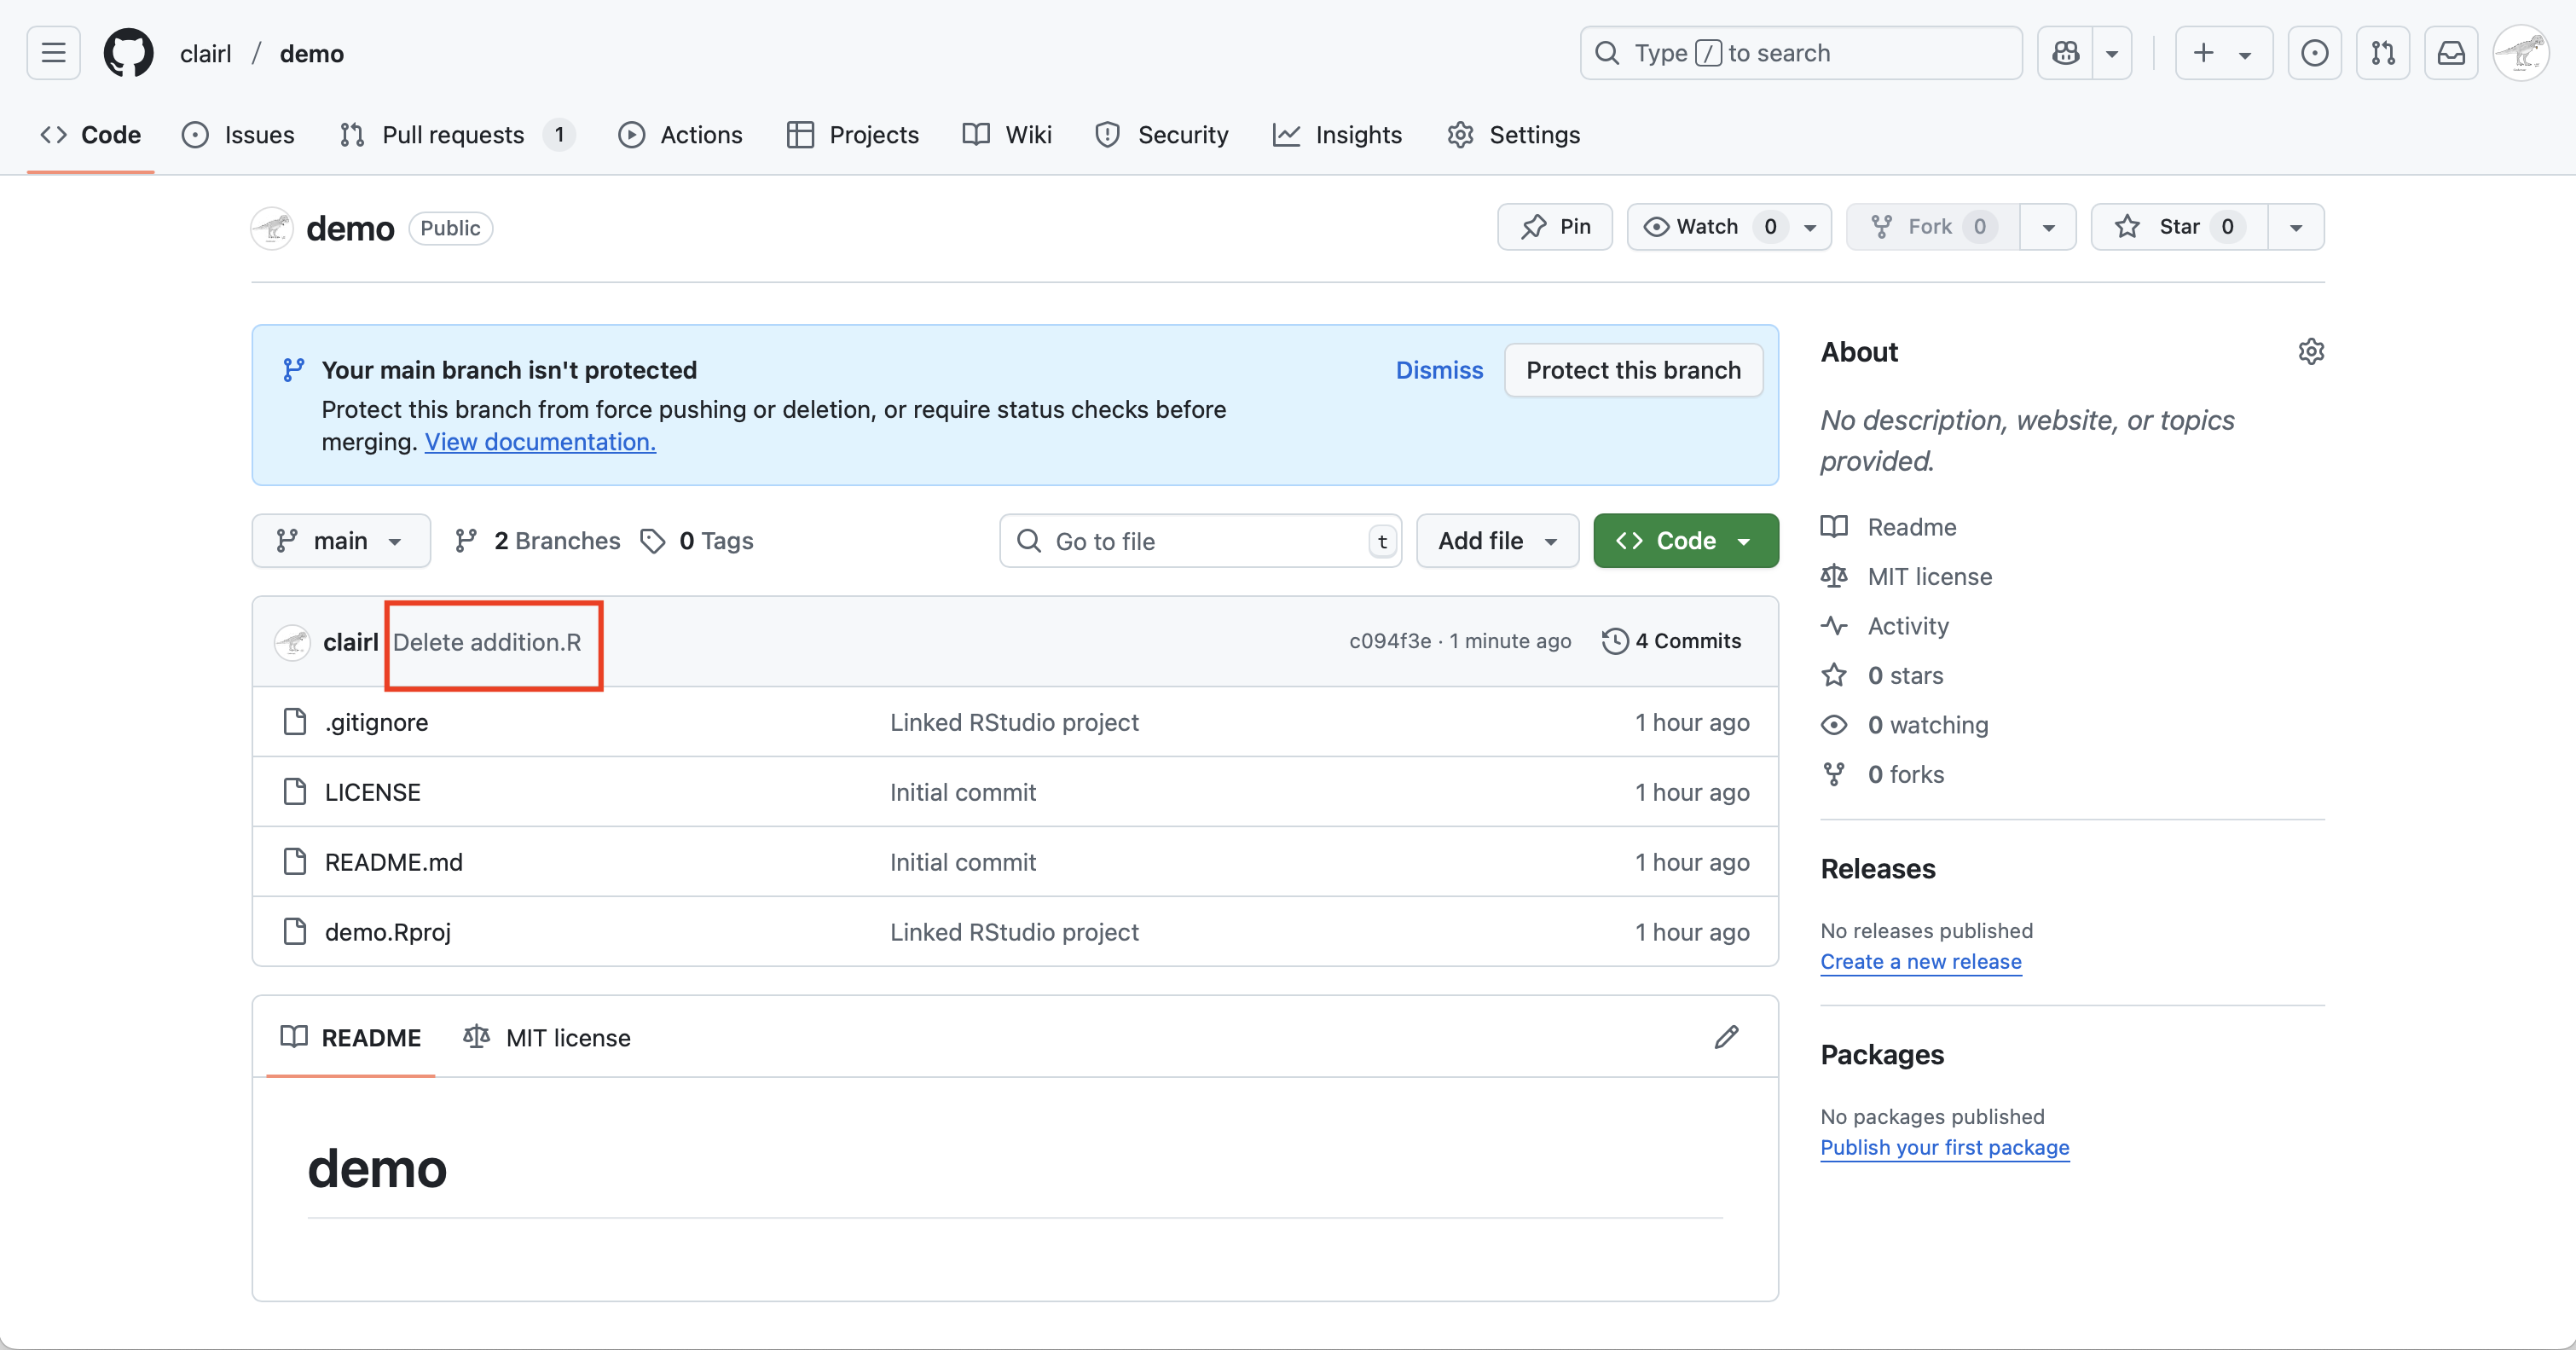
- The red minus sign indicates that the file has been deleted
- Write a comment (e.g., “Delete addition.R”), commit the change, and push to origin
Revert Commits (cont’d)
addition.Rhas been removed from the origin repo
Revert Commits (cont’d)
- To revert the change, return to GitHub Desktop and click the History tab
- Right click the commit you want to revert and select Revert changes in commit
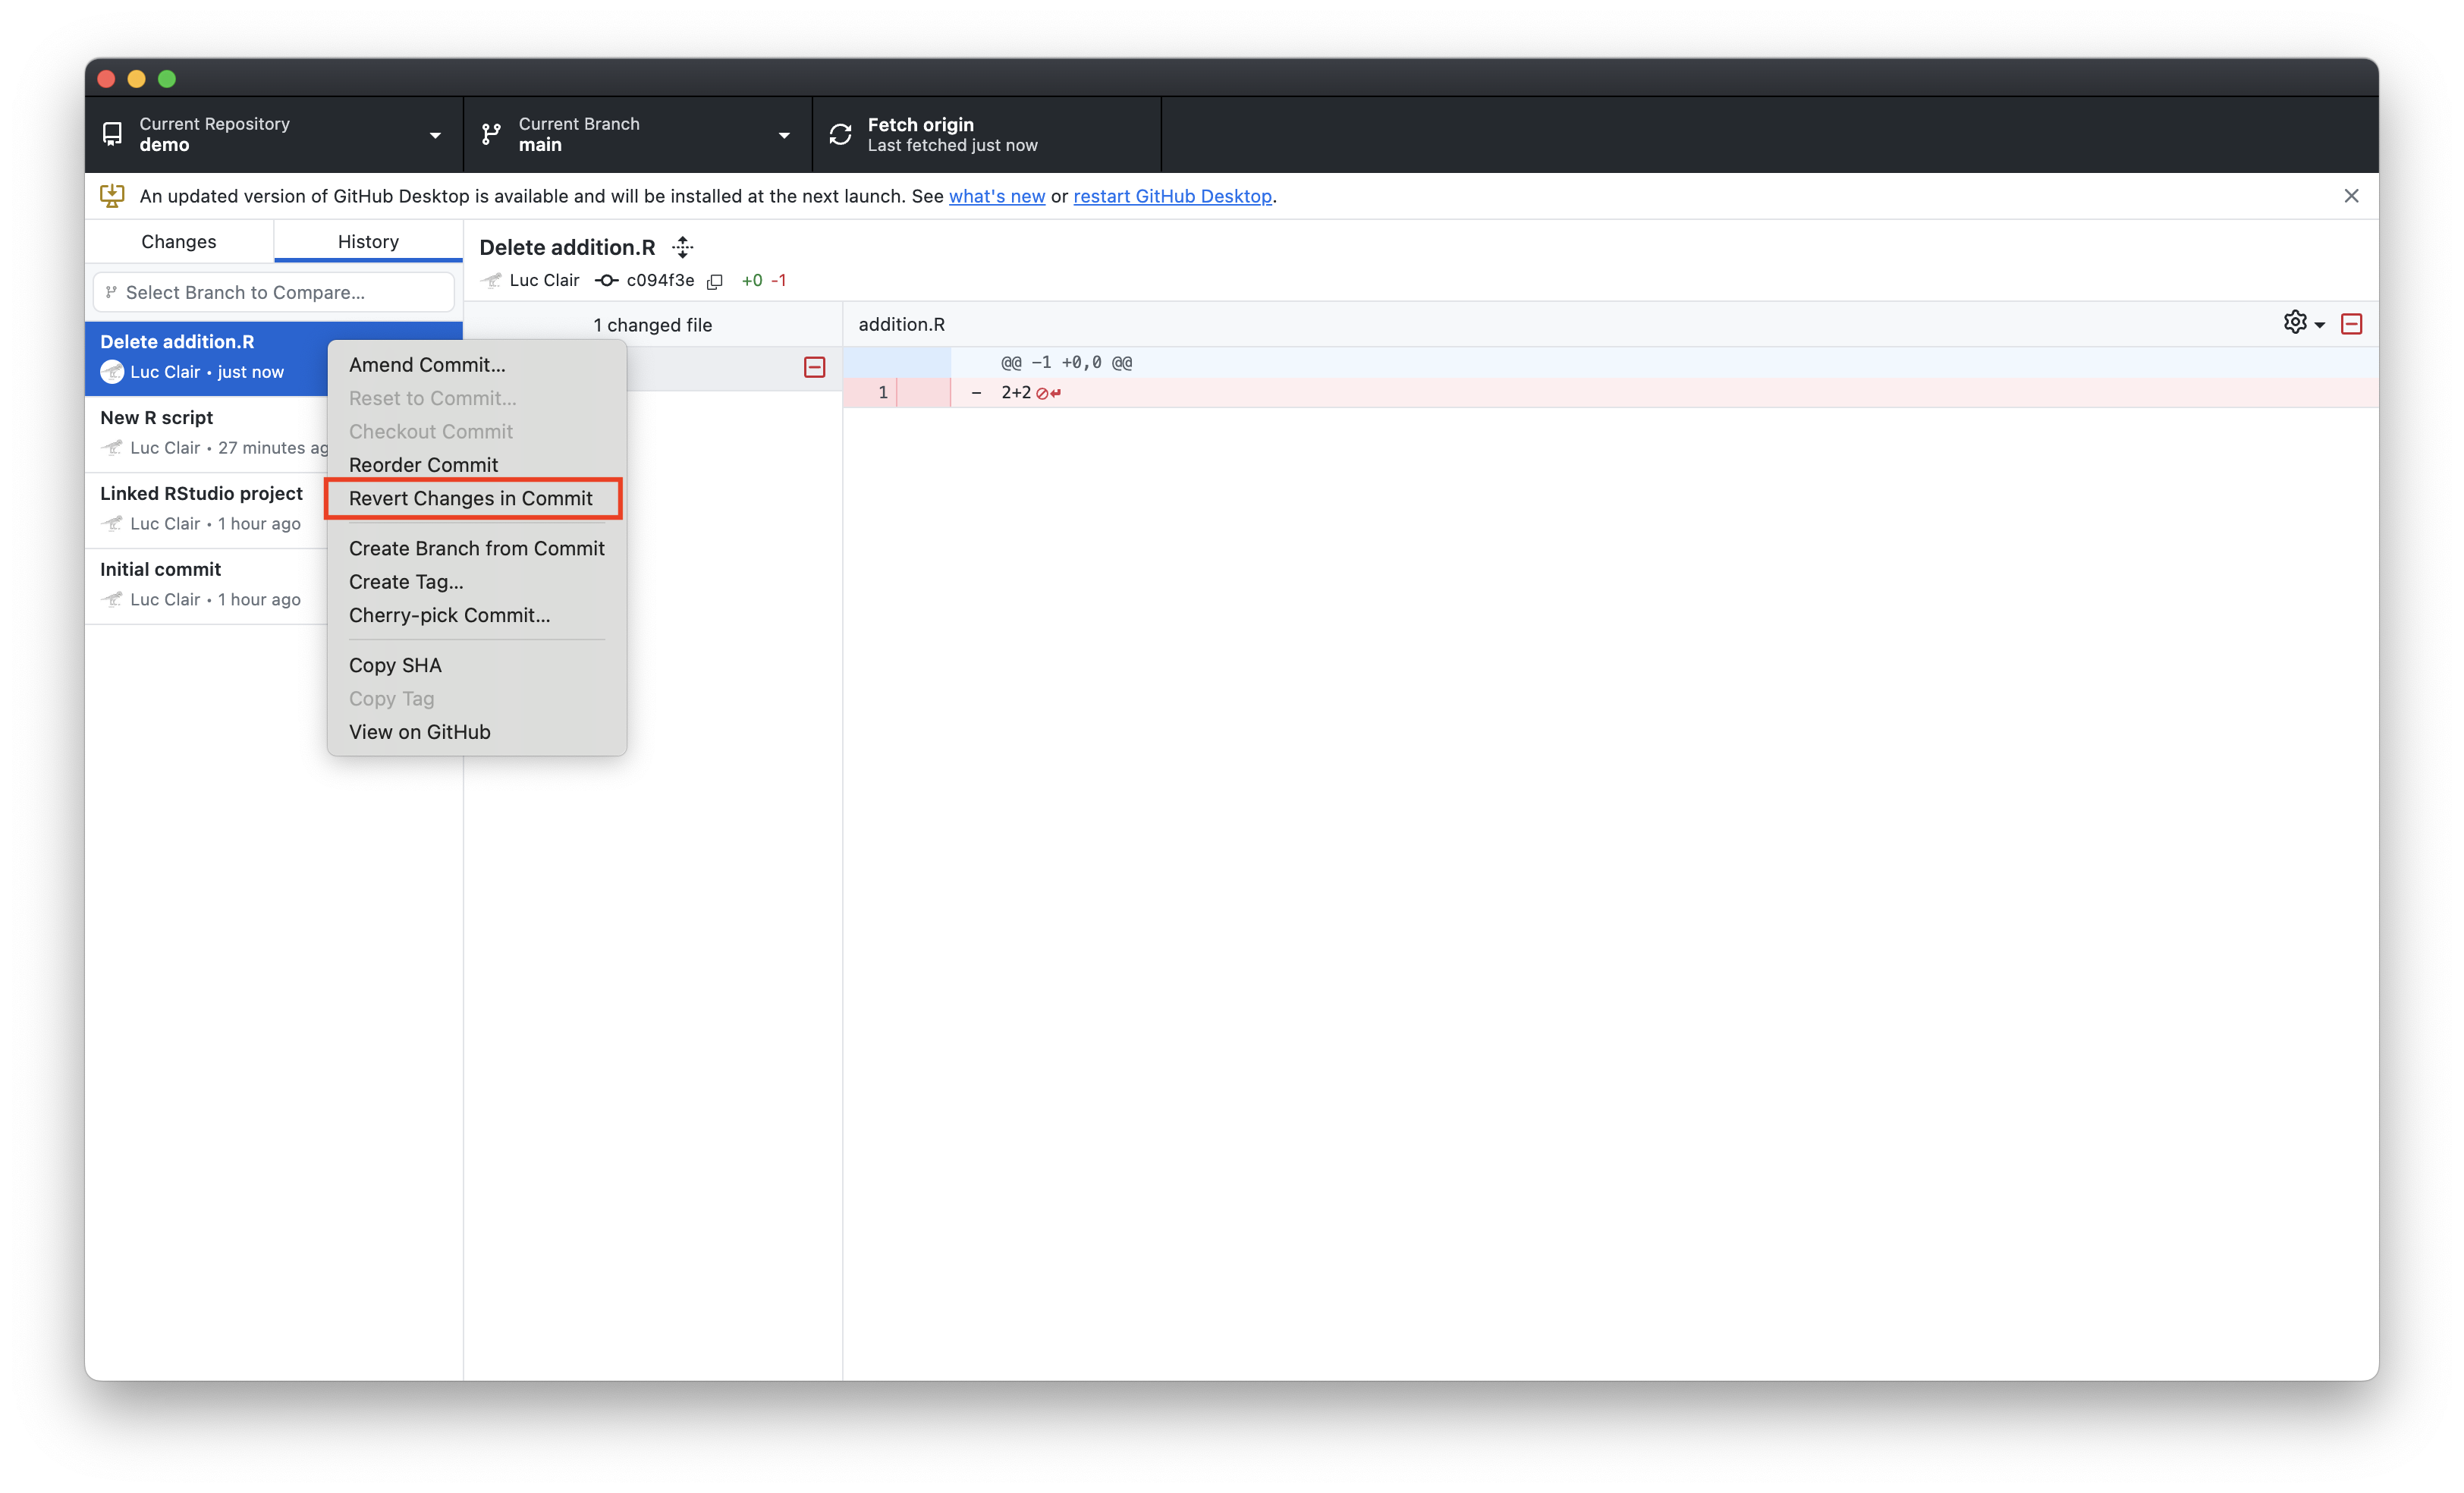
Revert Commits (cont’d)
- This reverses the previous commit and creates a new one reinstating the deleted file
- Push this new commit to origin
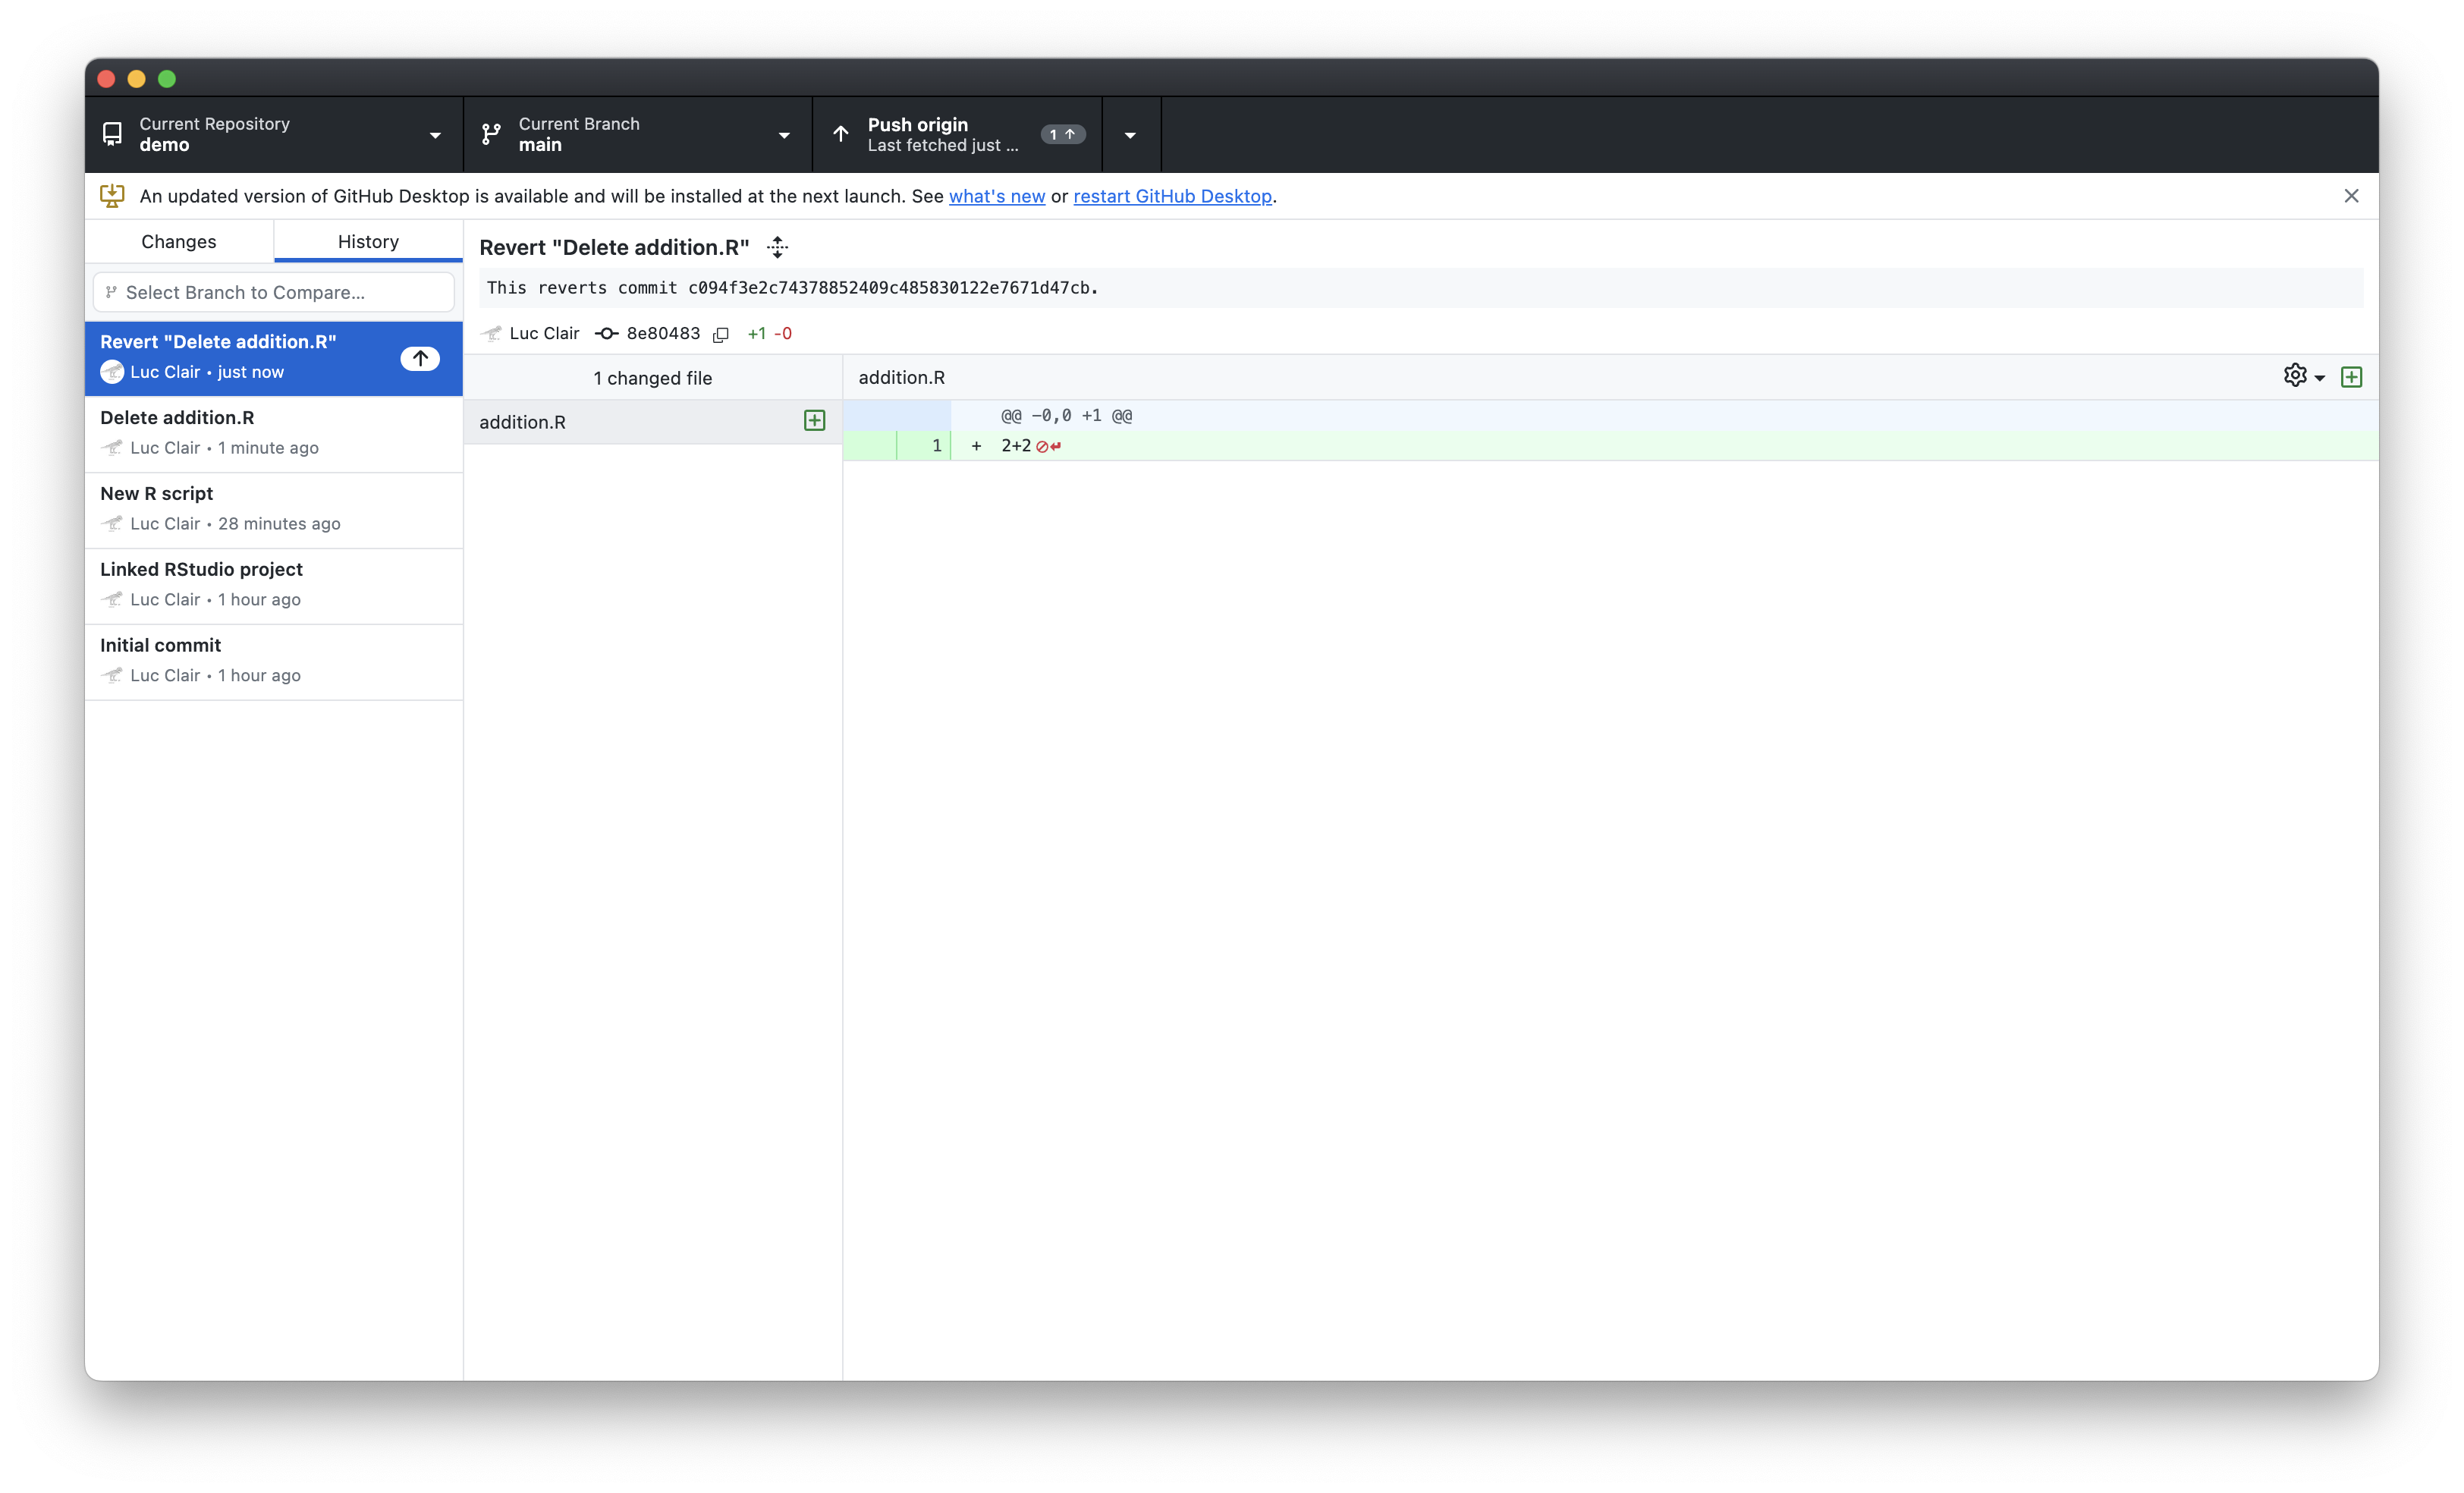
Revert Commits (cont’d)
addition.Ris back in the repo

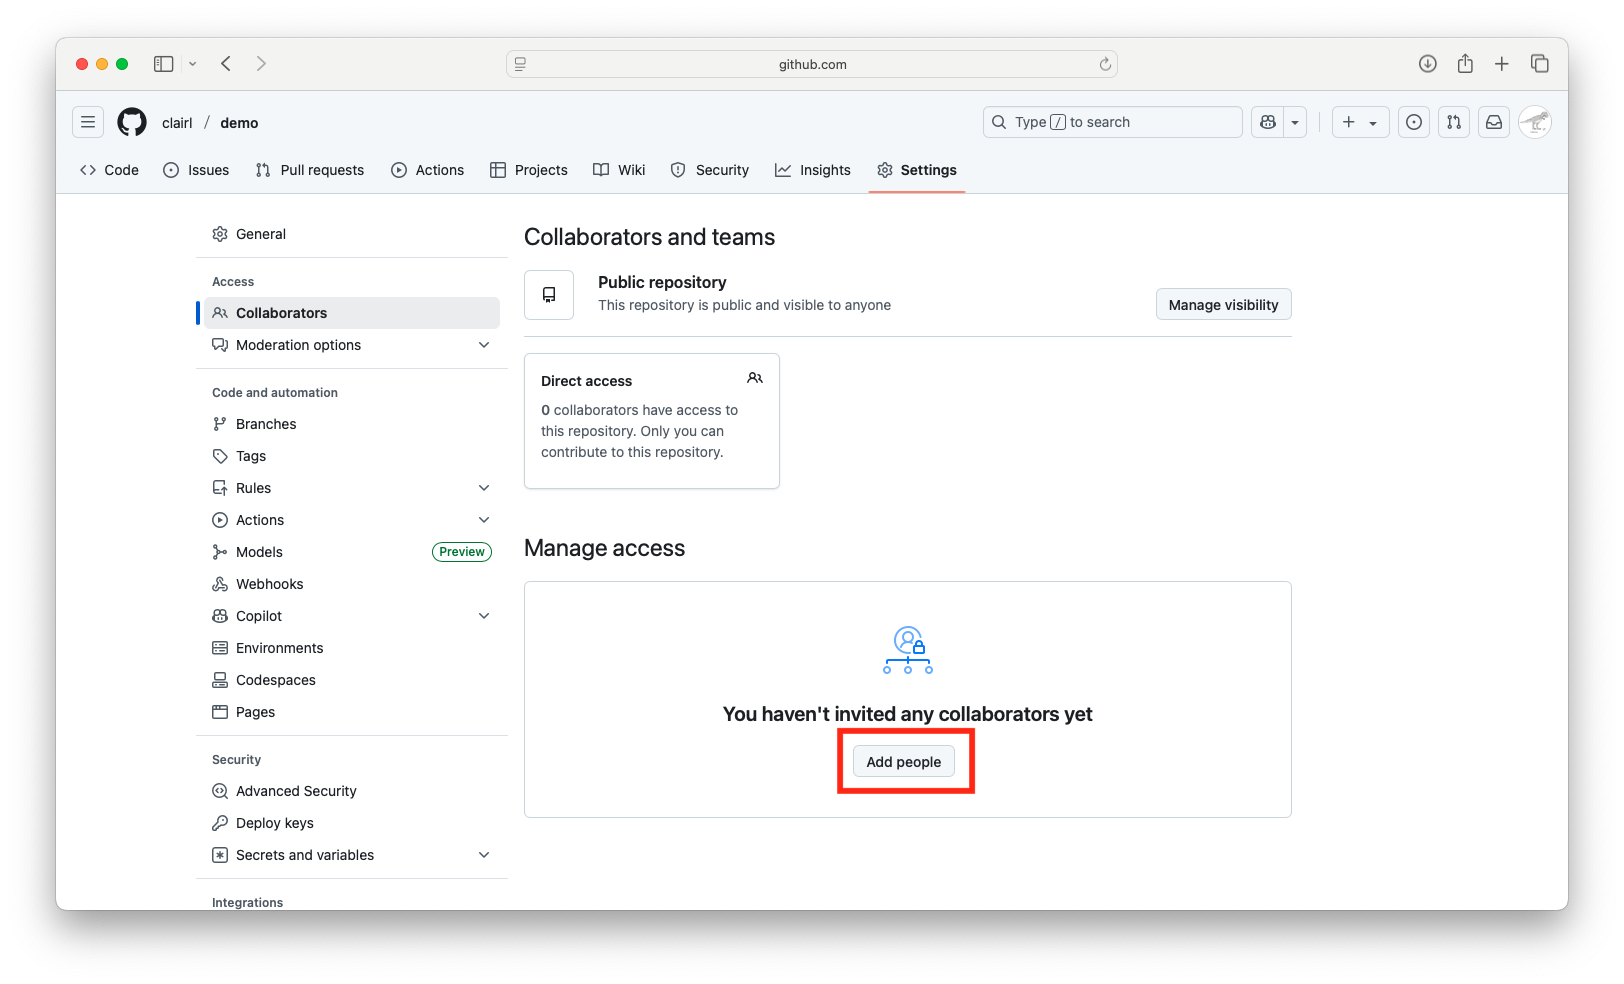
Collaborators
- We can invite collaborators by going to our repository on GitHub.com and selecting Settings > Collaborators
- Click Add people
Collaborators (cont’d)
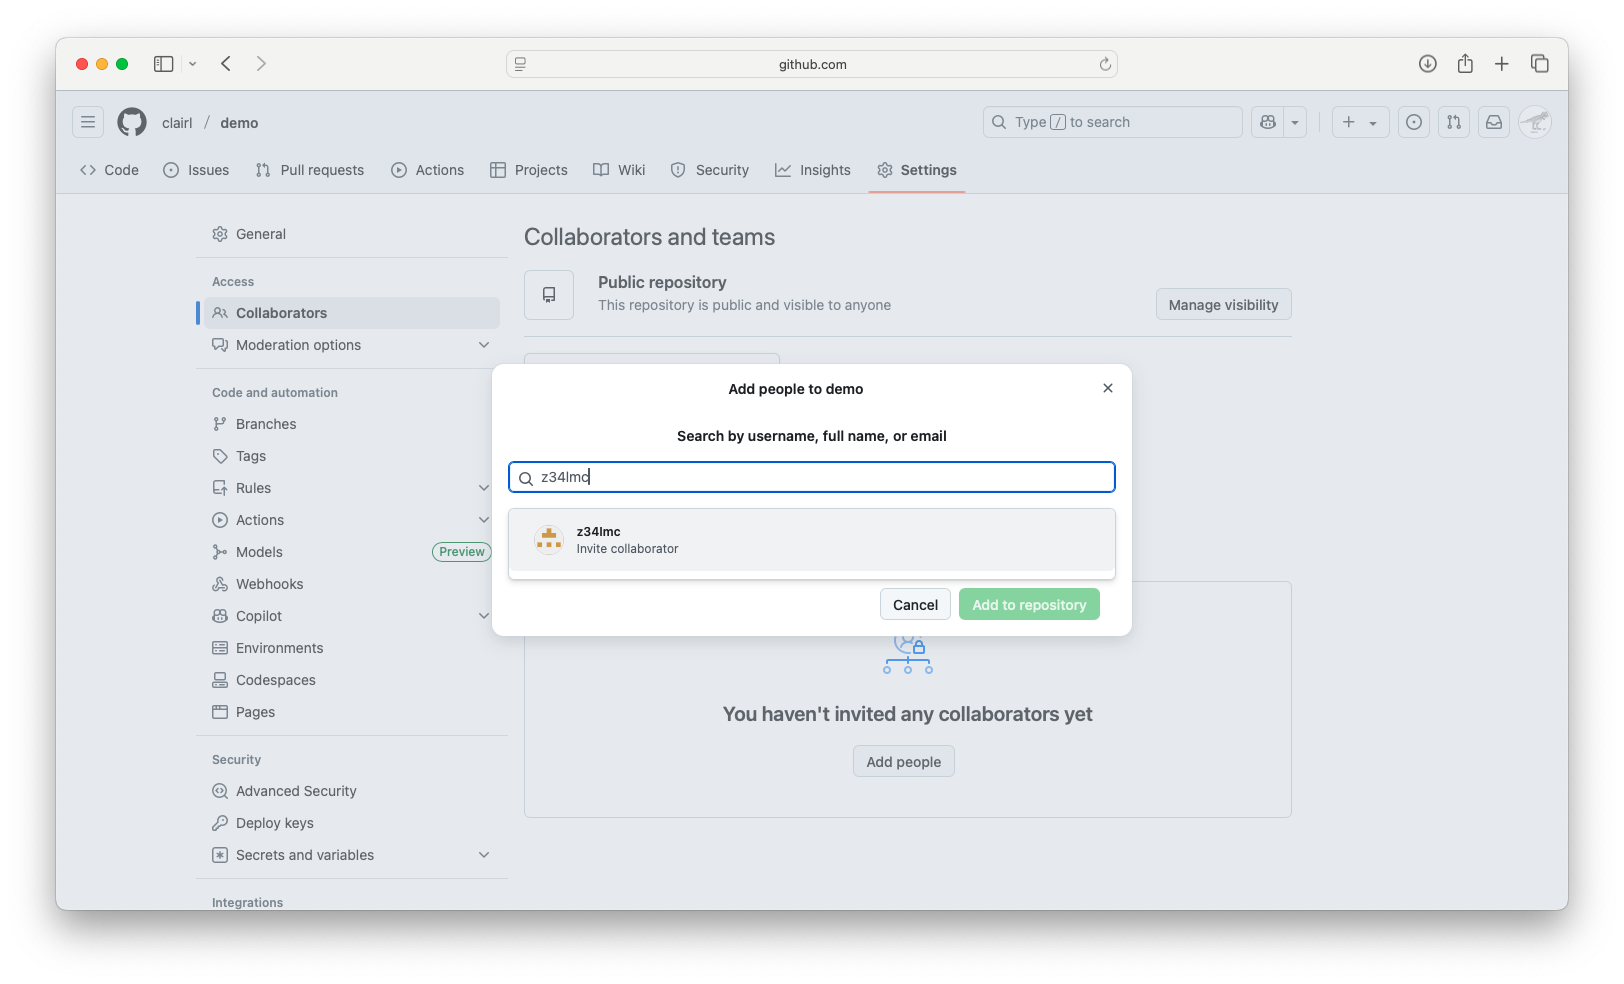
- Search for team members and click Add to repository
Collaborators (cont’d)
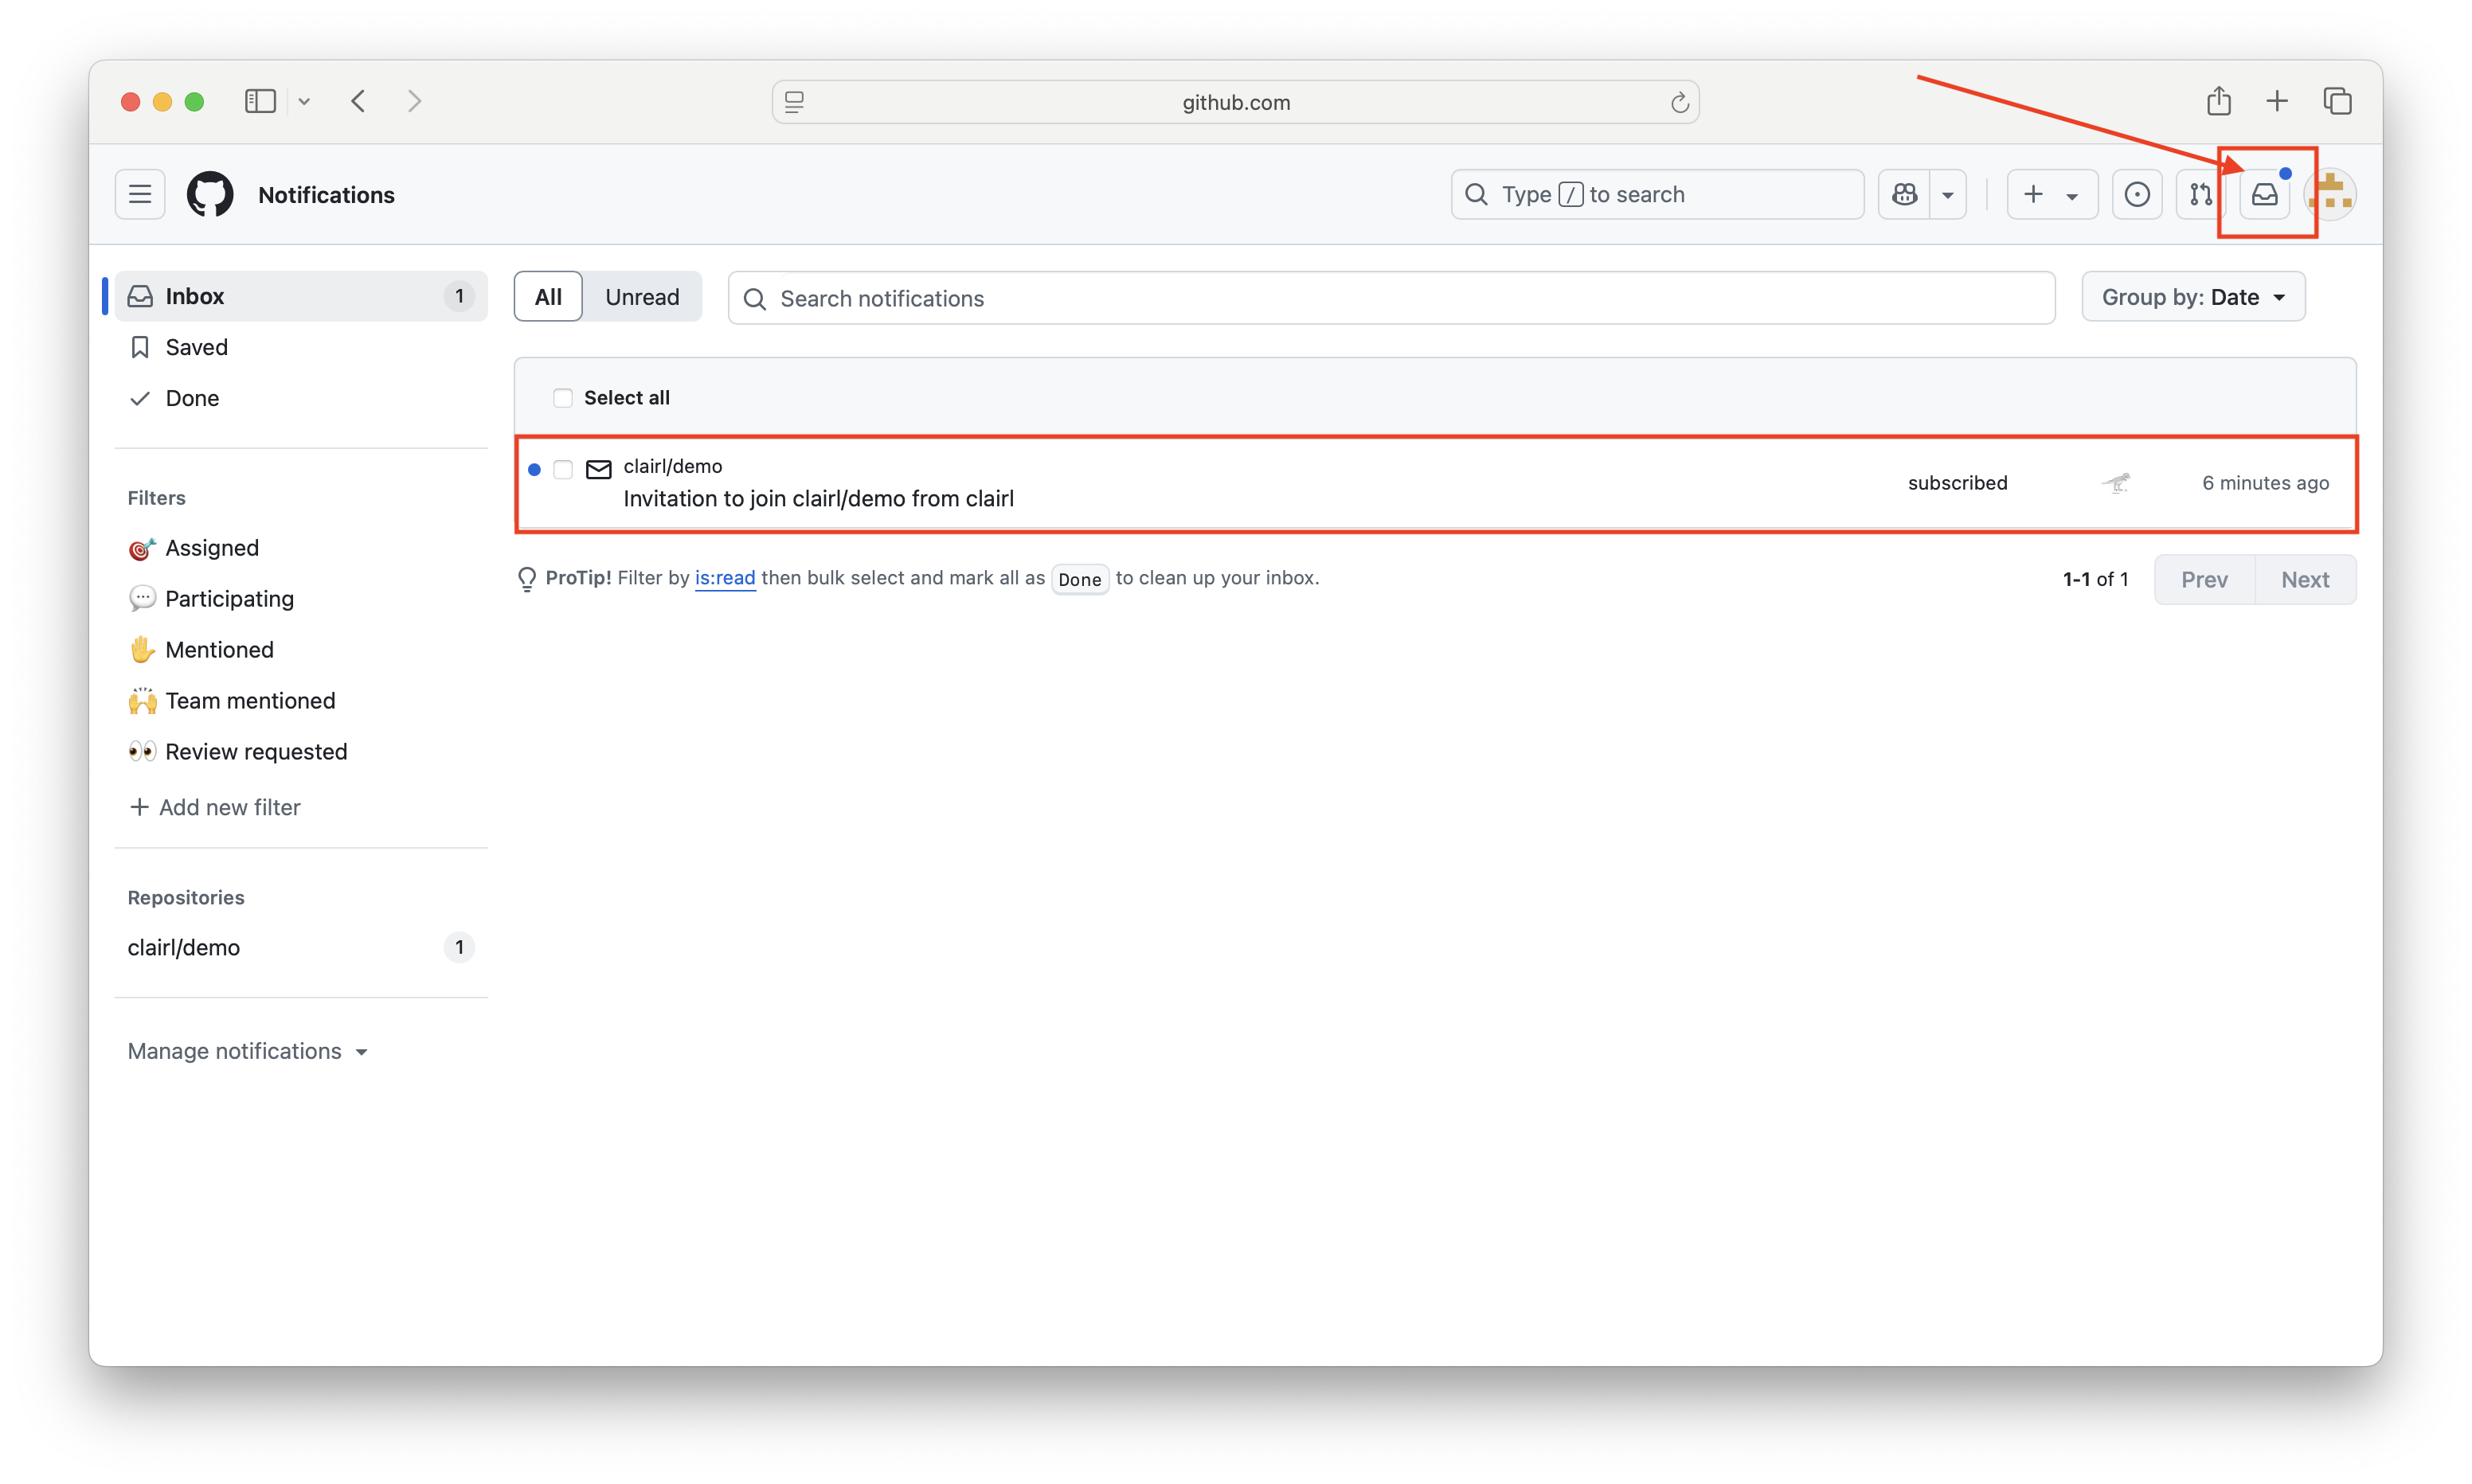
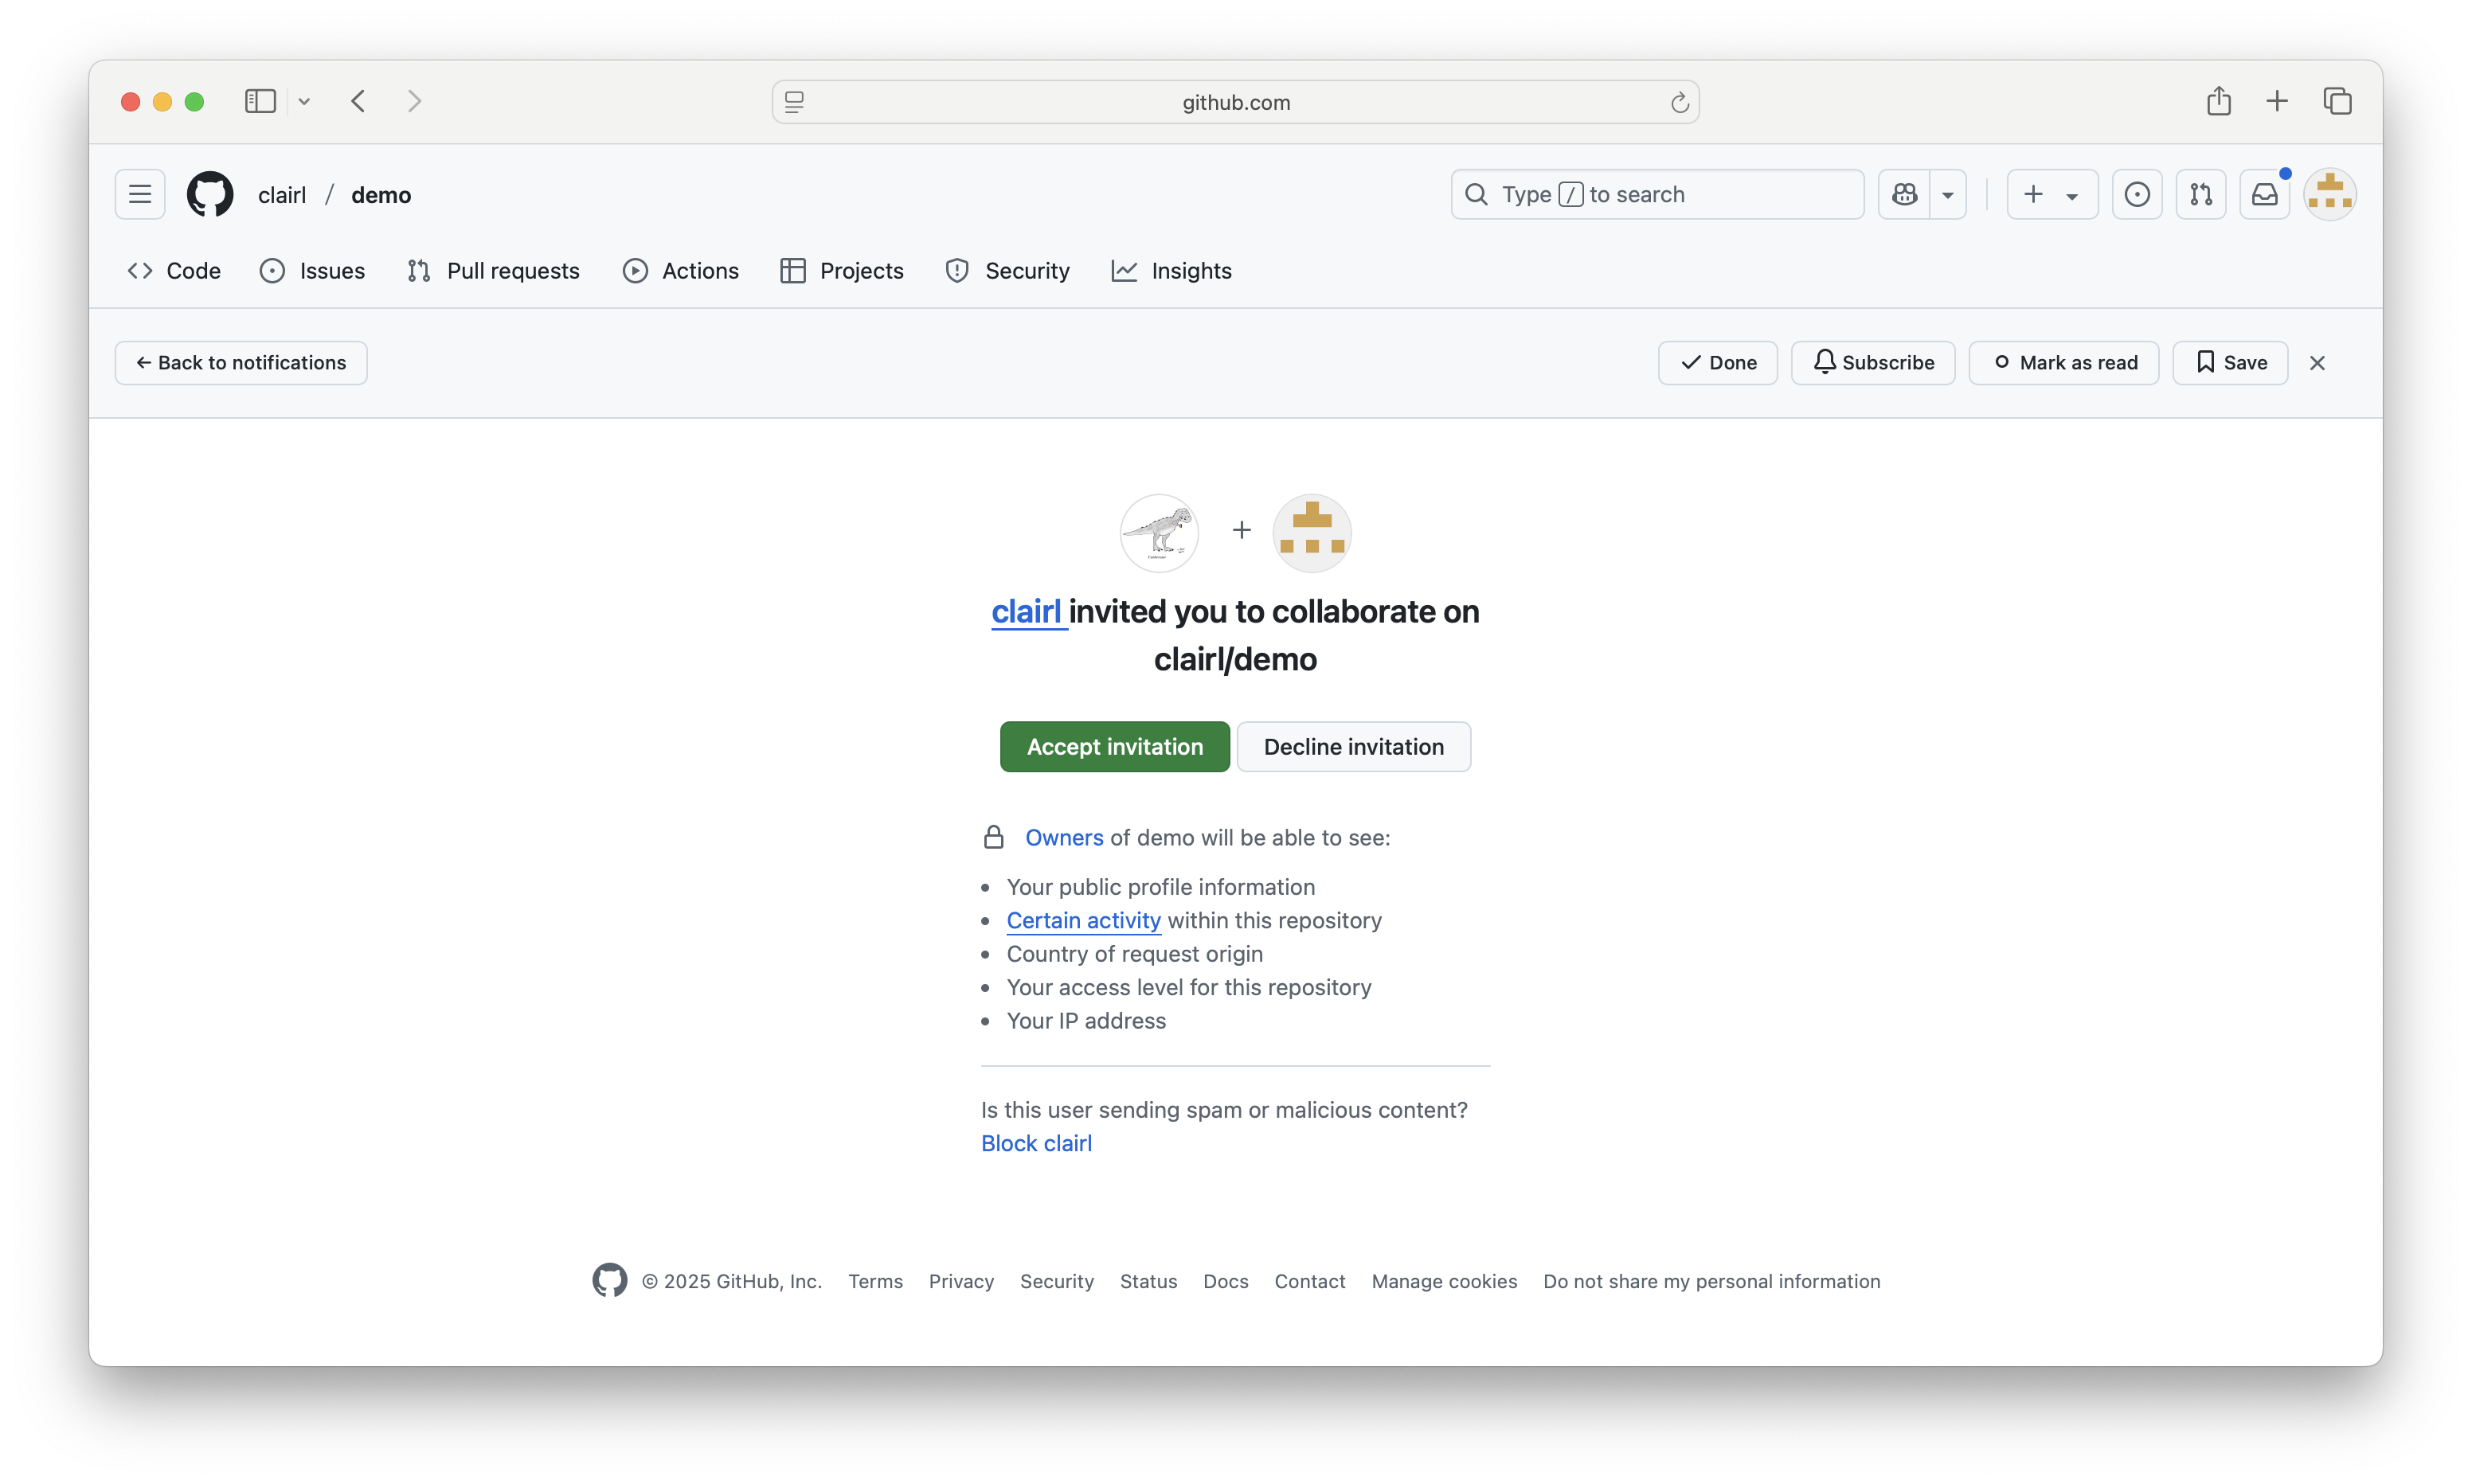
- As a collaborator, you can accept an invitation to join a project
Collaborators (cont’d)
How to Create a Branch
- In GitHub Desktop, go to Branch>New Branch
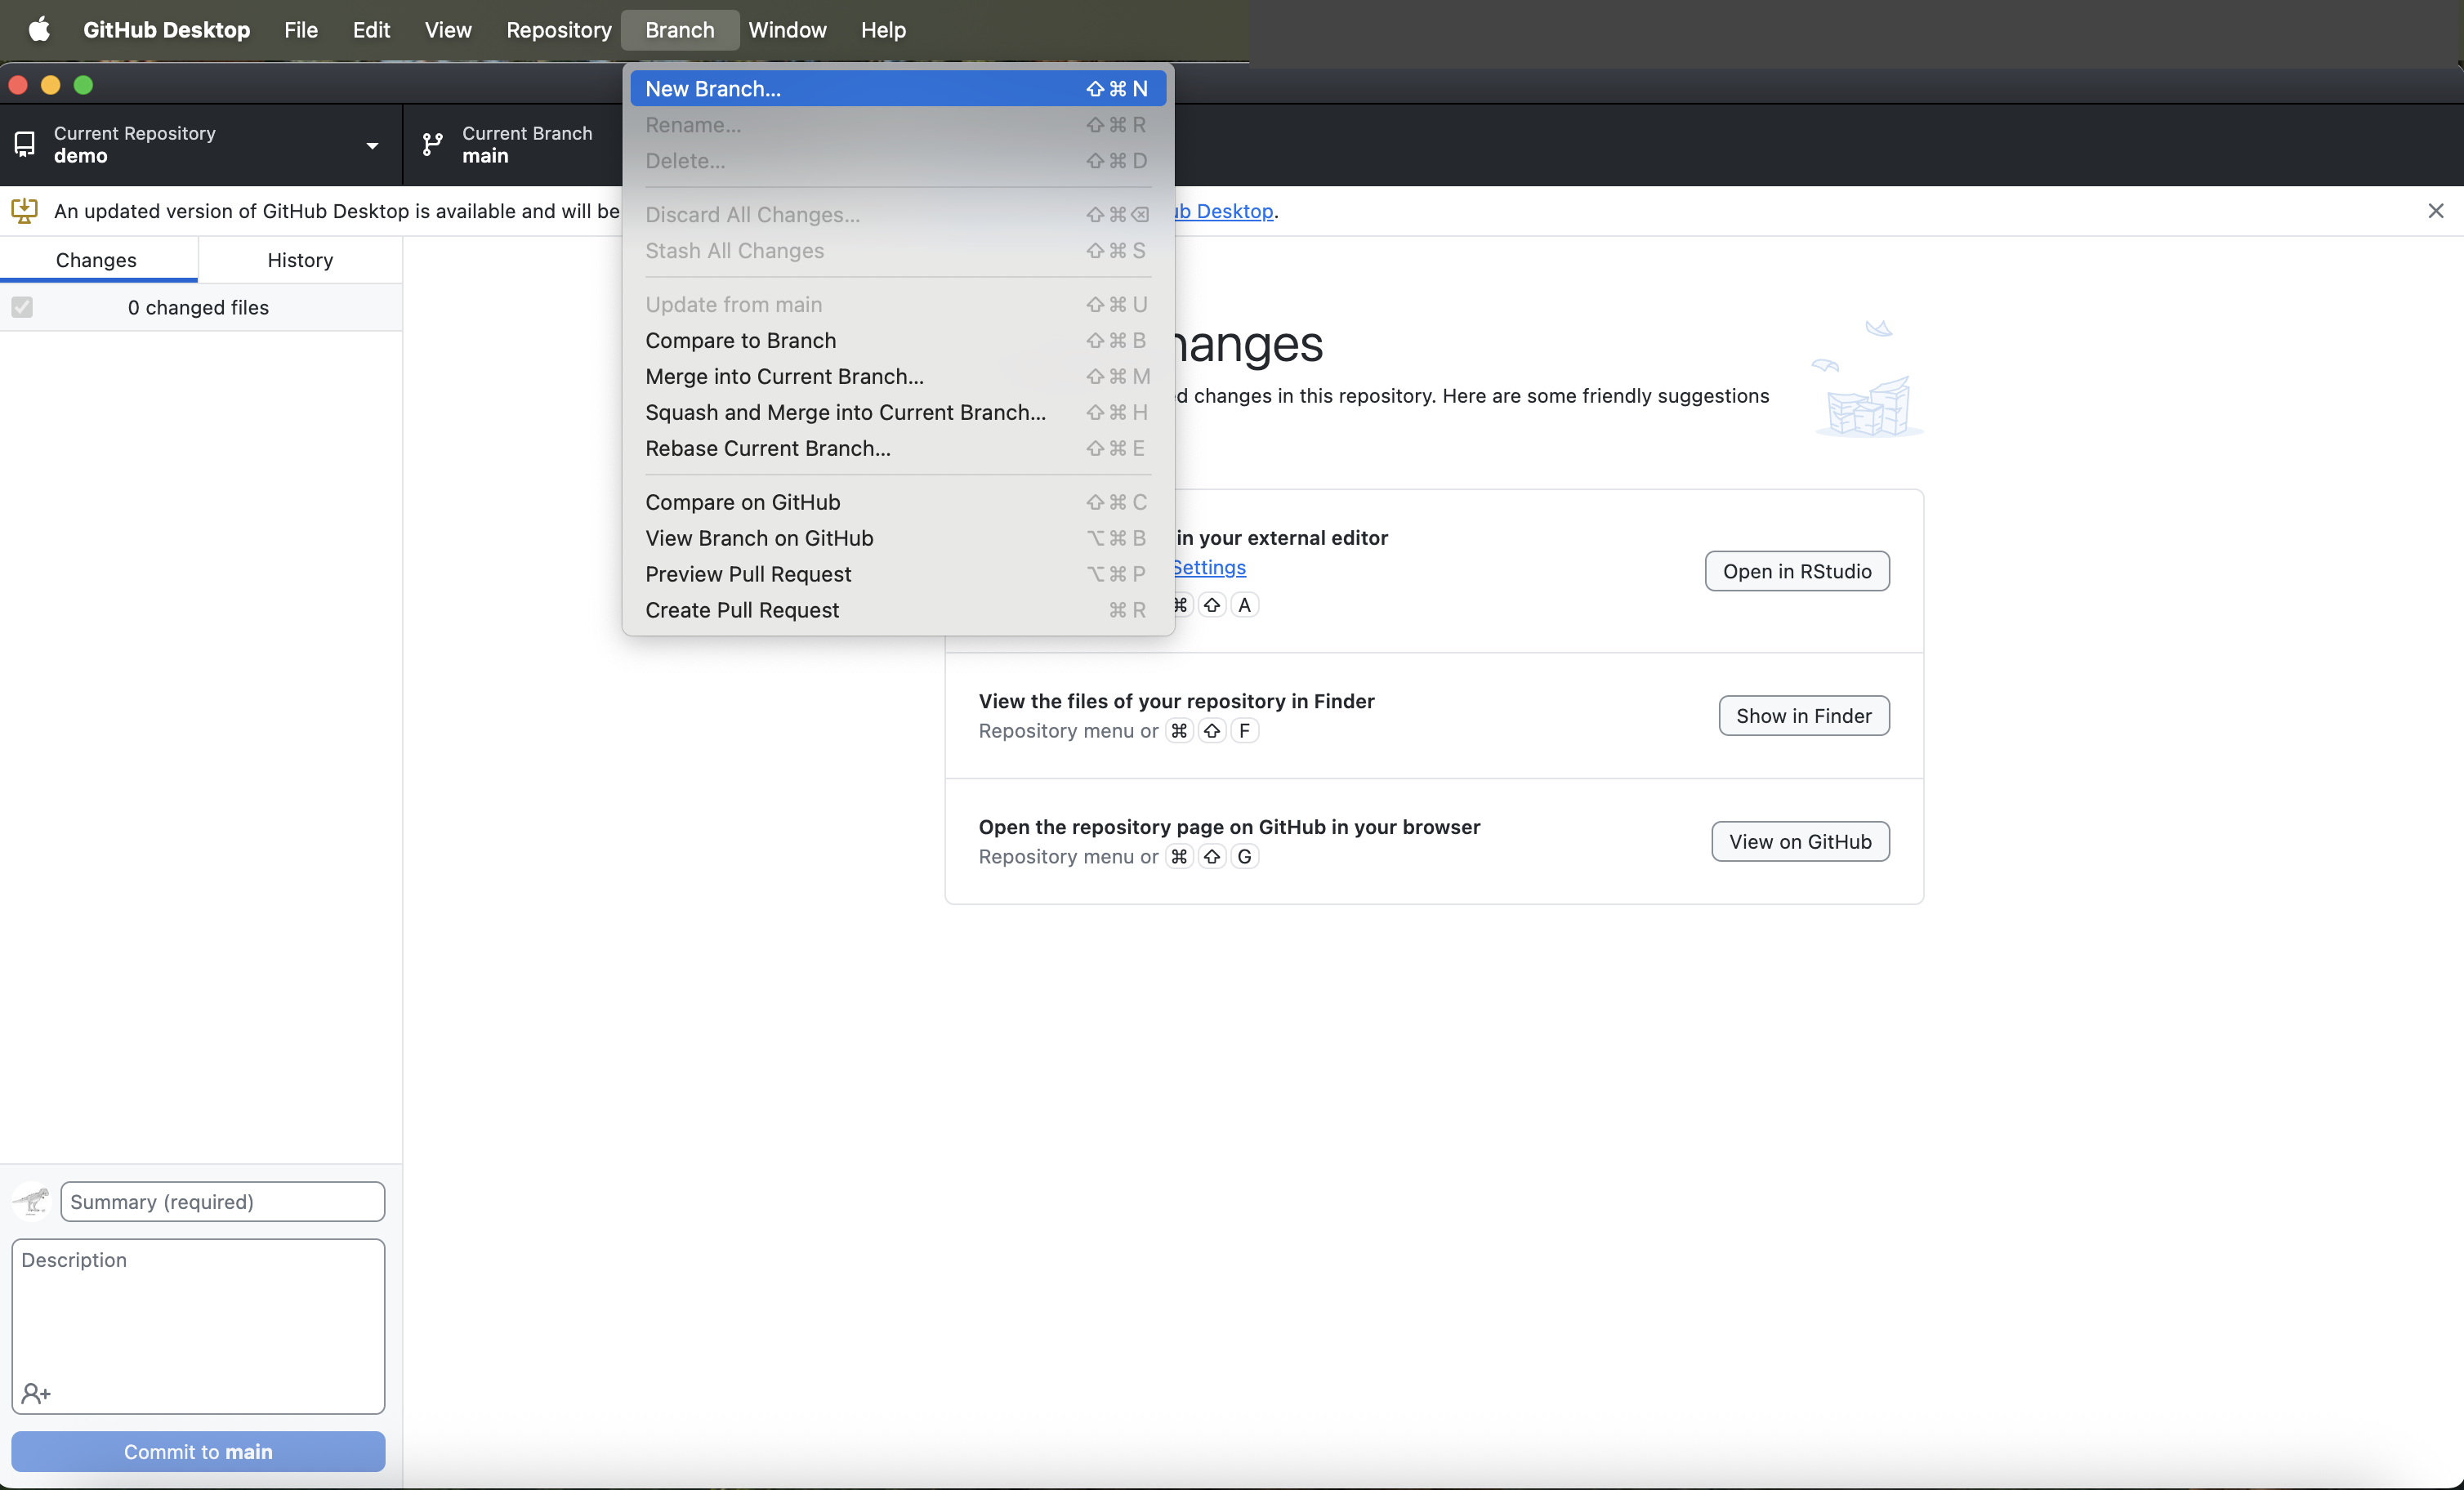
- Note that the new branch will be based on the current branch, which is the
mainbranch
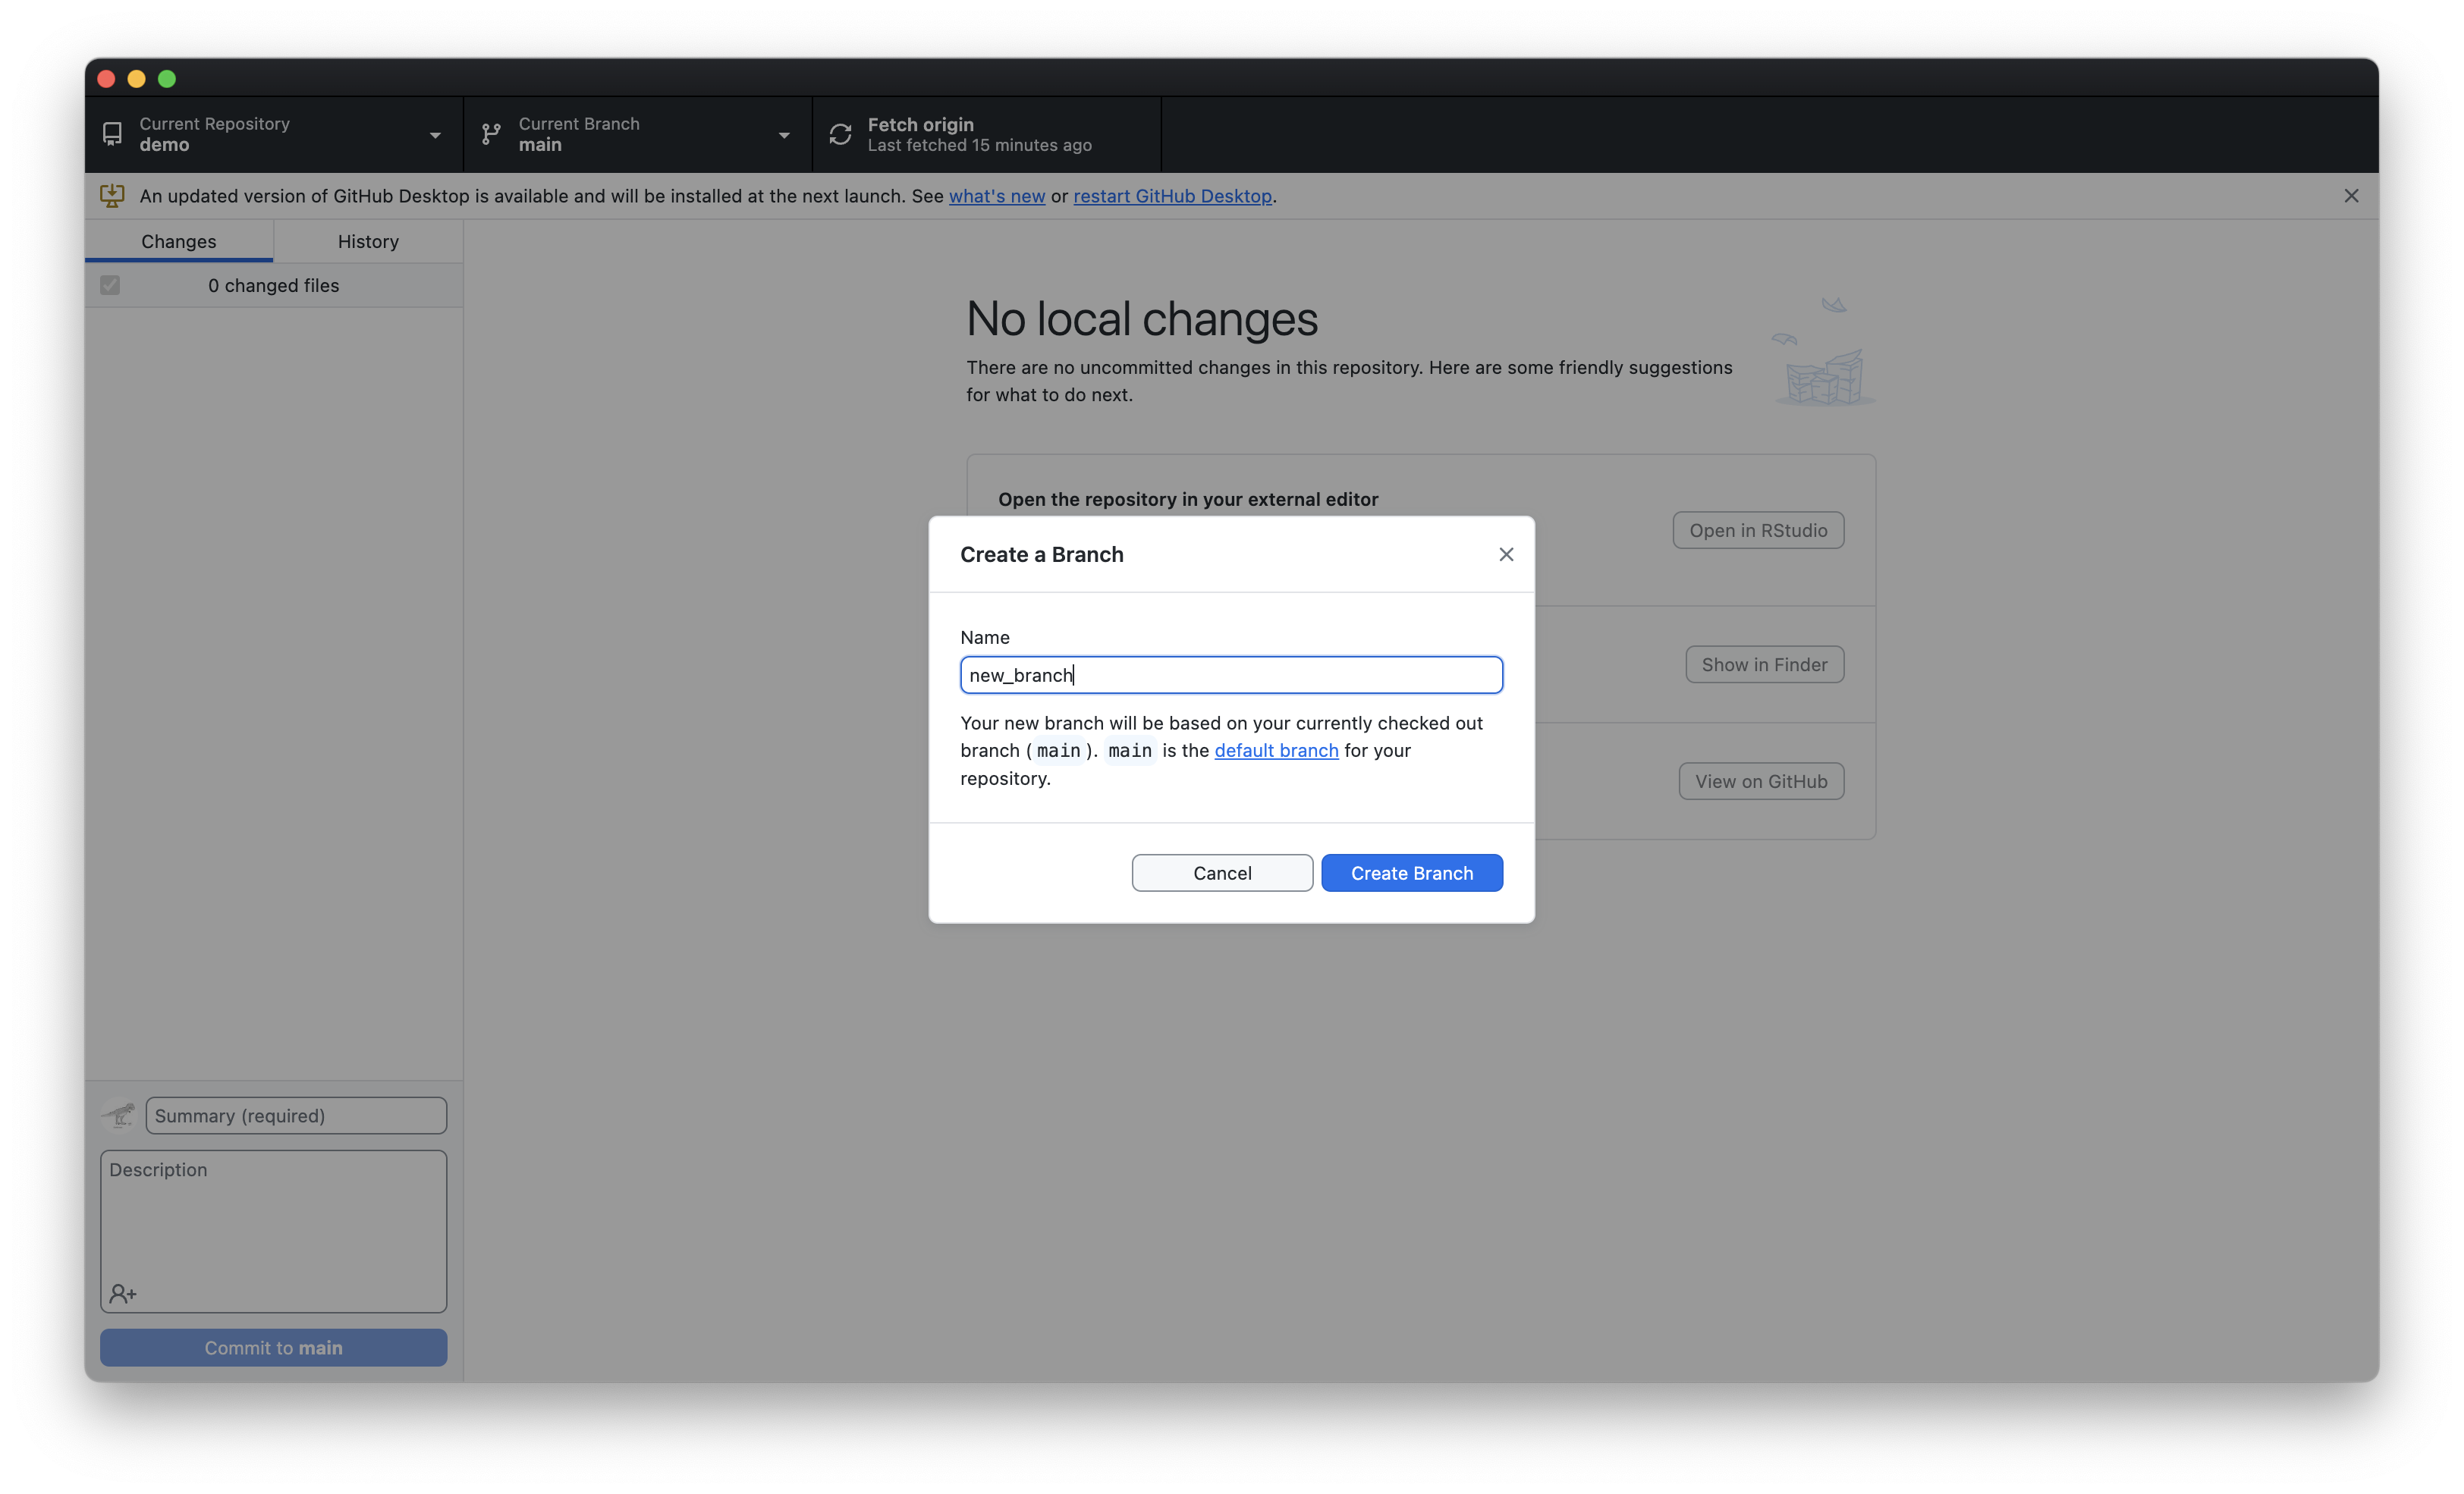
How to Create a Branch (cont’d)
- Name your branch, e.g.,
new_branchand click Create Branch
How to Create a Branch (cont’d)
- We are now working on a new branch
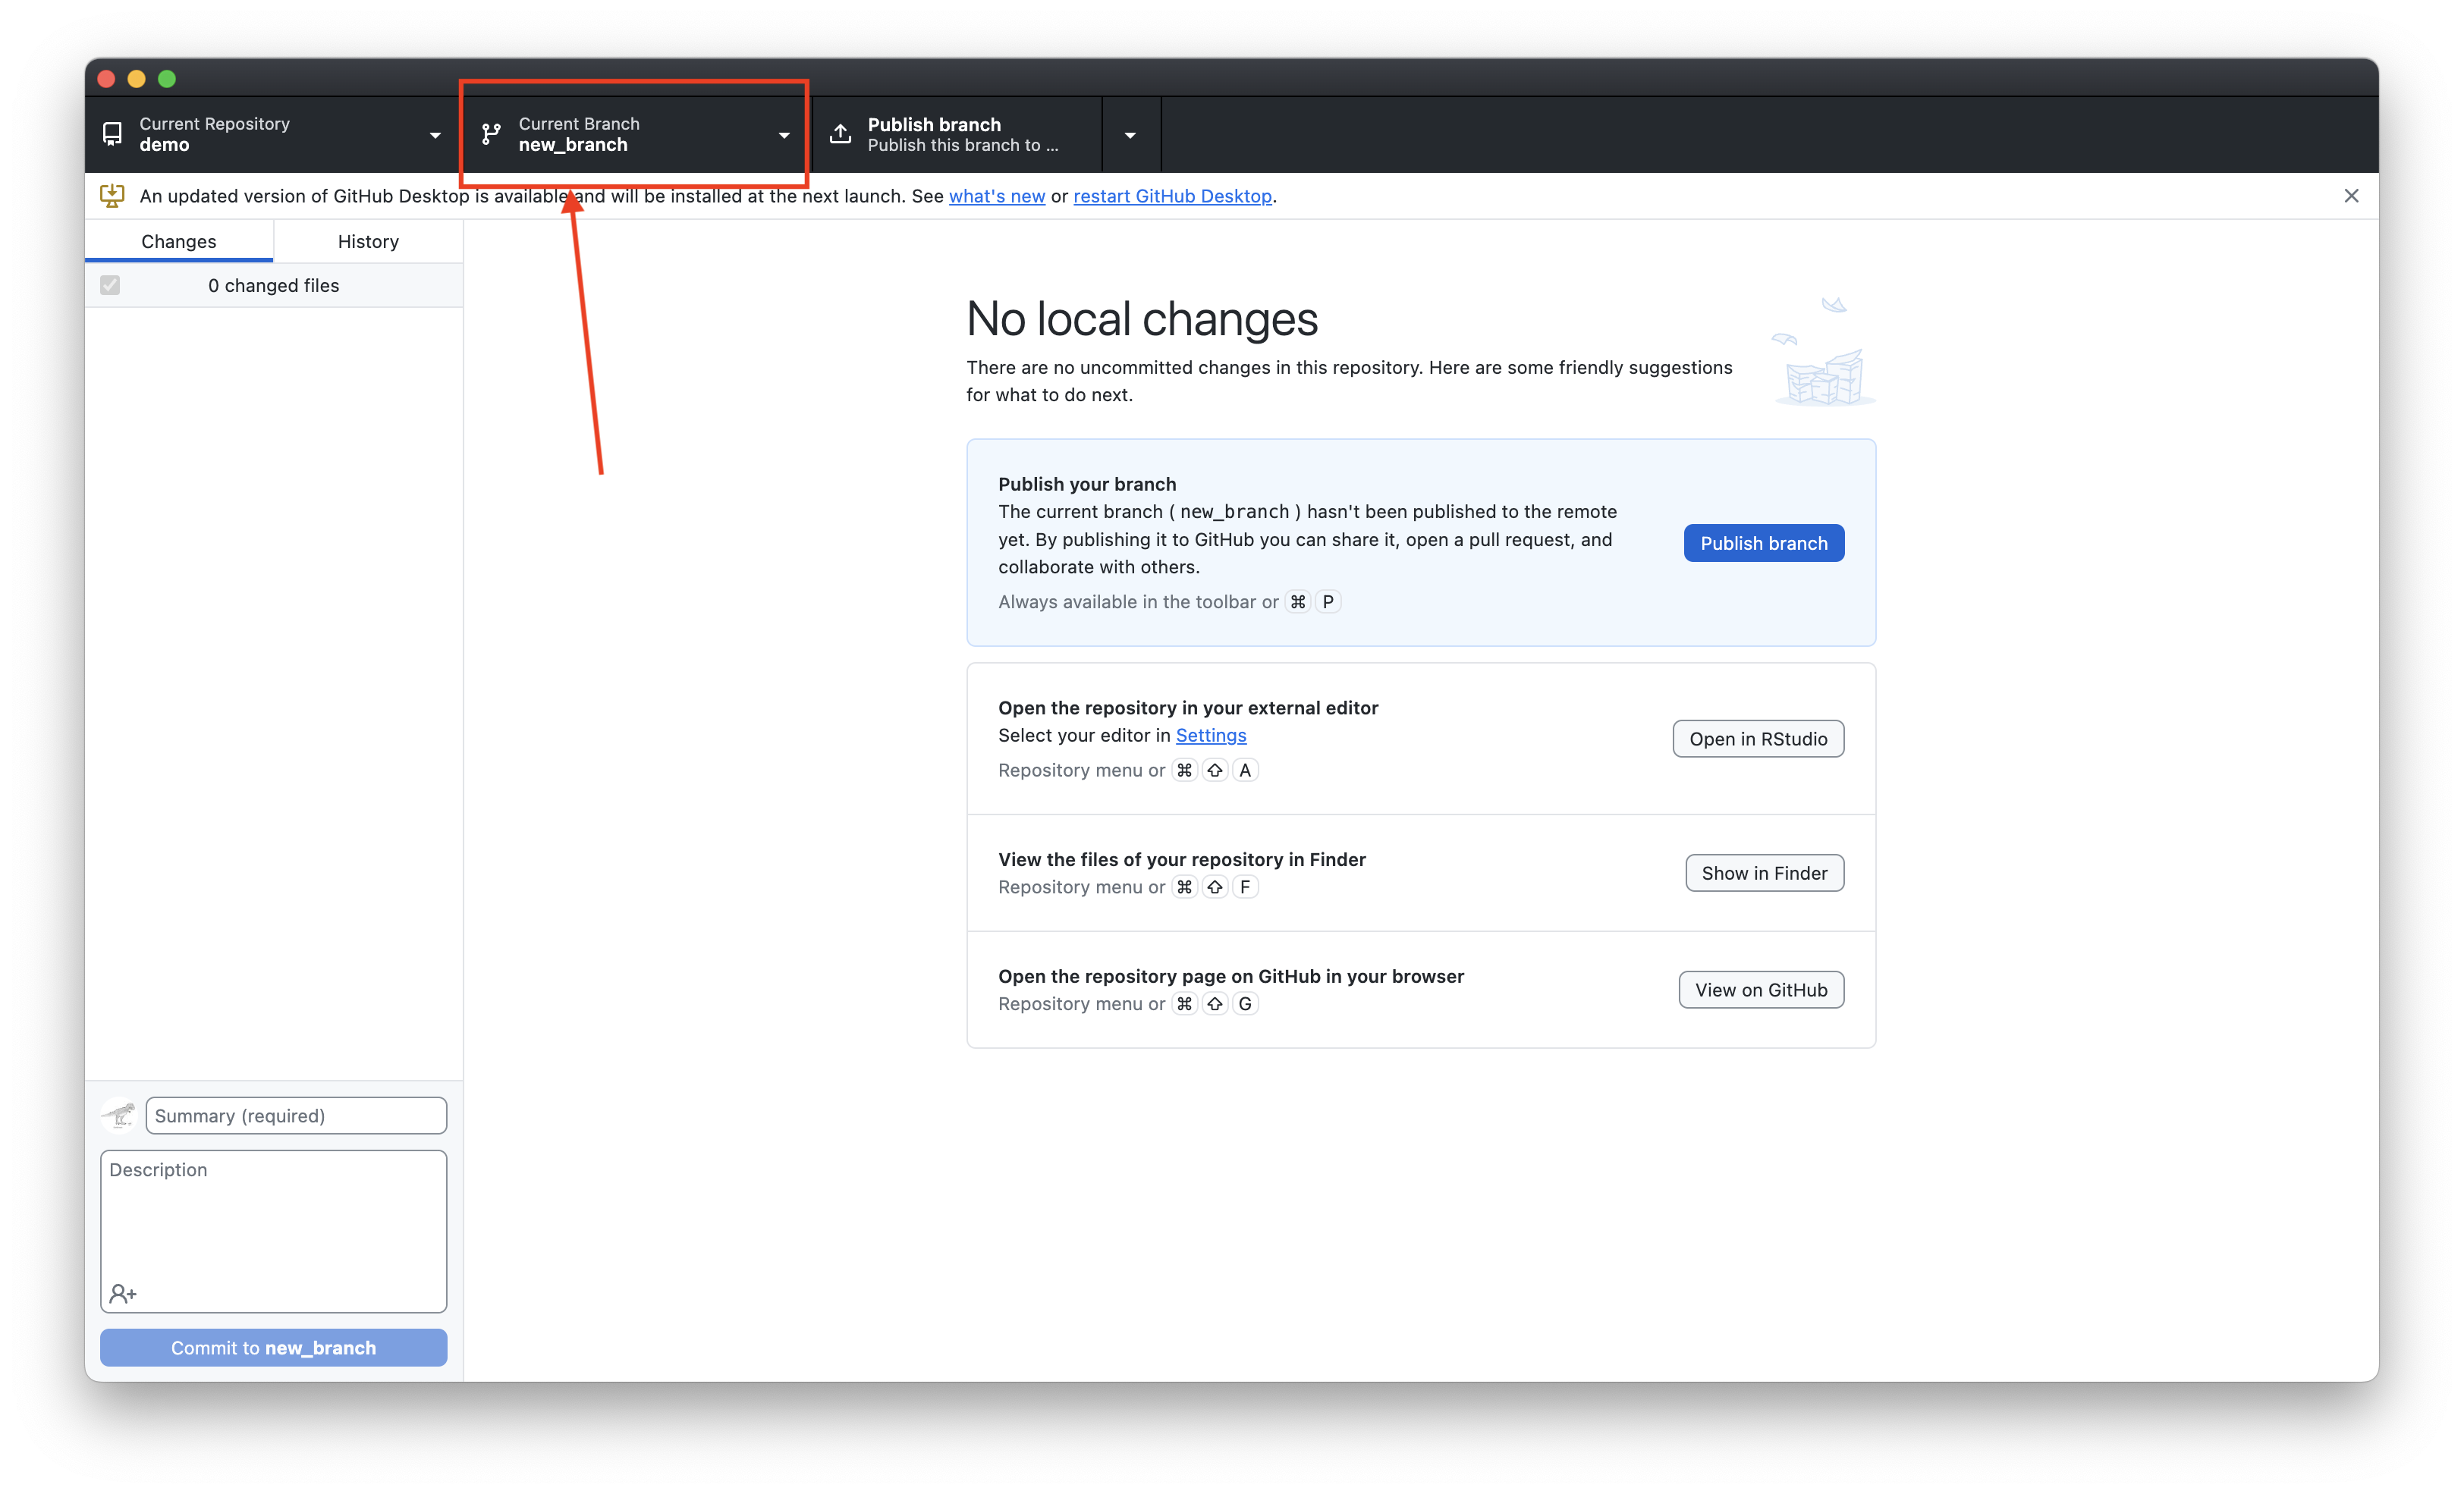
- To publish your branch on GitHub, press Publish branch
How to Create a Branch (cont’d)
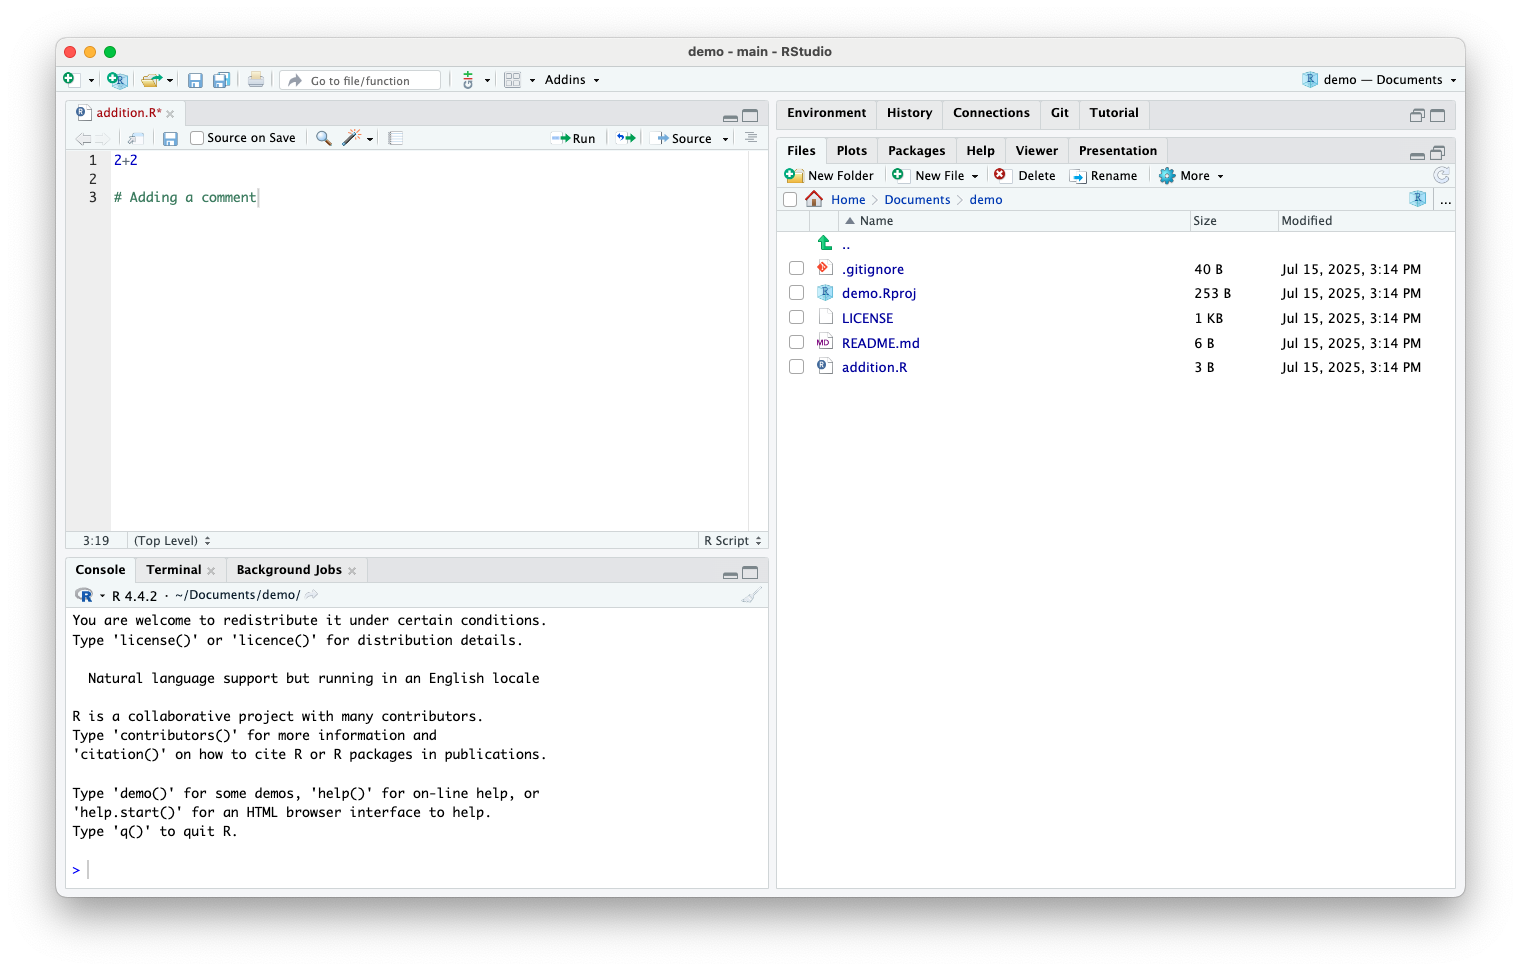
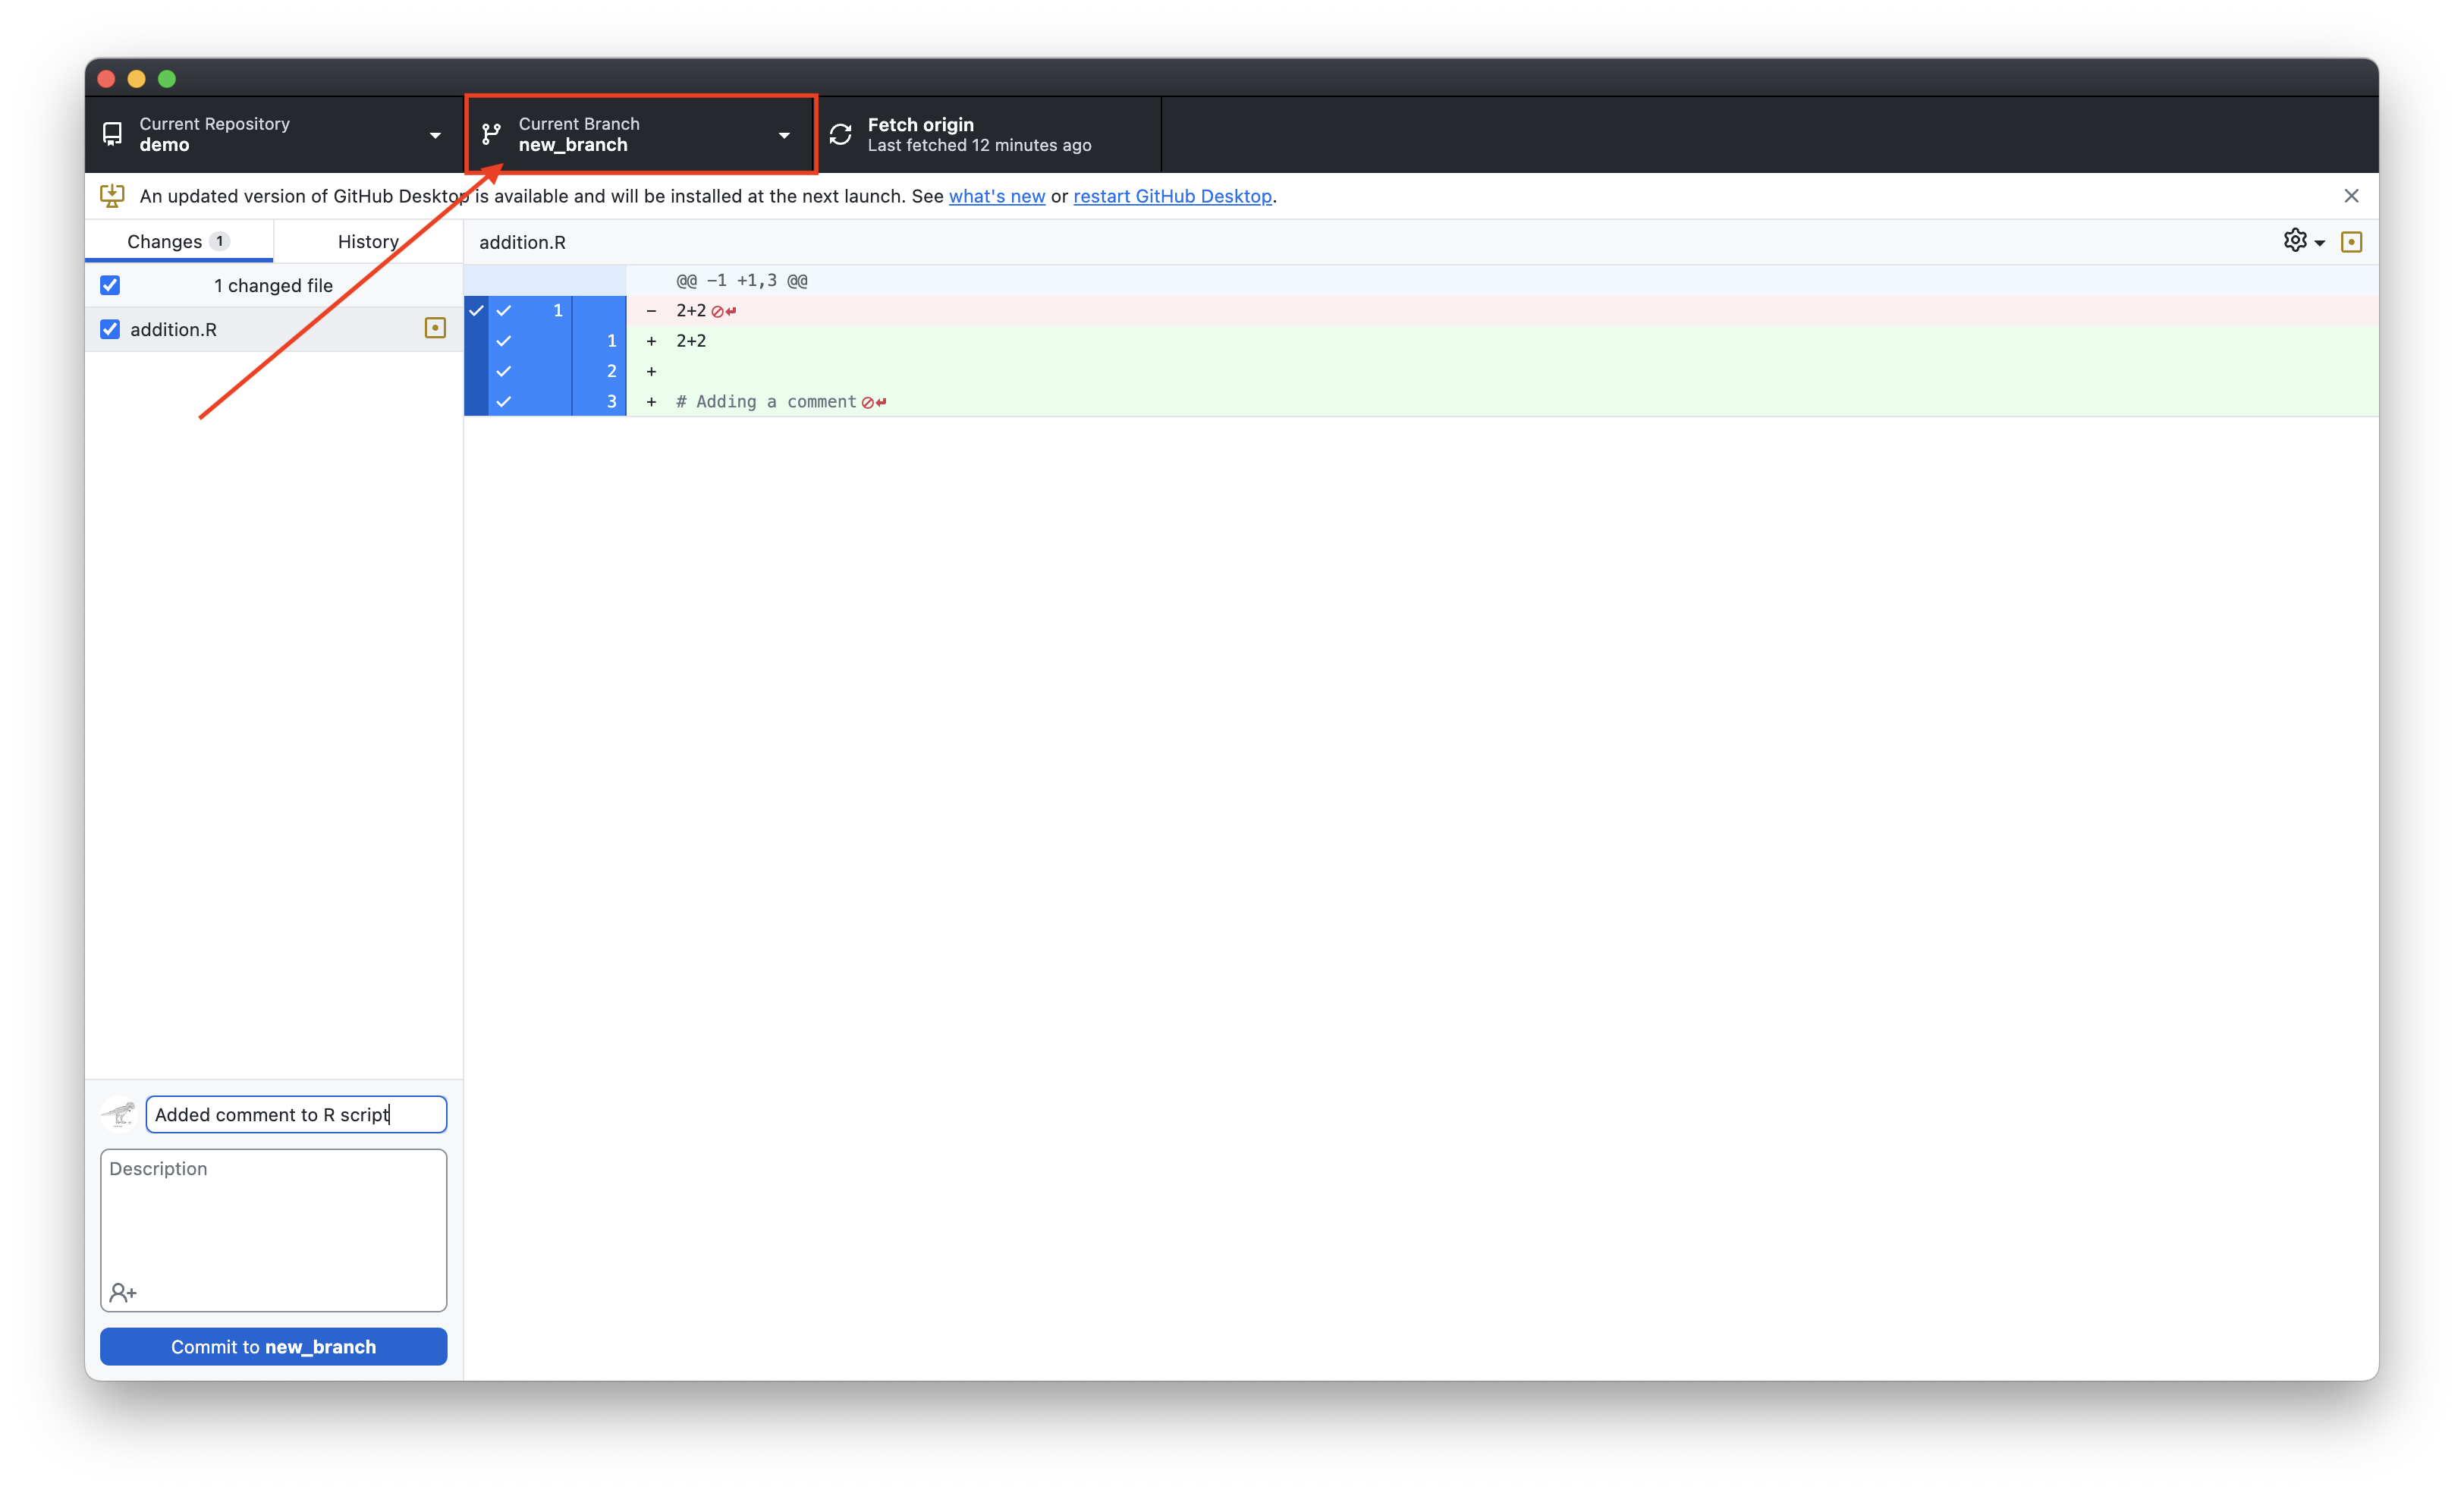
Make Changes on Branch
We can now edit files without altering the main branch
E.g., add a comment to your R script
Make Changes on Branch (cont’d)
- Open GitHub Desktop to review saved changes, commit, and push to origin
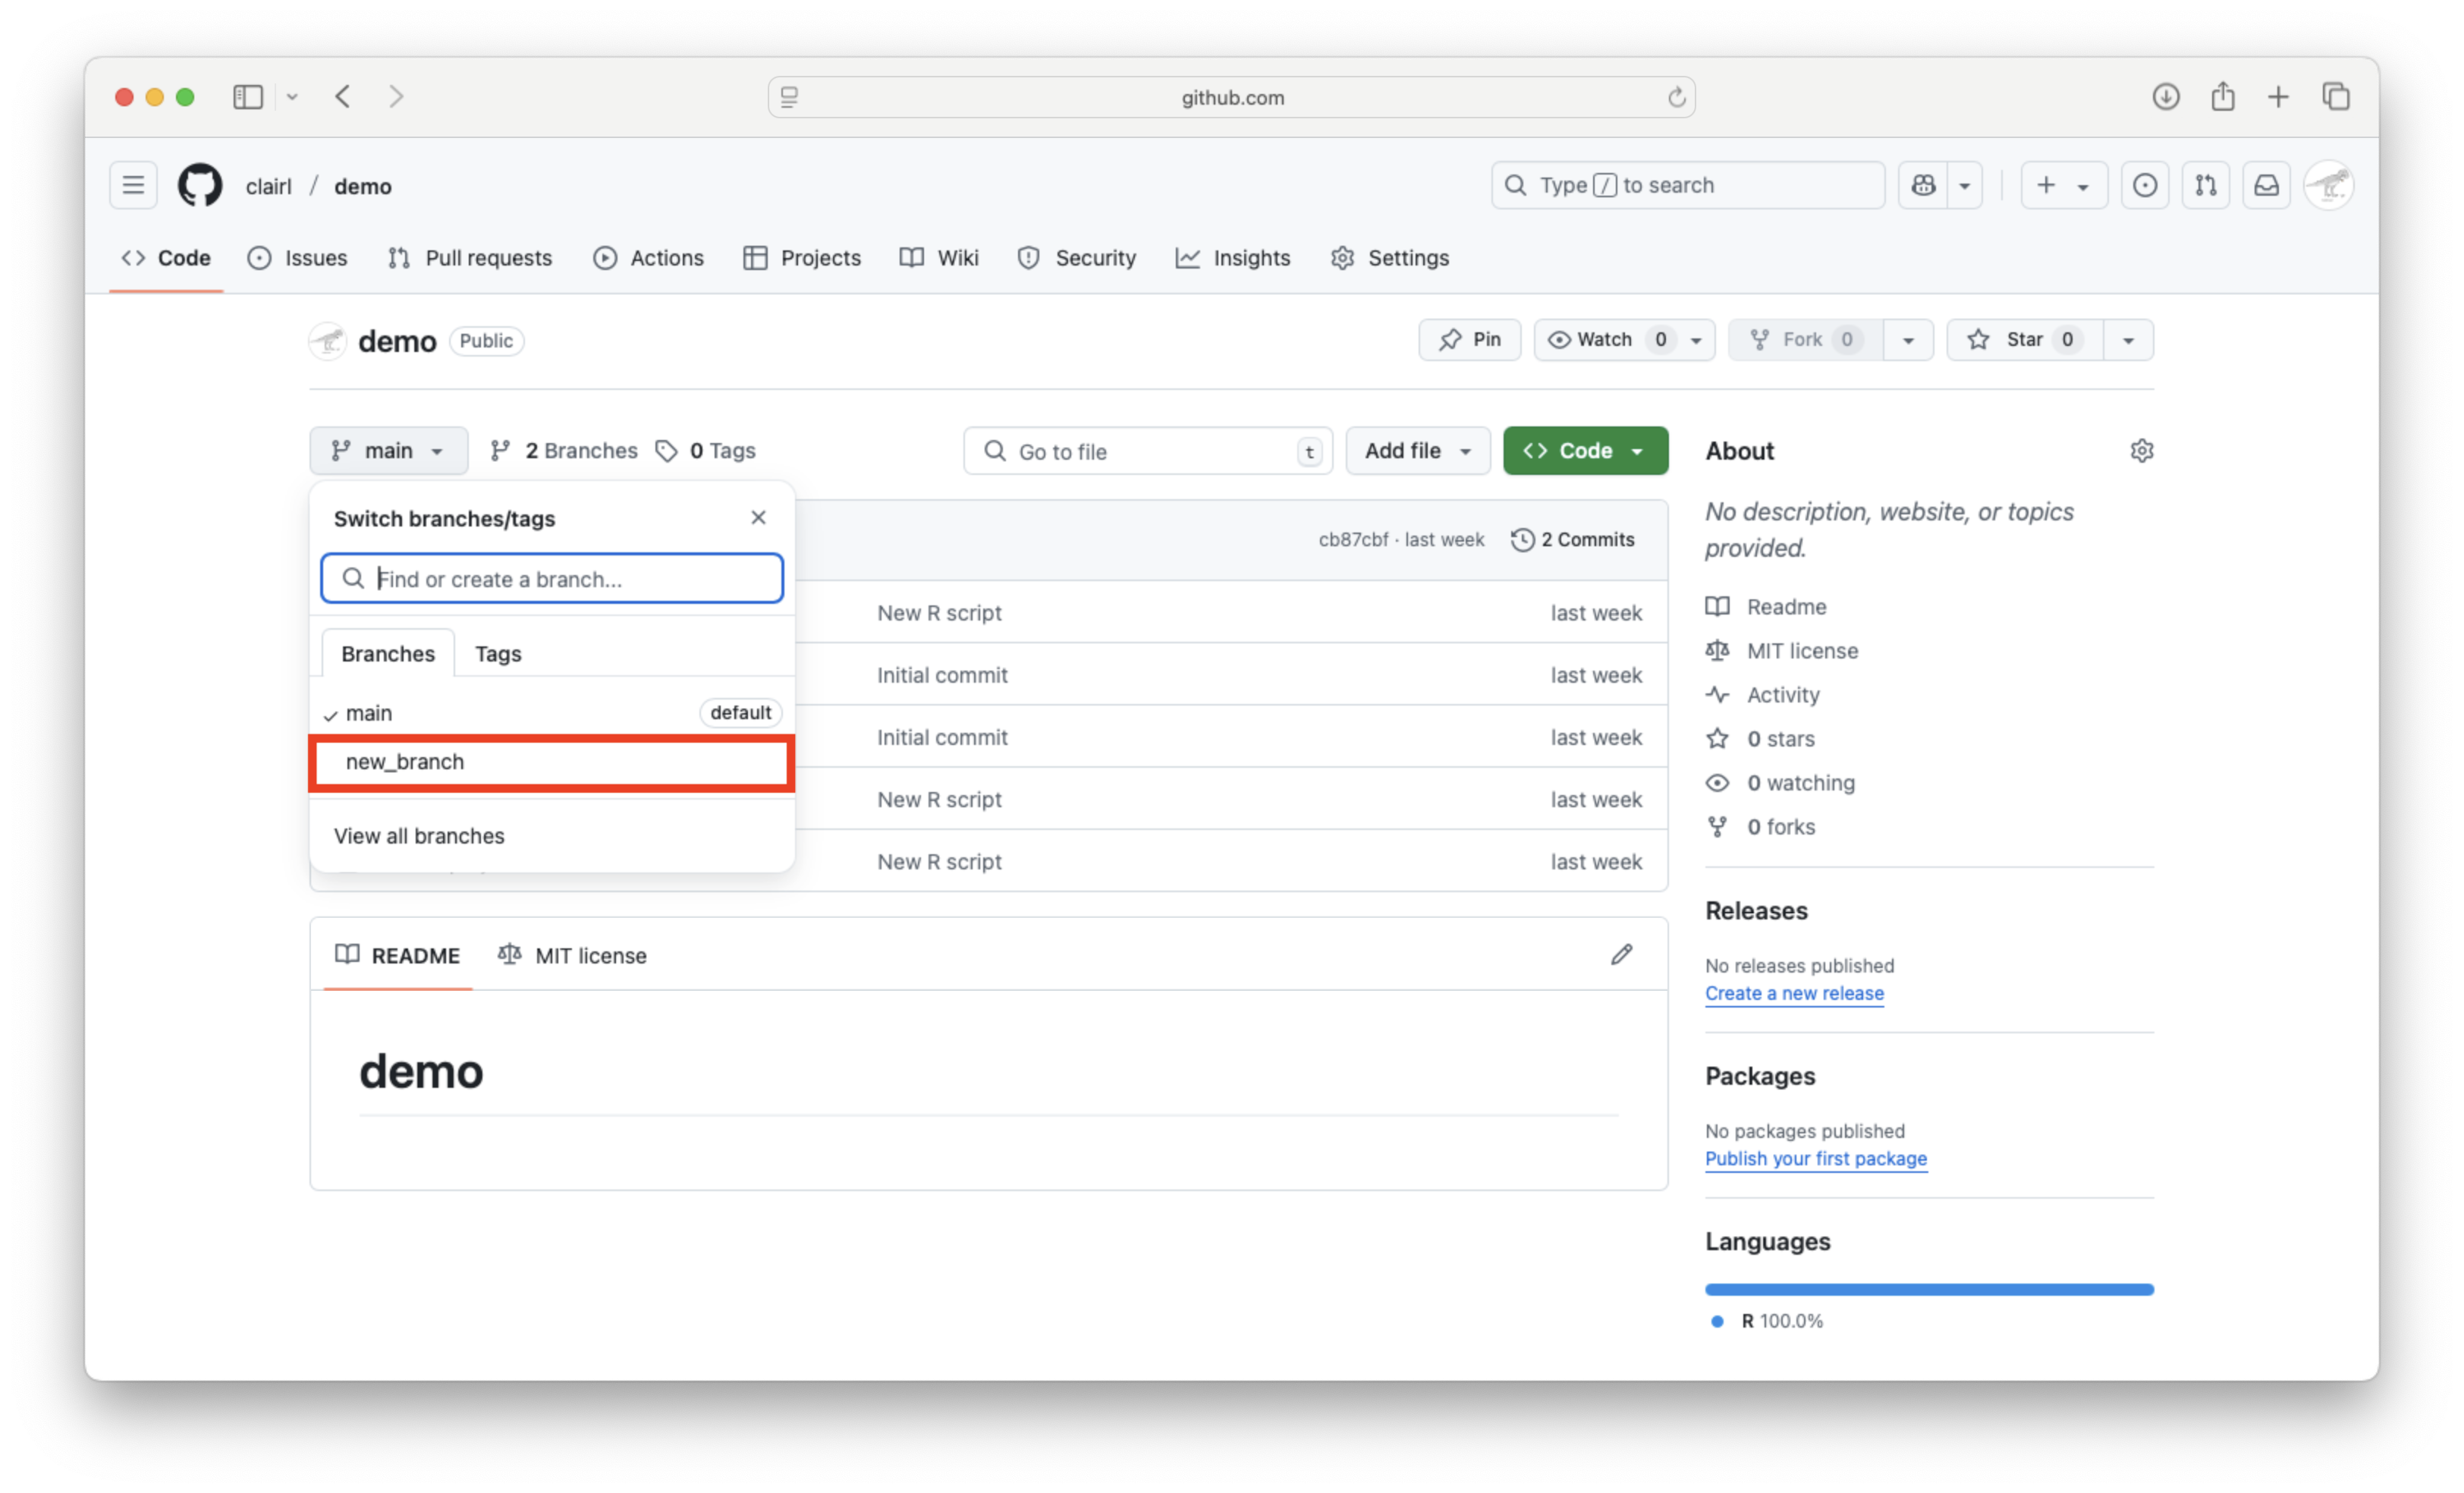
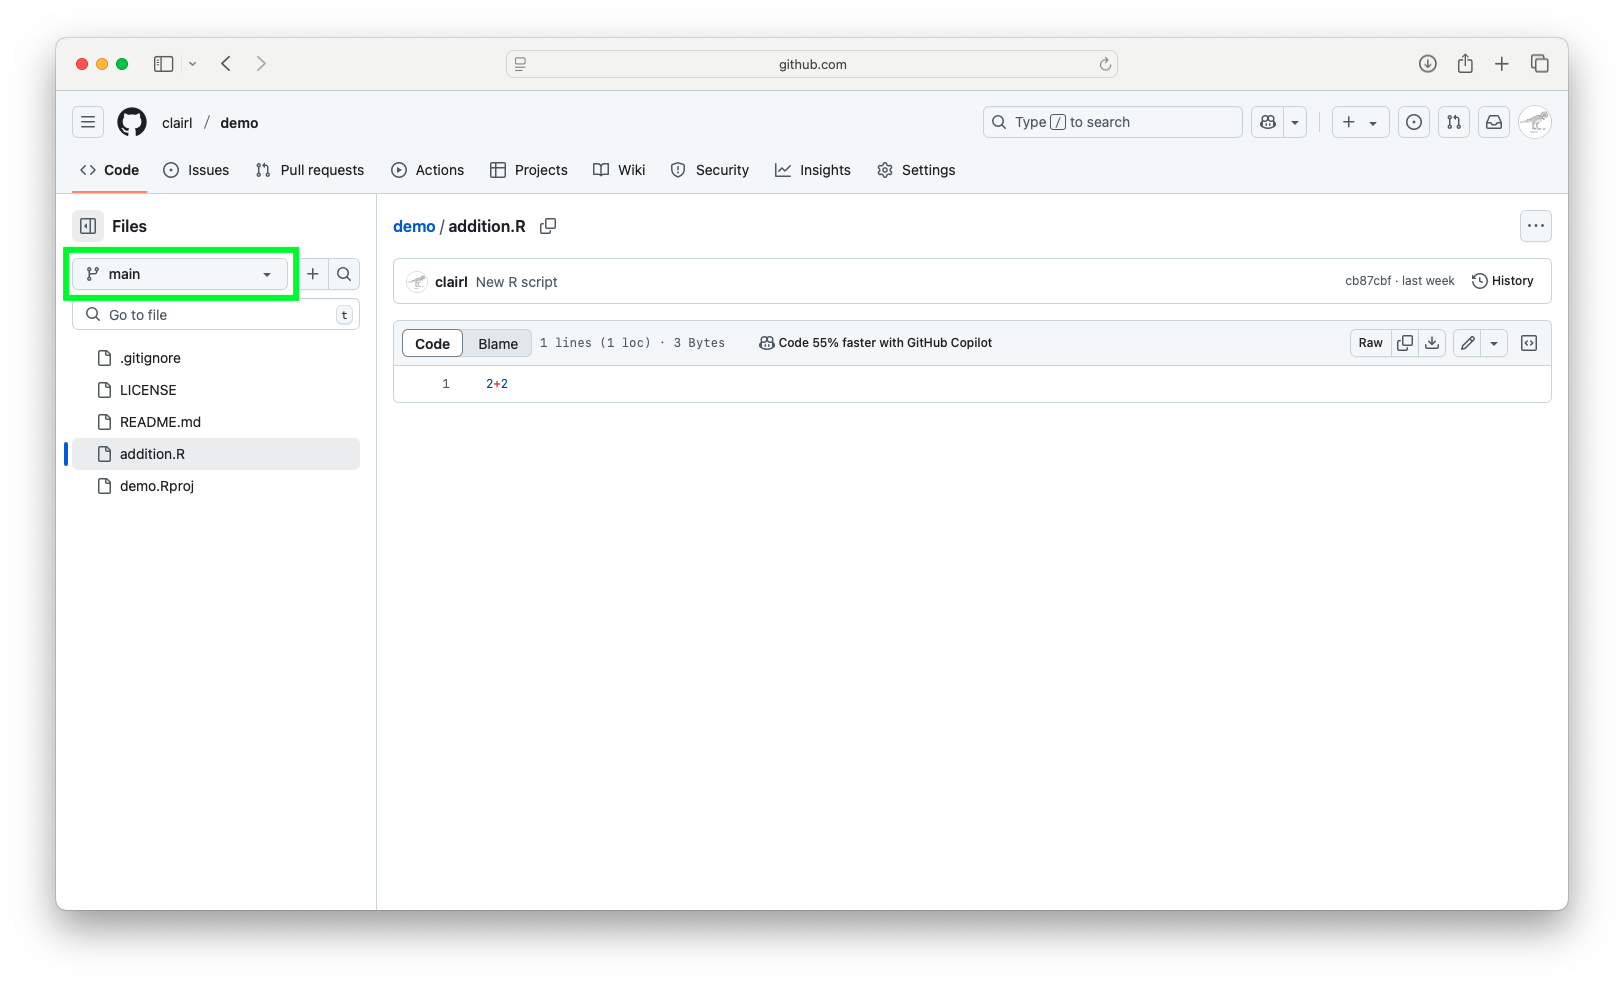
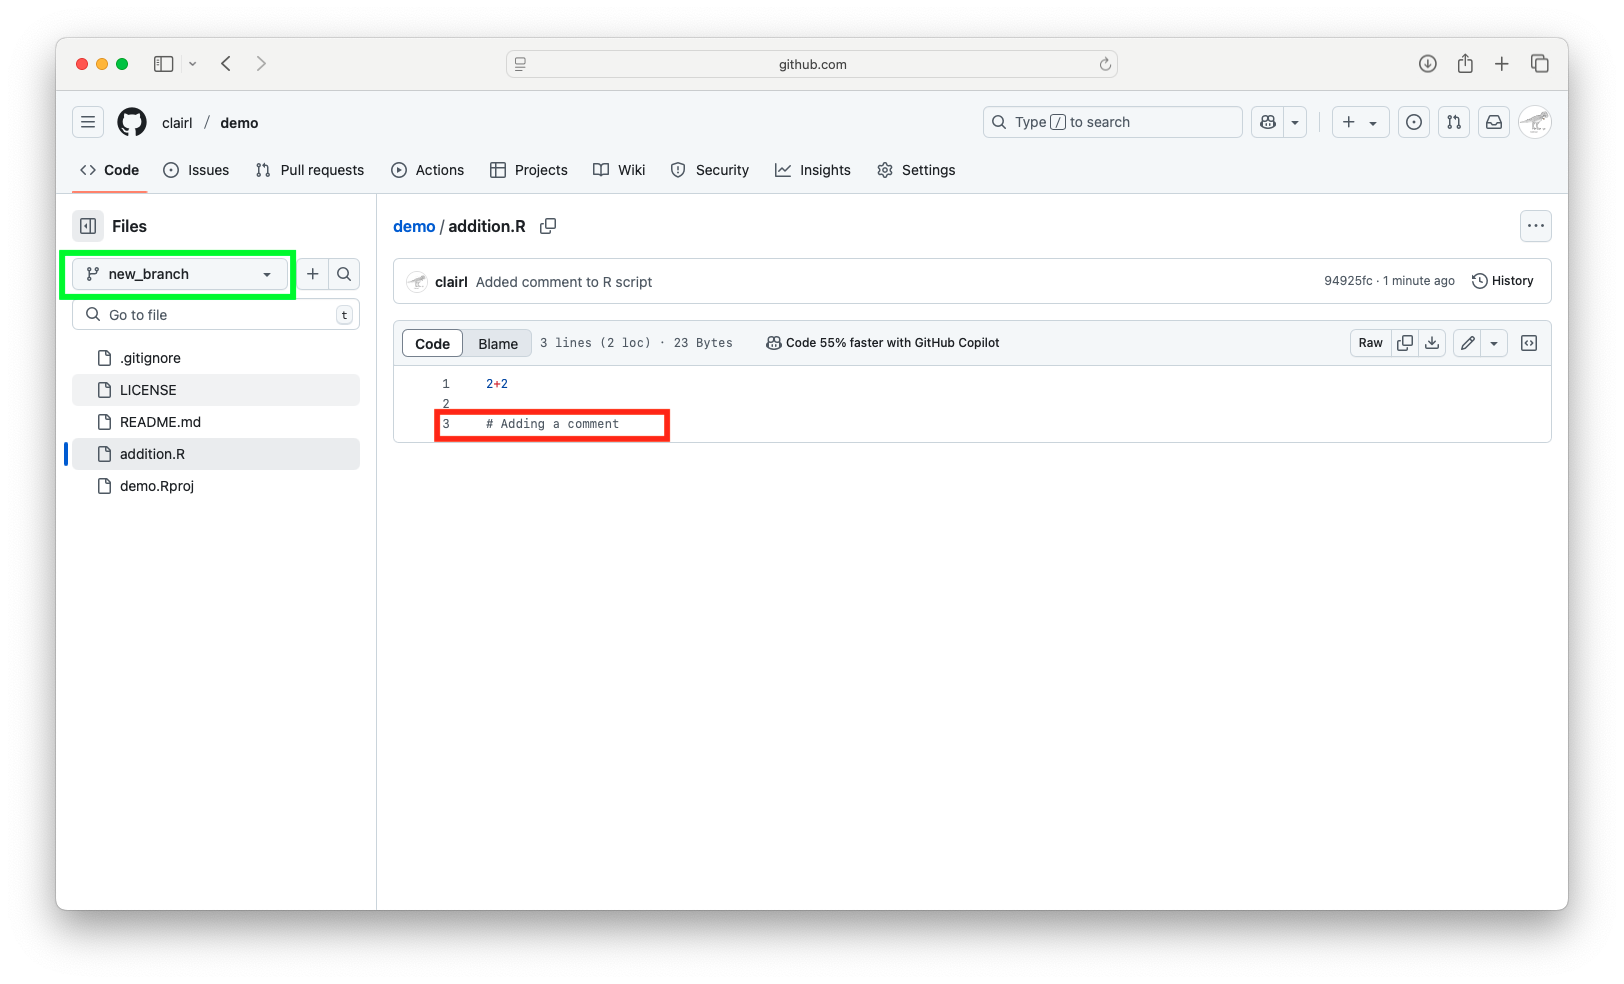
Make Changes on Branch (cont’d)
- On GitHub we can compare the .R file on the two branches
Make a Pull Request (cont’d)
- In GitHub Desktop, click Branch > Create Pull Request
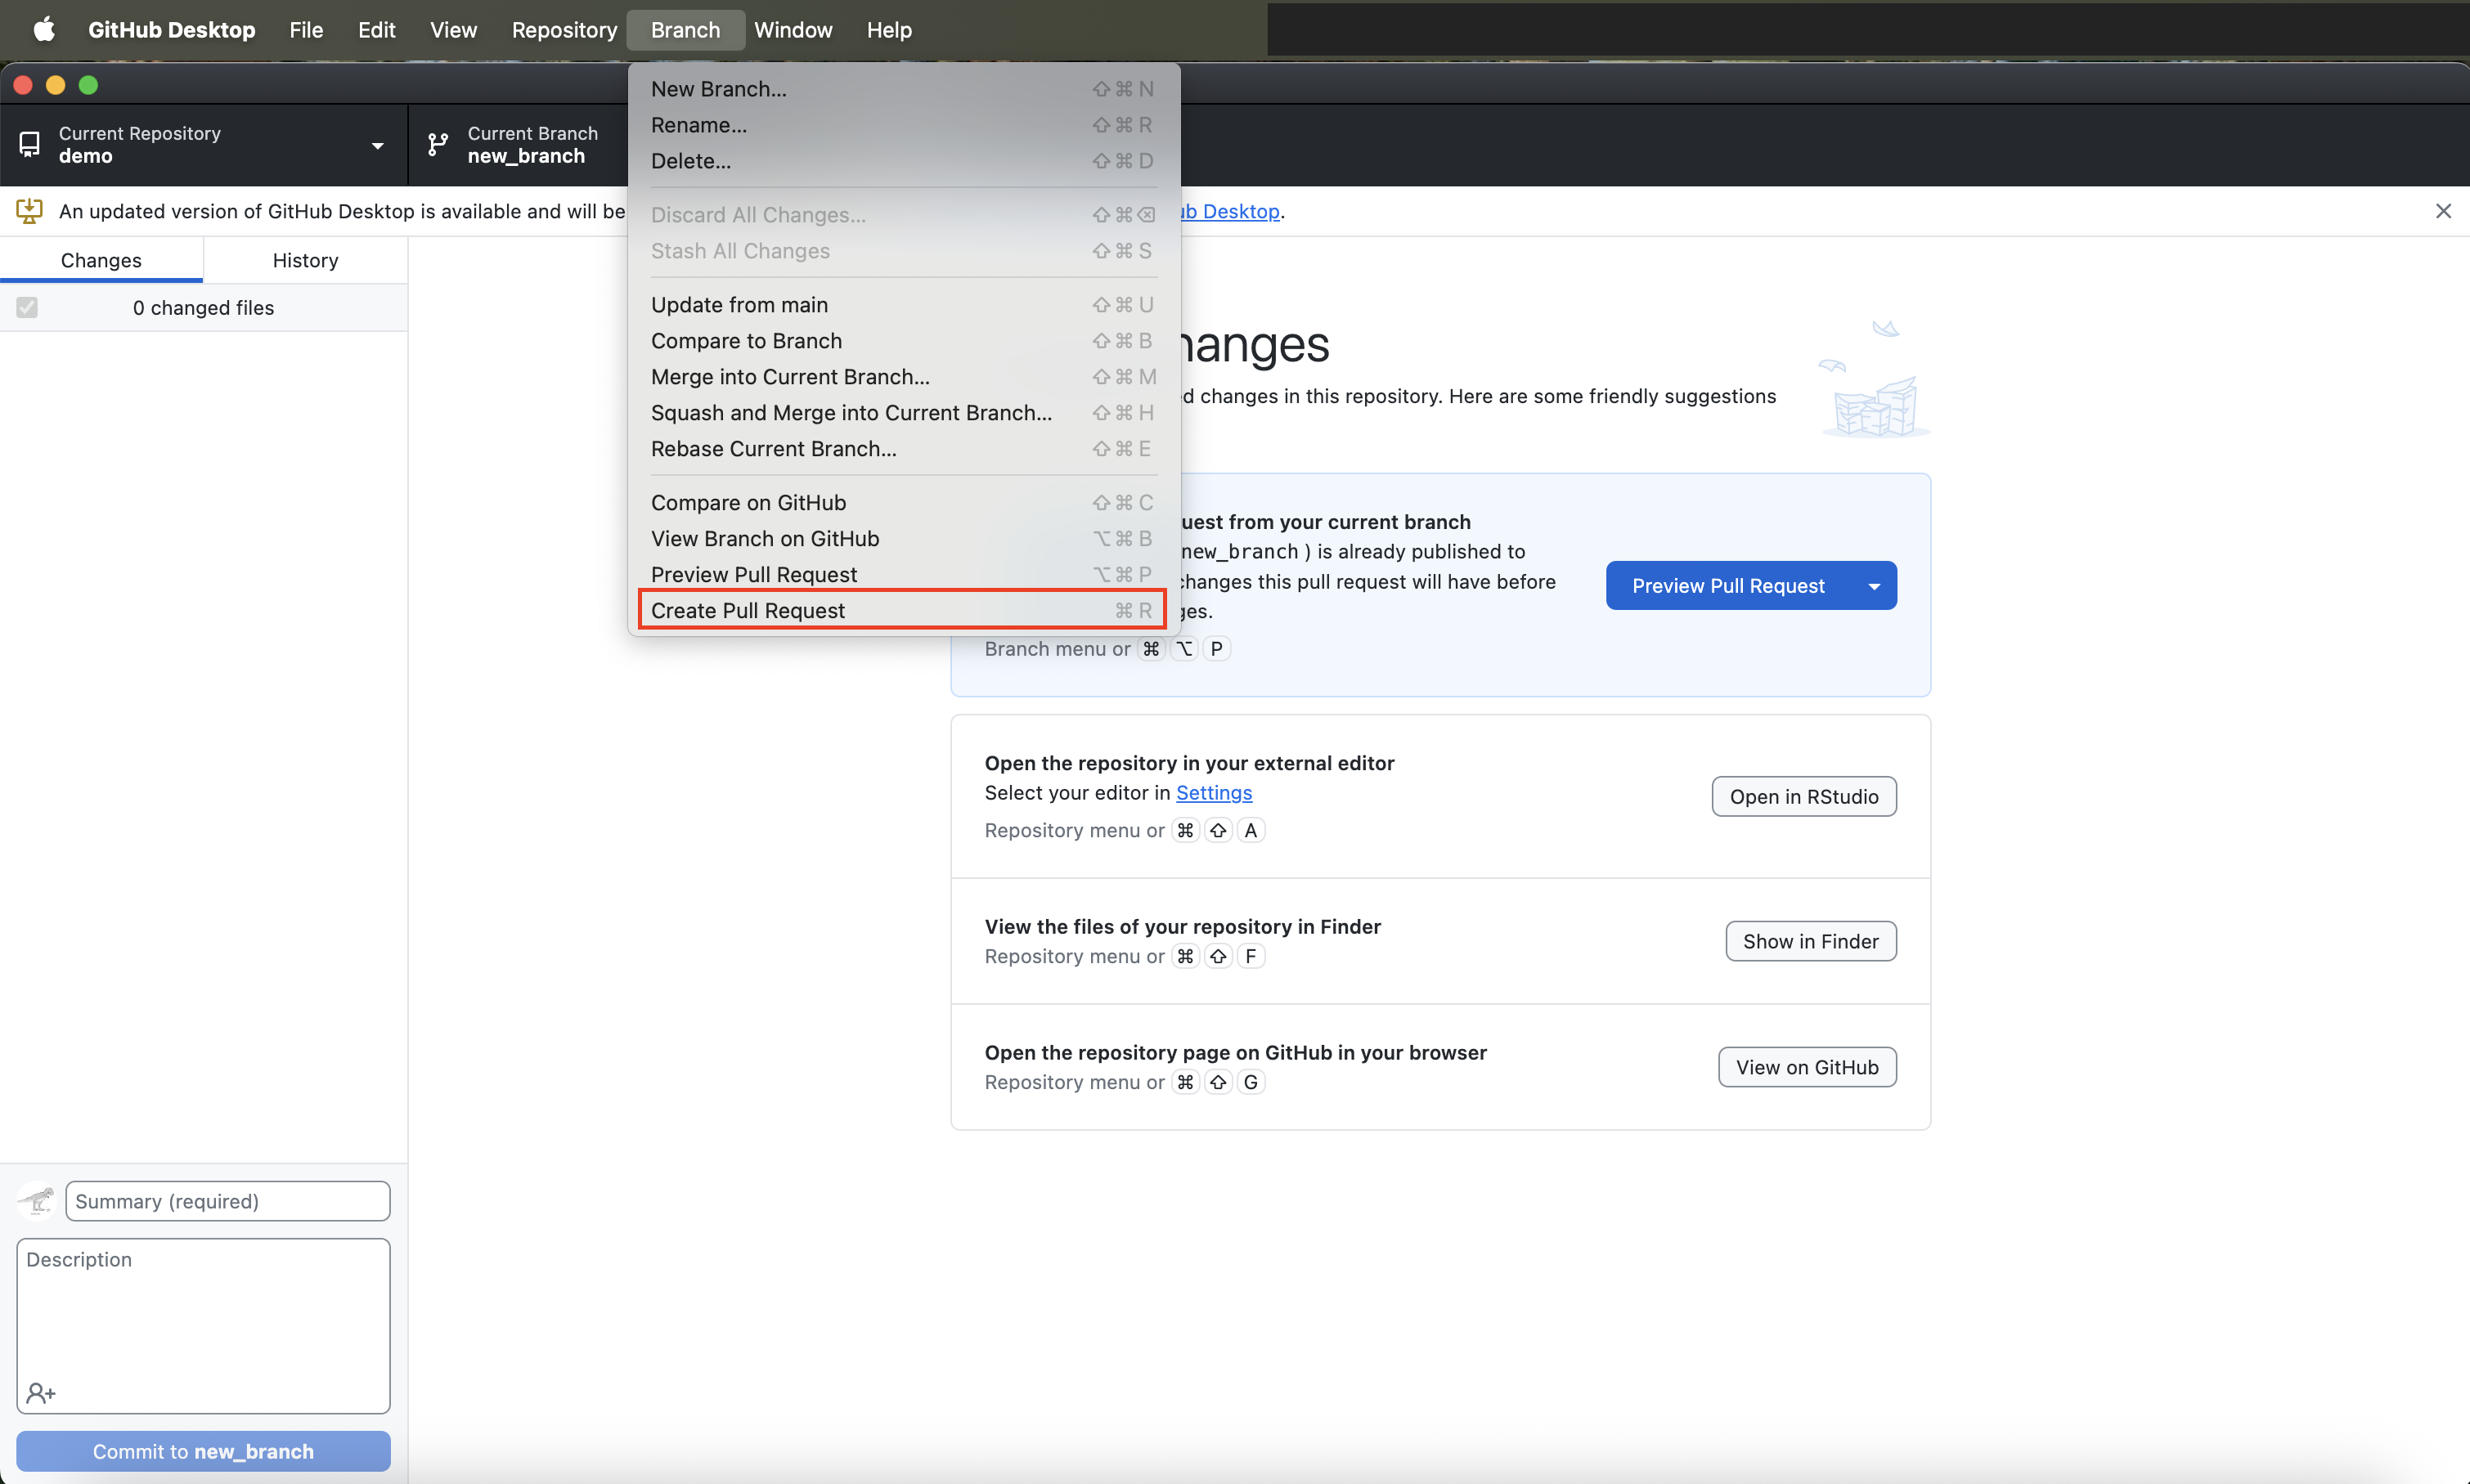
Make a Pull Request (cont’d)
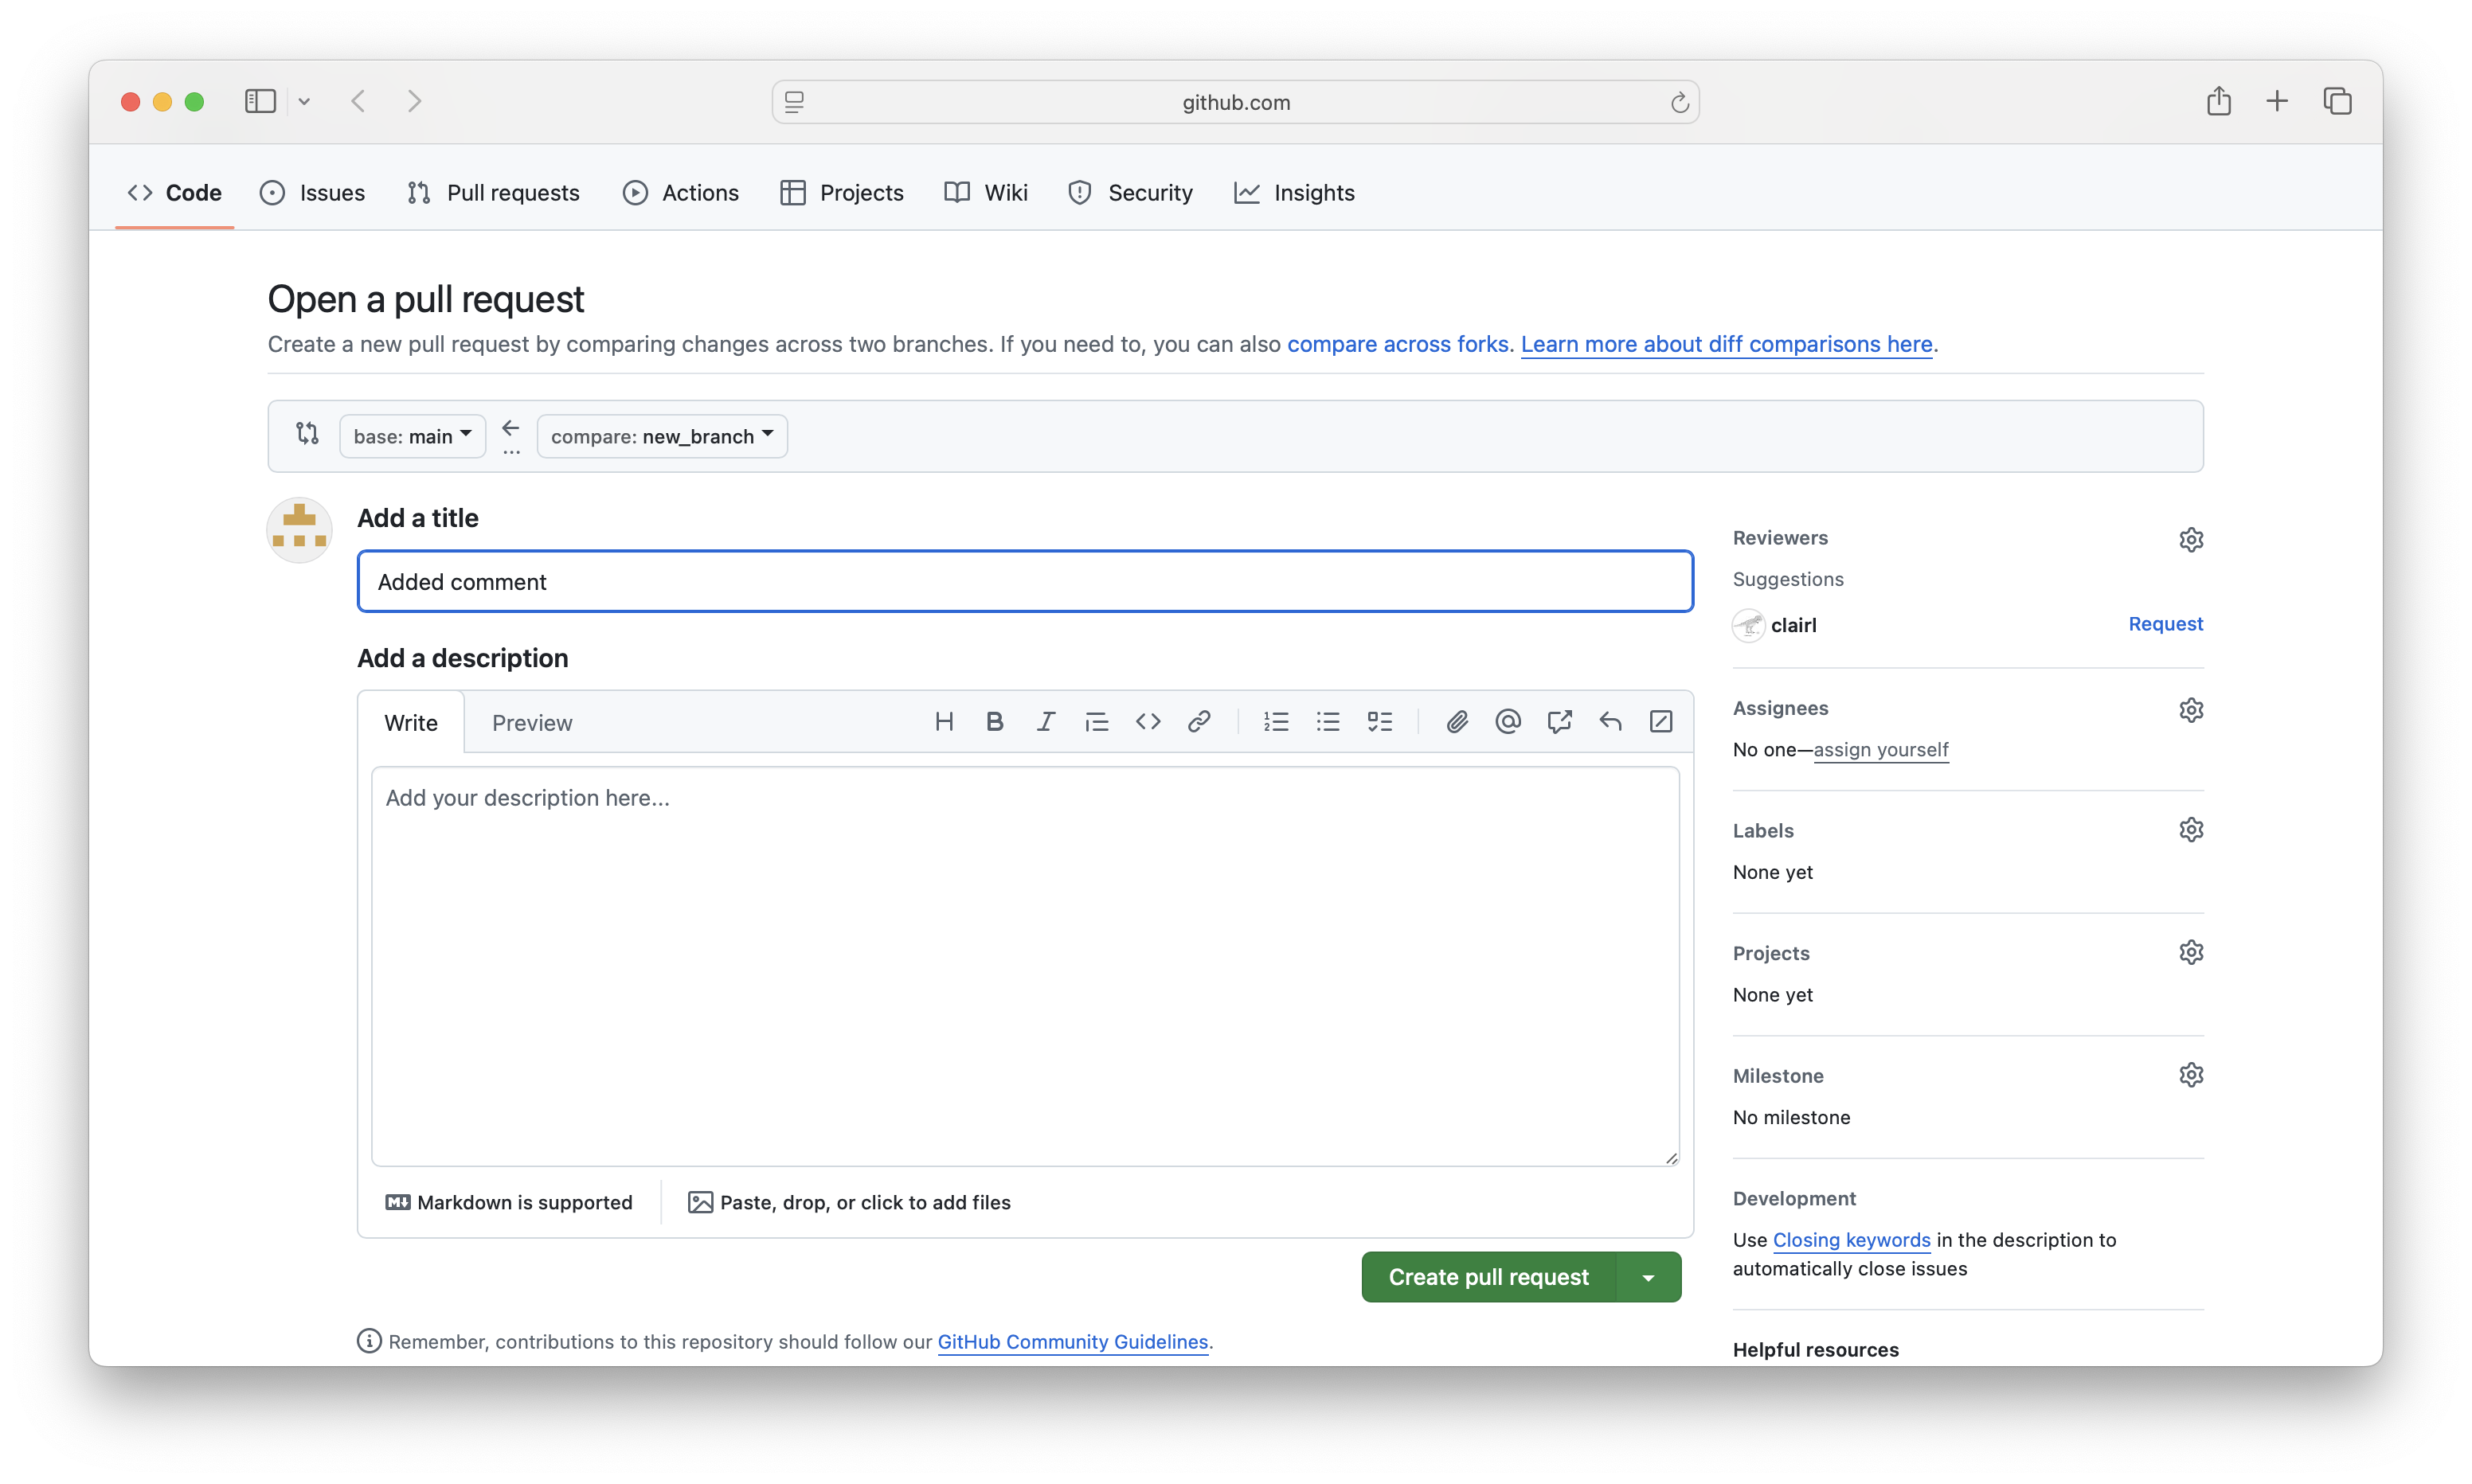
- This will open a GitHub.com window in your browser
- You can add a comment (if you want) the click Create pull request
Make a Pull Request (cont’d)
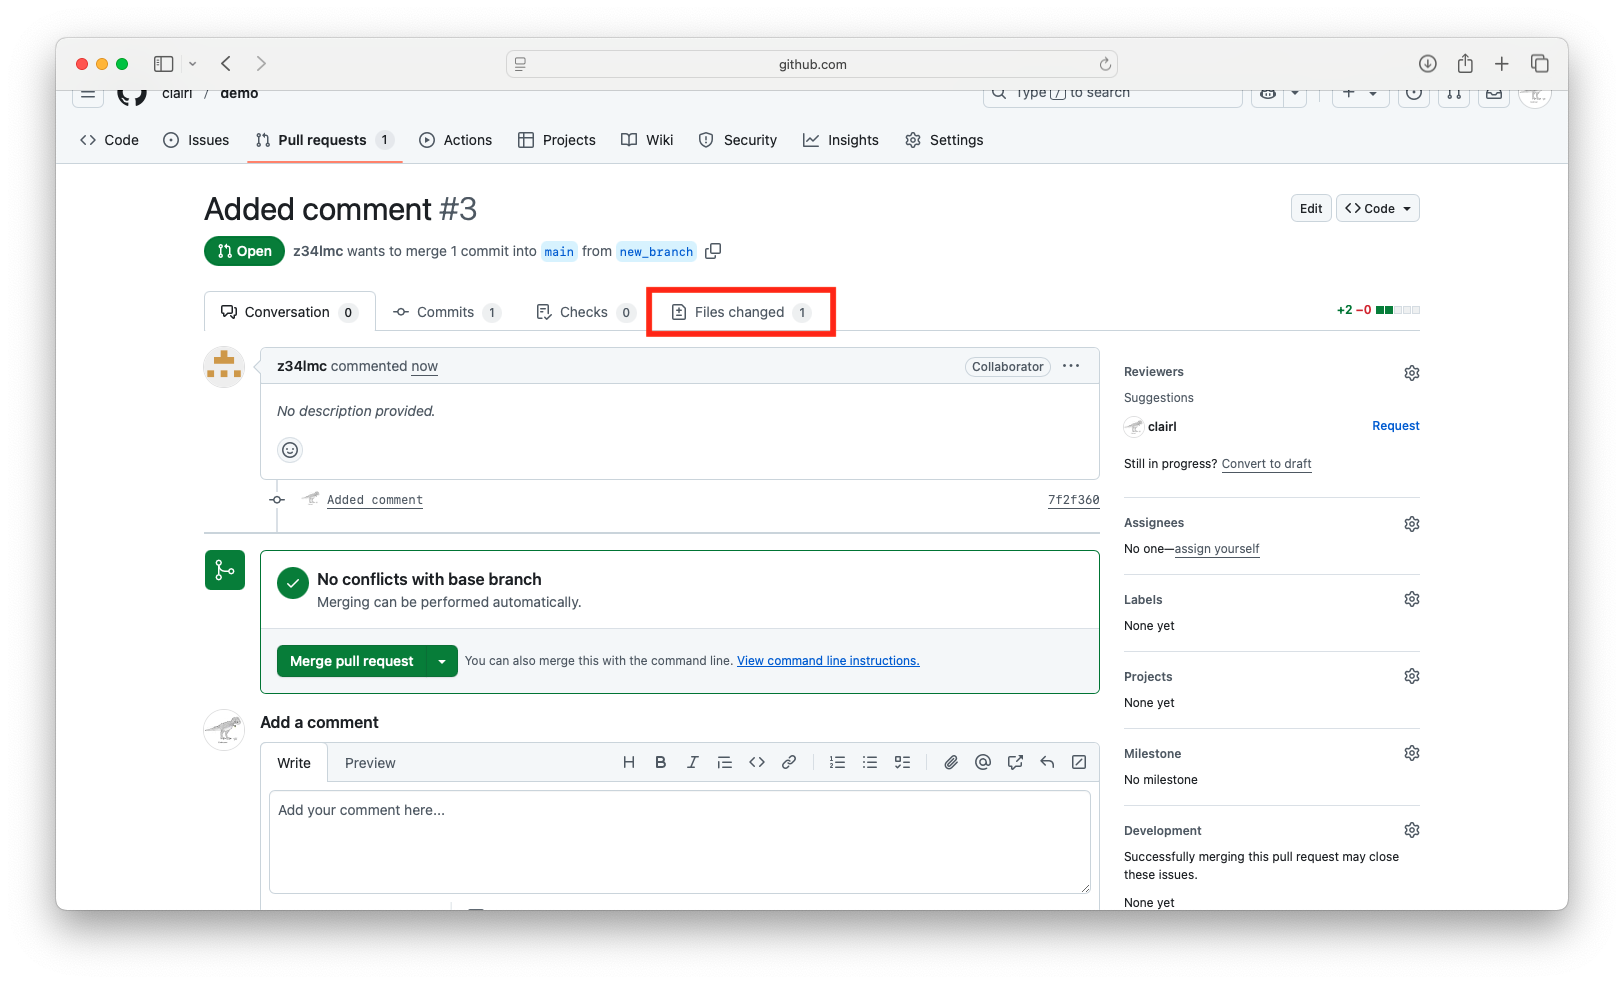
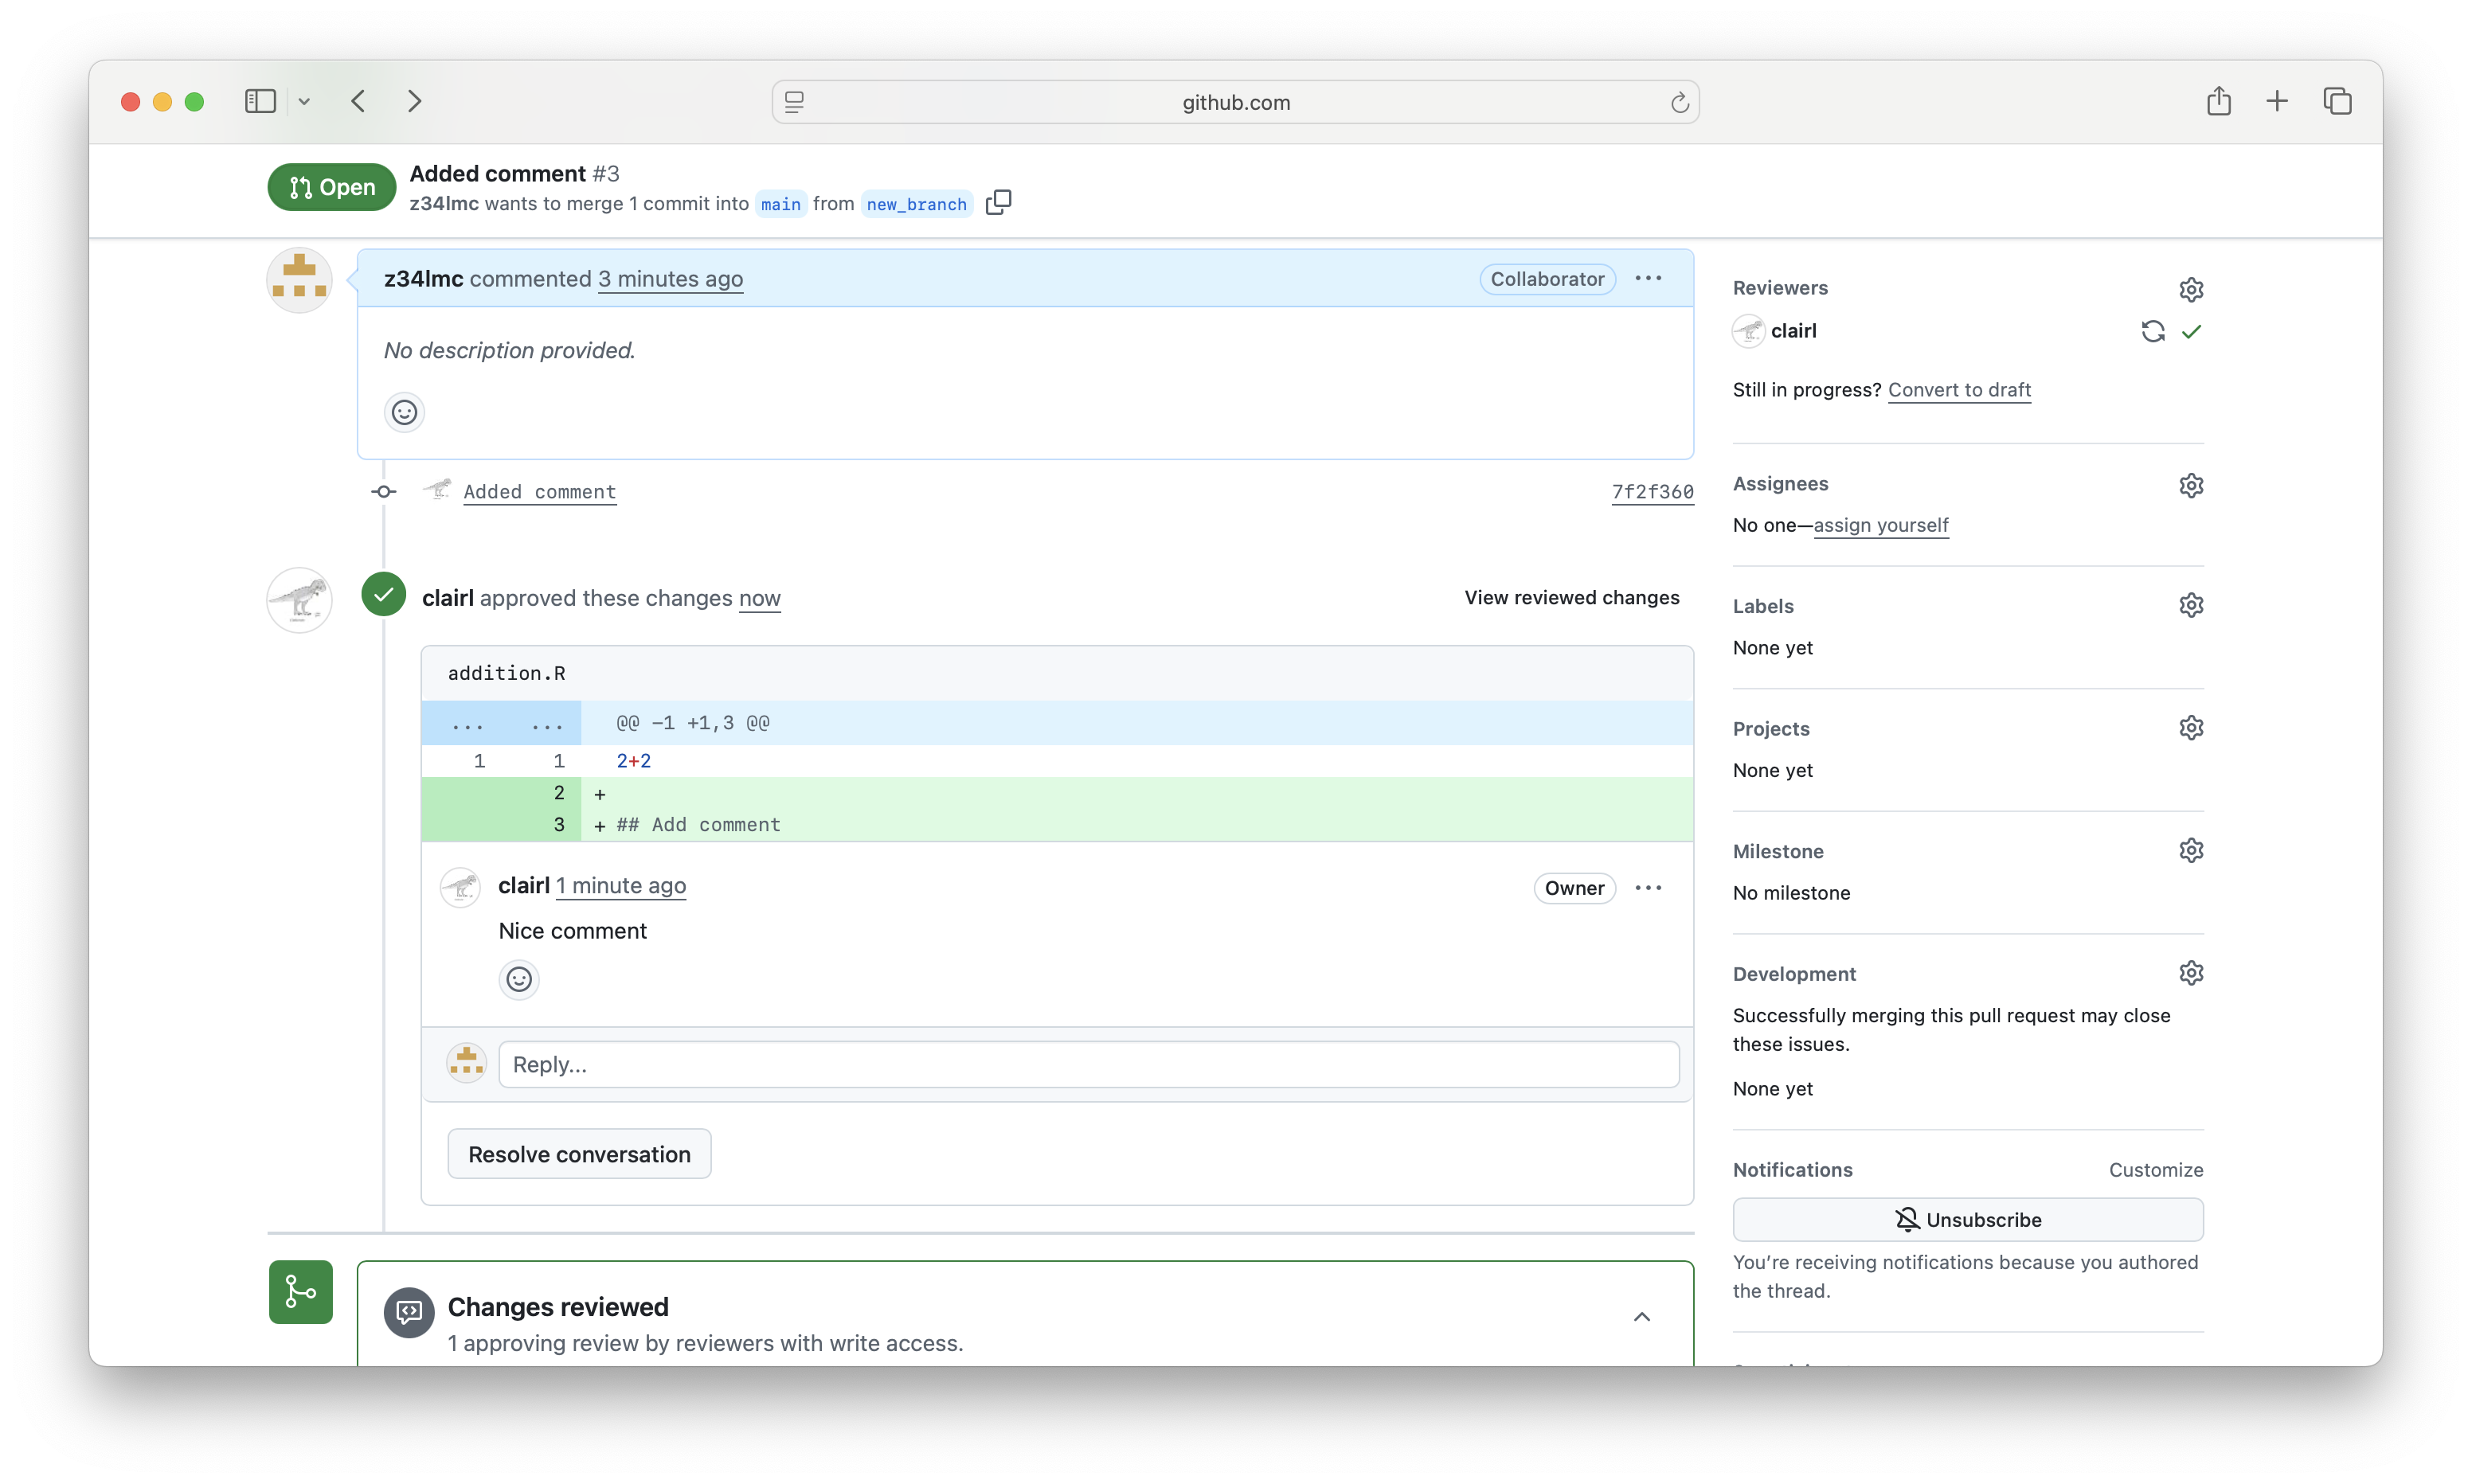
- Collaborators can then review changes made by looking at Files changed
Make a Pull Request (cont’d)
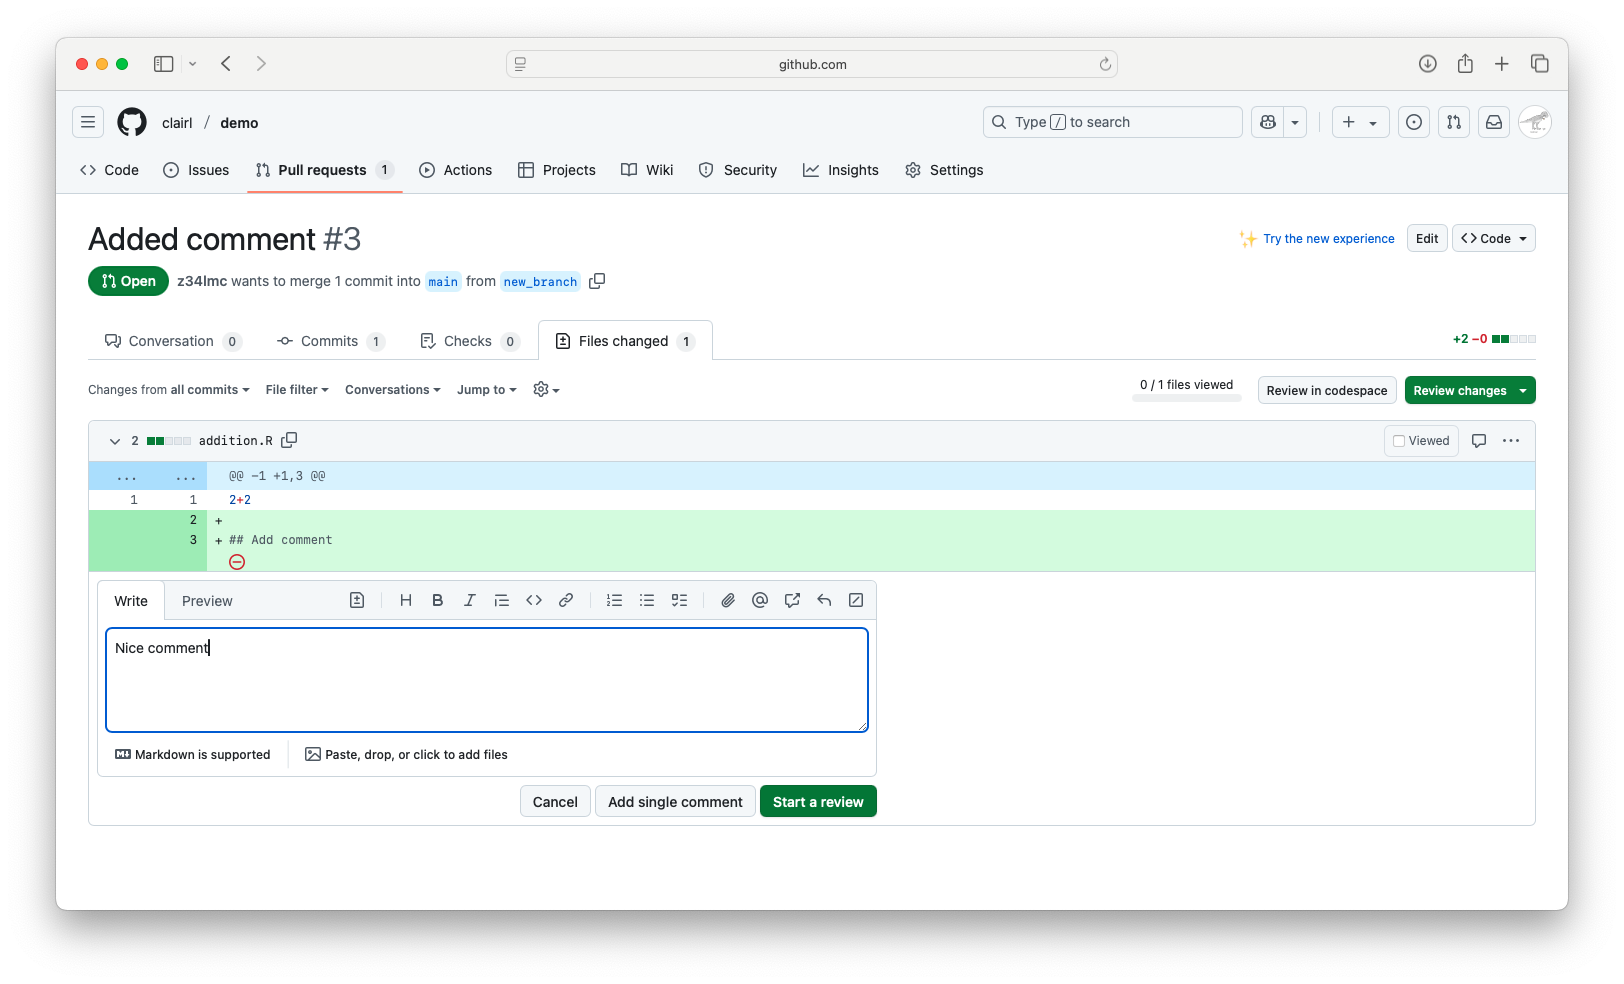
- If you want, you can comment on specific lines within the document
Make a Pull Request (cont’d)
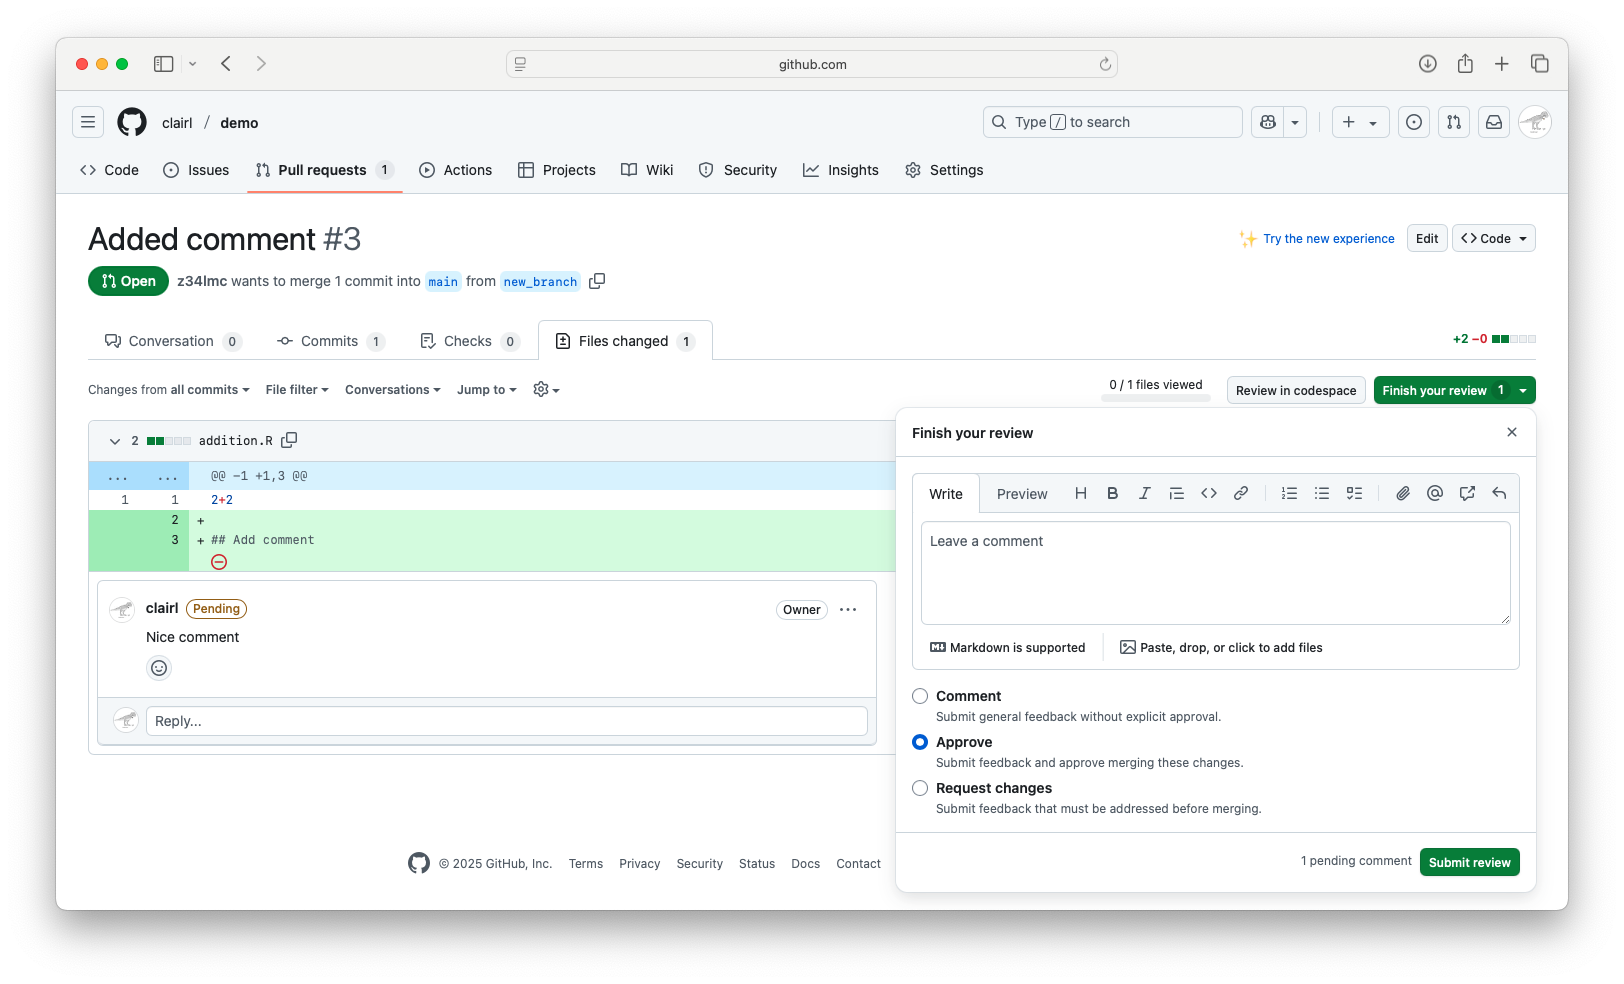
- Once reviewed, you can leave a comment, approve the changes, or request changes
- Click Submit review
Make a Pull Request (cont’d)
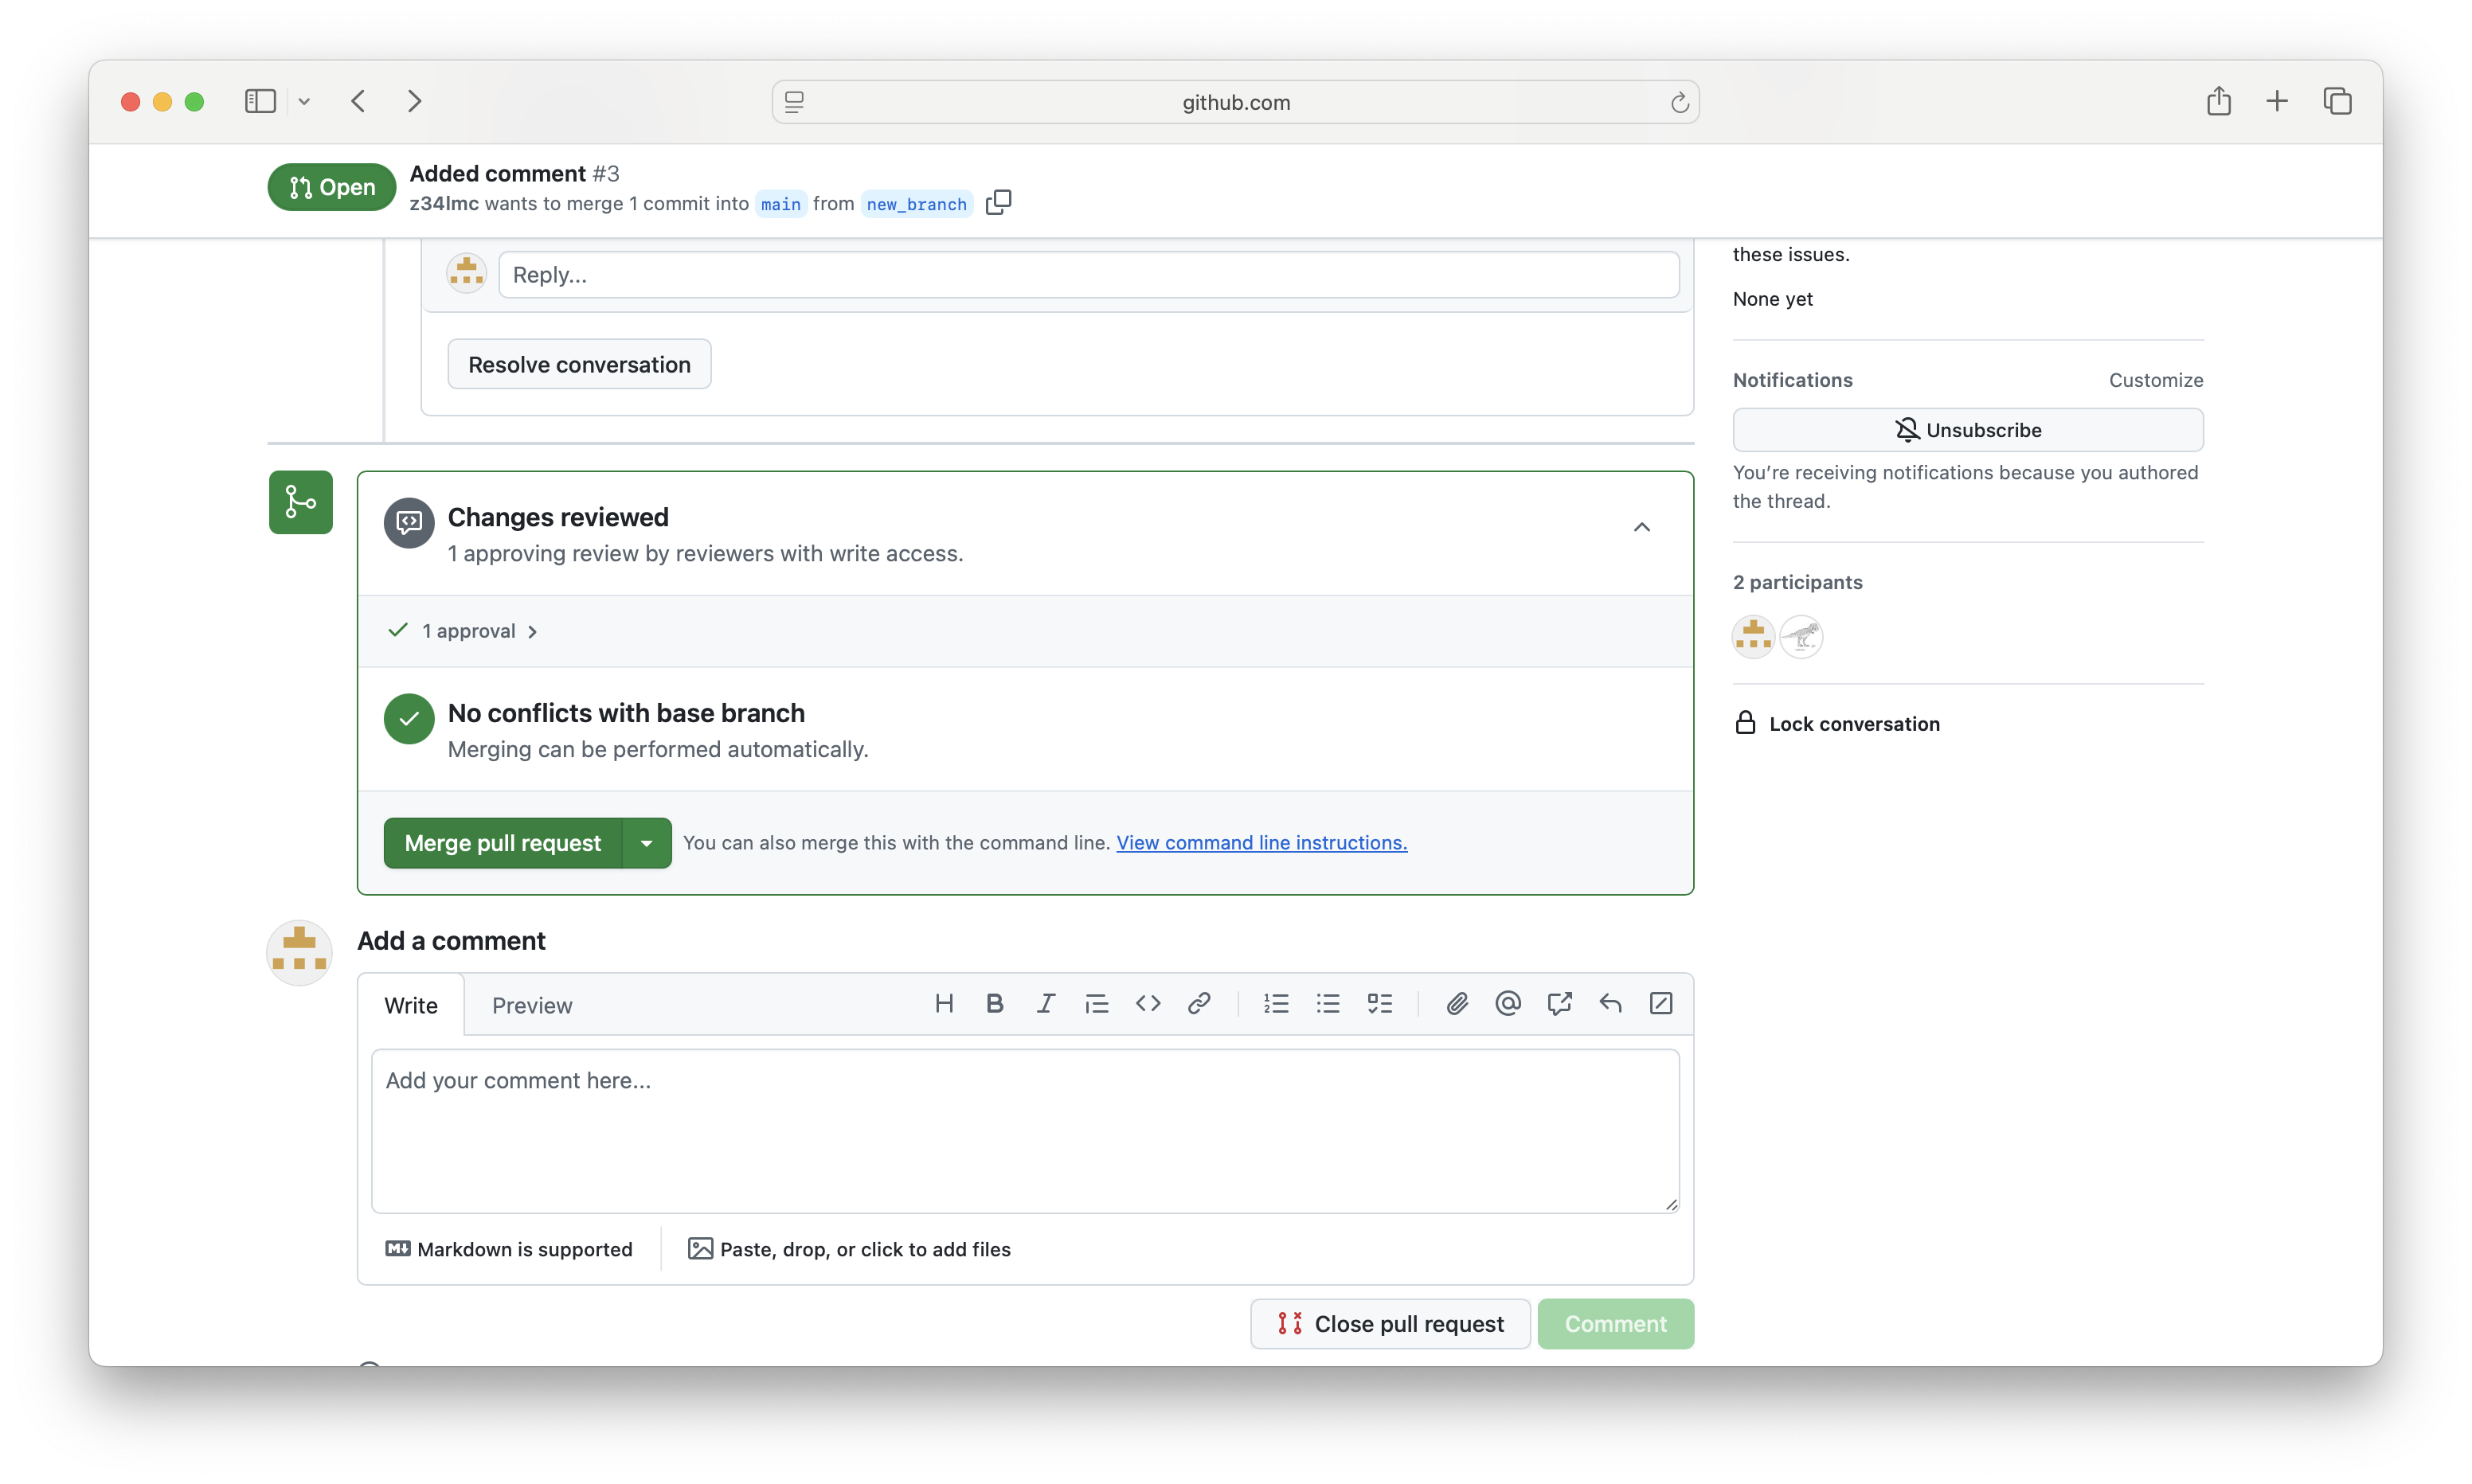
- Other collaborators can review the pull request and comments made by other team members
Make a Pull Request (cont’d)
- Finally, they can accept the changes once everyone is happy
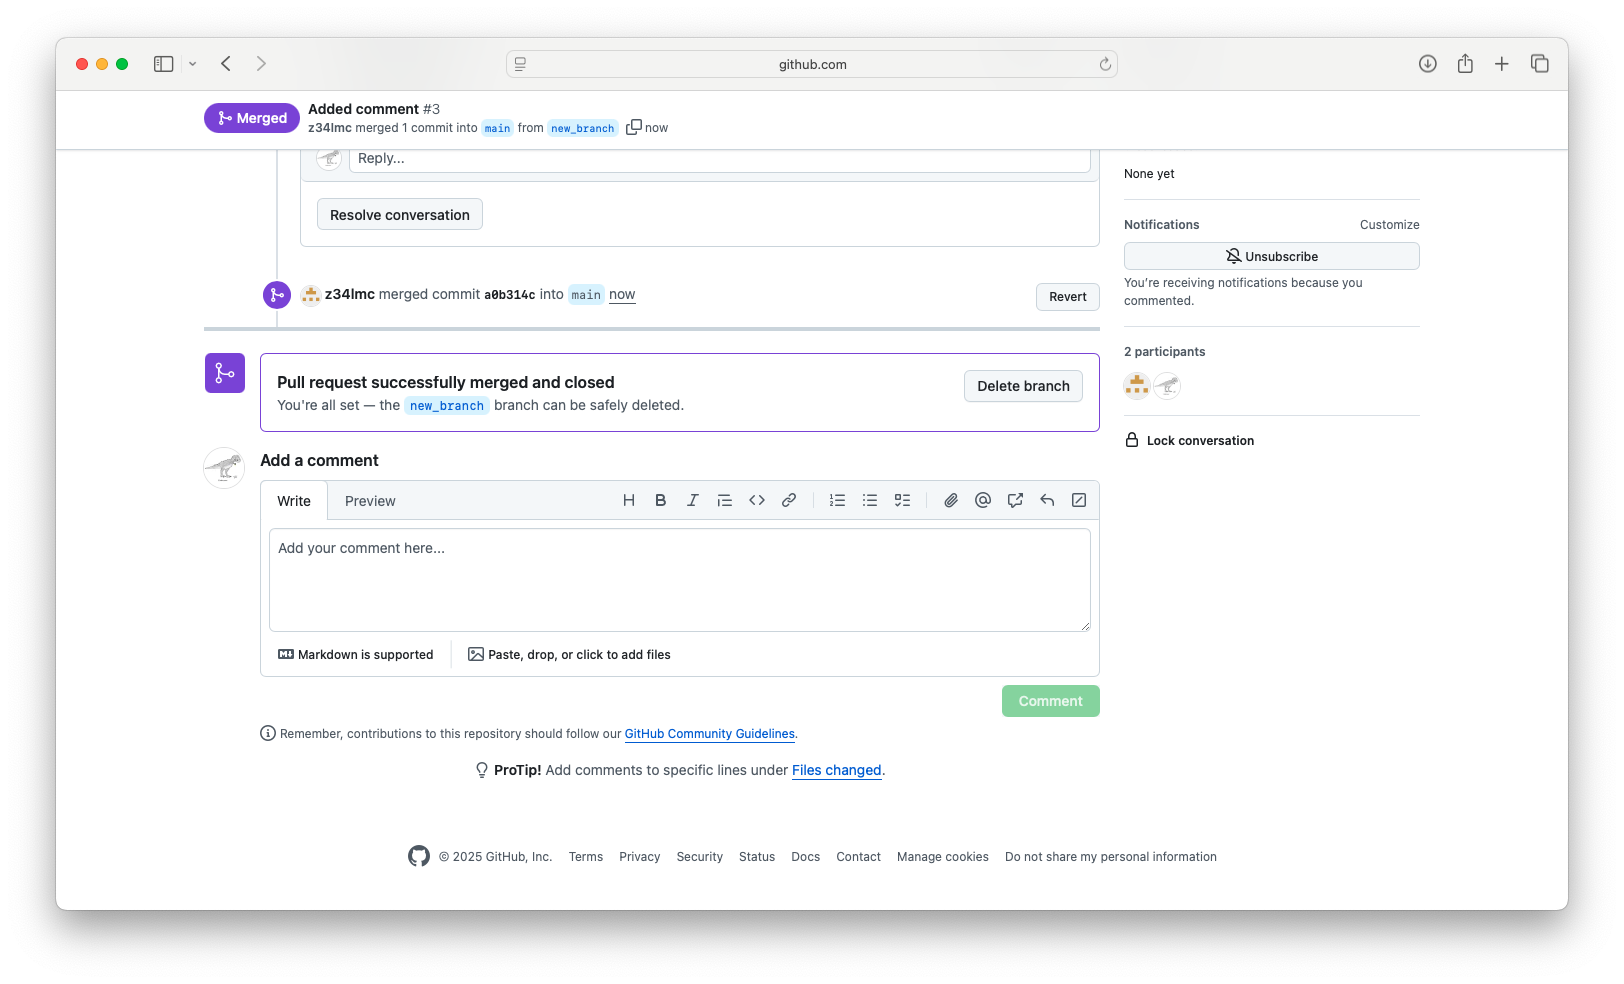
Make a Pull Request (cont’d)
- Once the changes are accepted, we are given the option to delete the branch
Forks
- A fork is an independent copy of someone else’s Git repository
- It allows people unaffiliated with the project to make edits to project files
- To perform a fork press the
![]() button on the repository page
button on the repository page
 button on the repository page
- Edit a forked repository by making a clone as before
README Example
- Can edit README files in RStudio
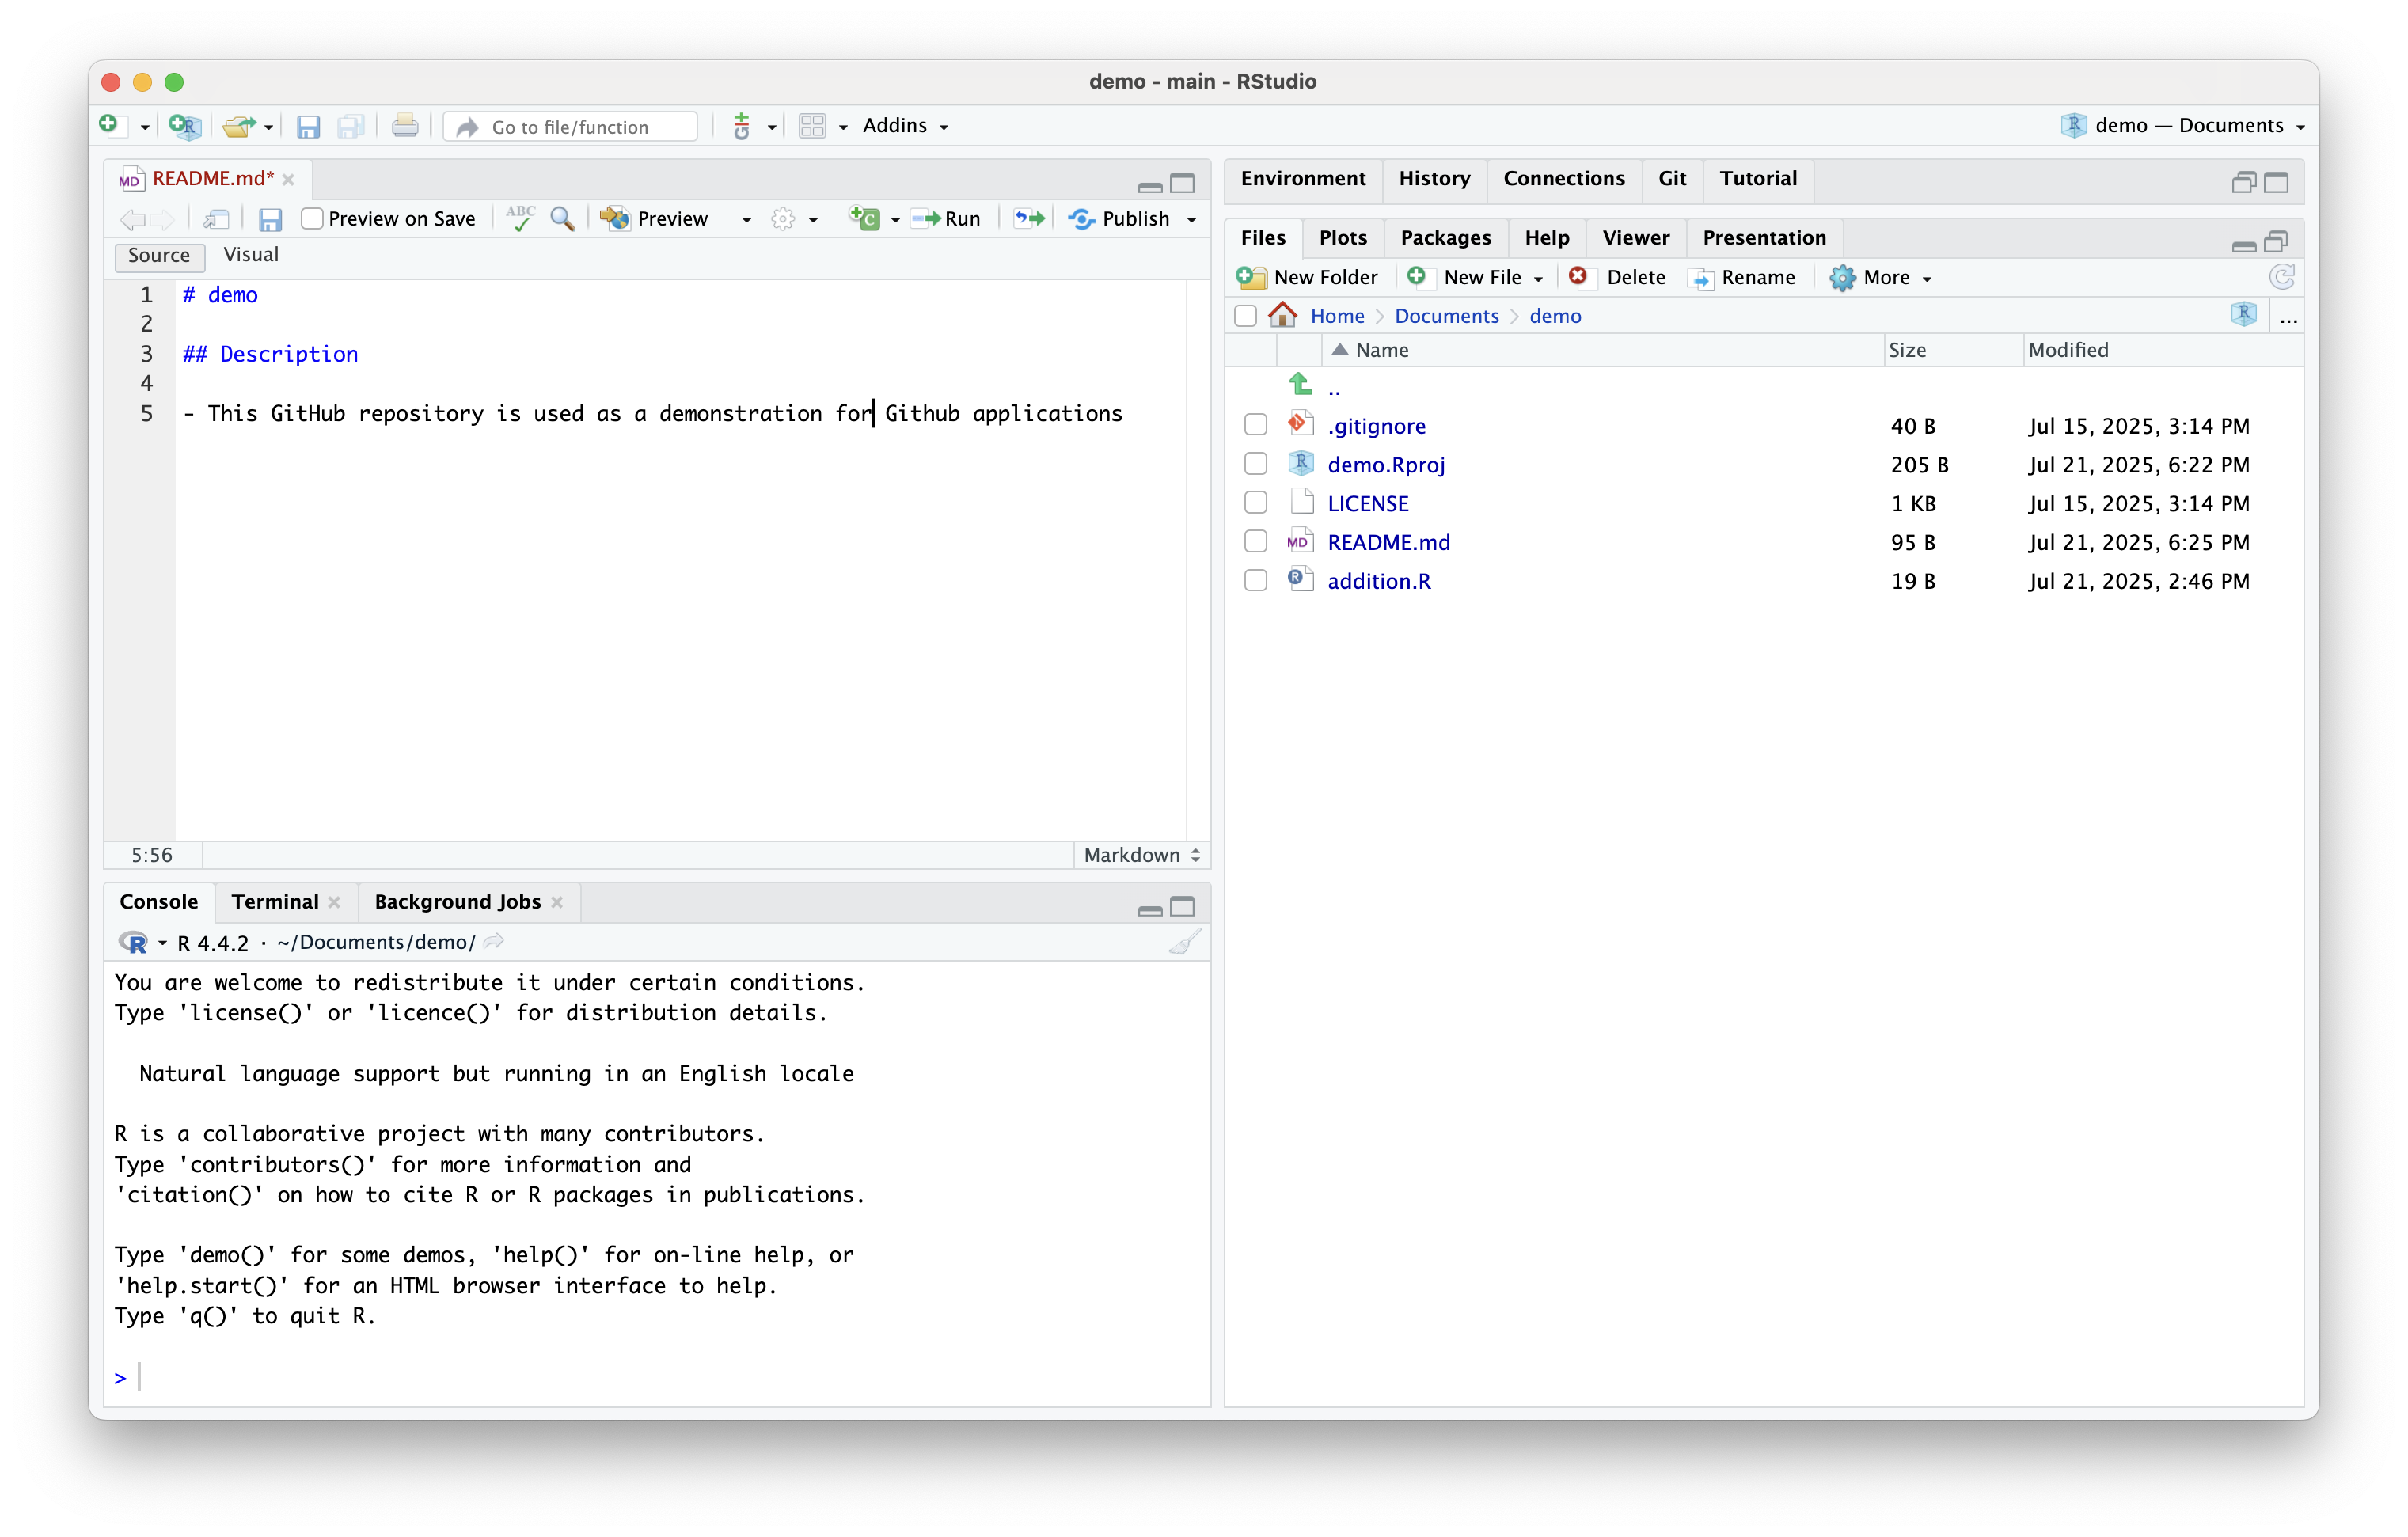
README Example
- Save, commit, and push to orign
Excluding Files (cont’d)
- E.g., temp.txt
Excluding Files (cont’d)
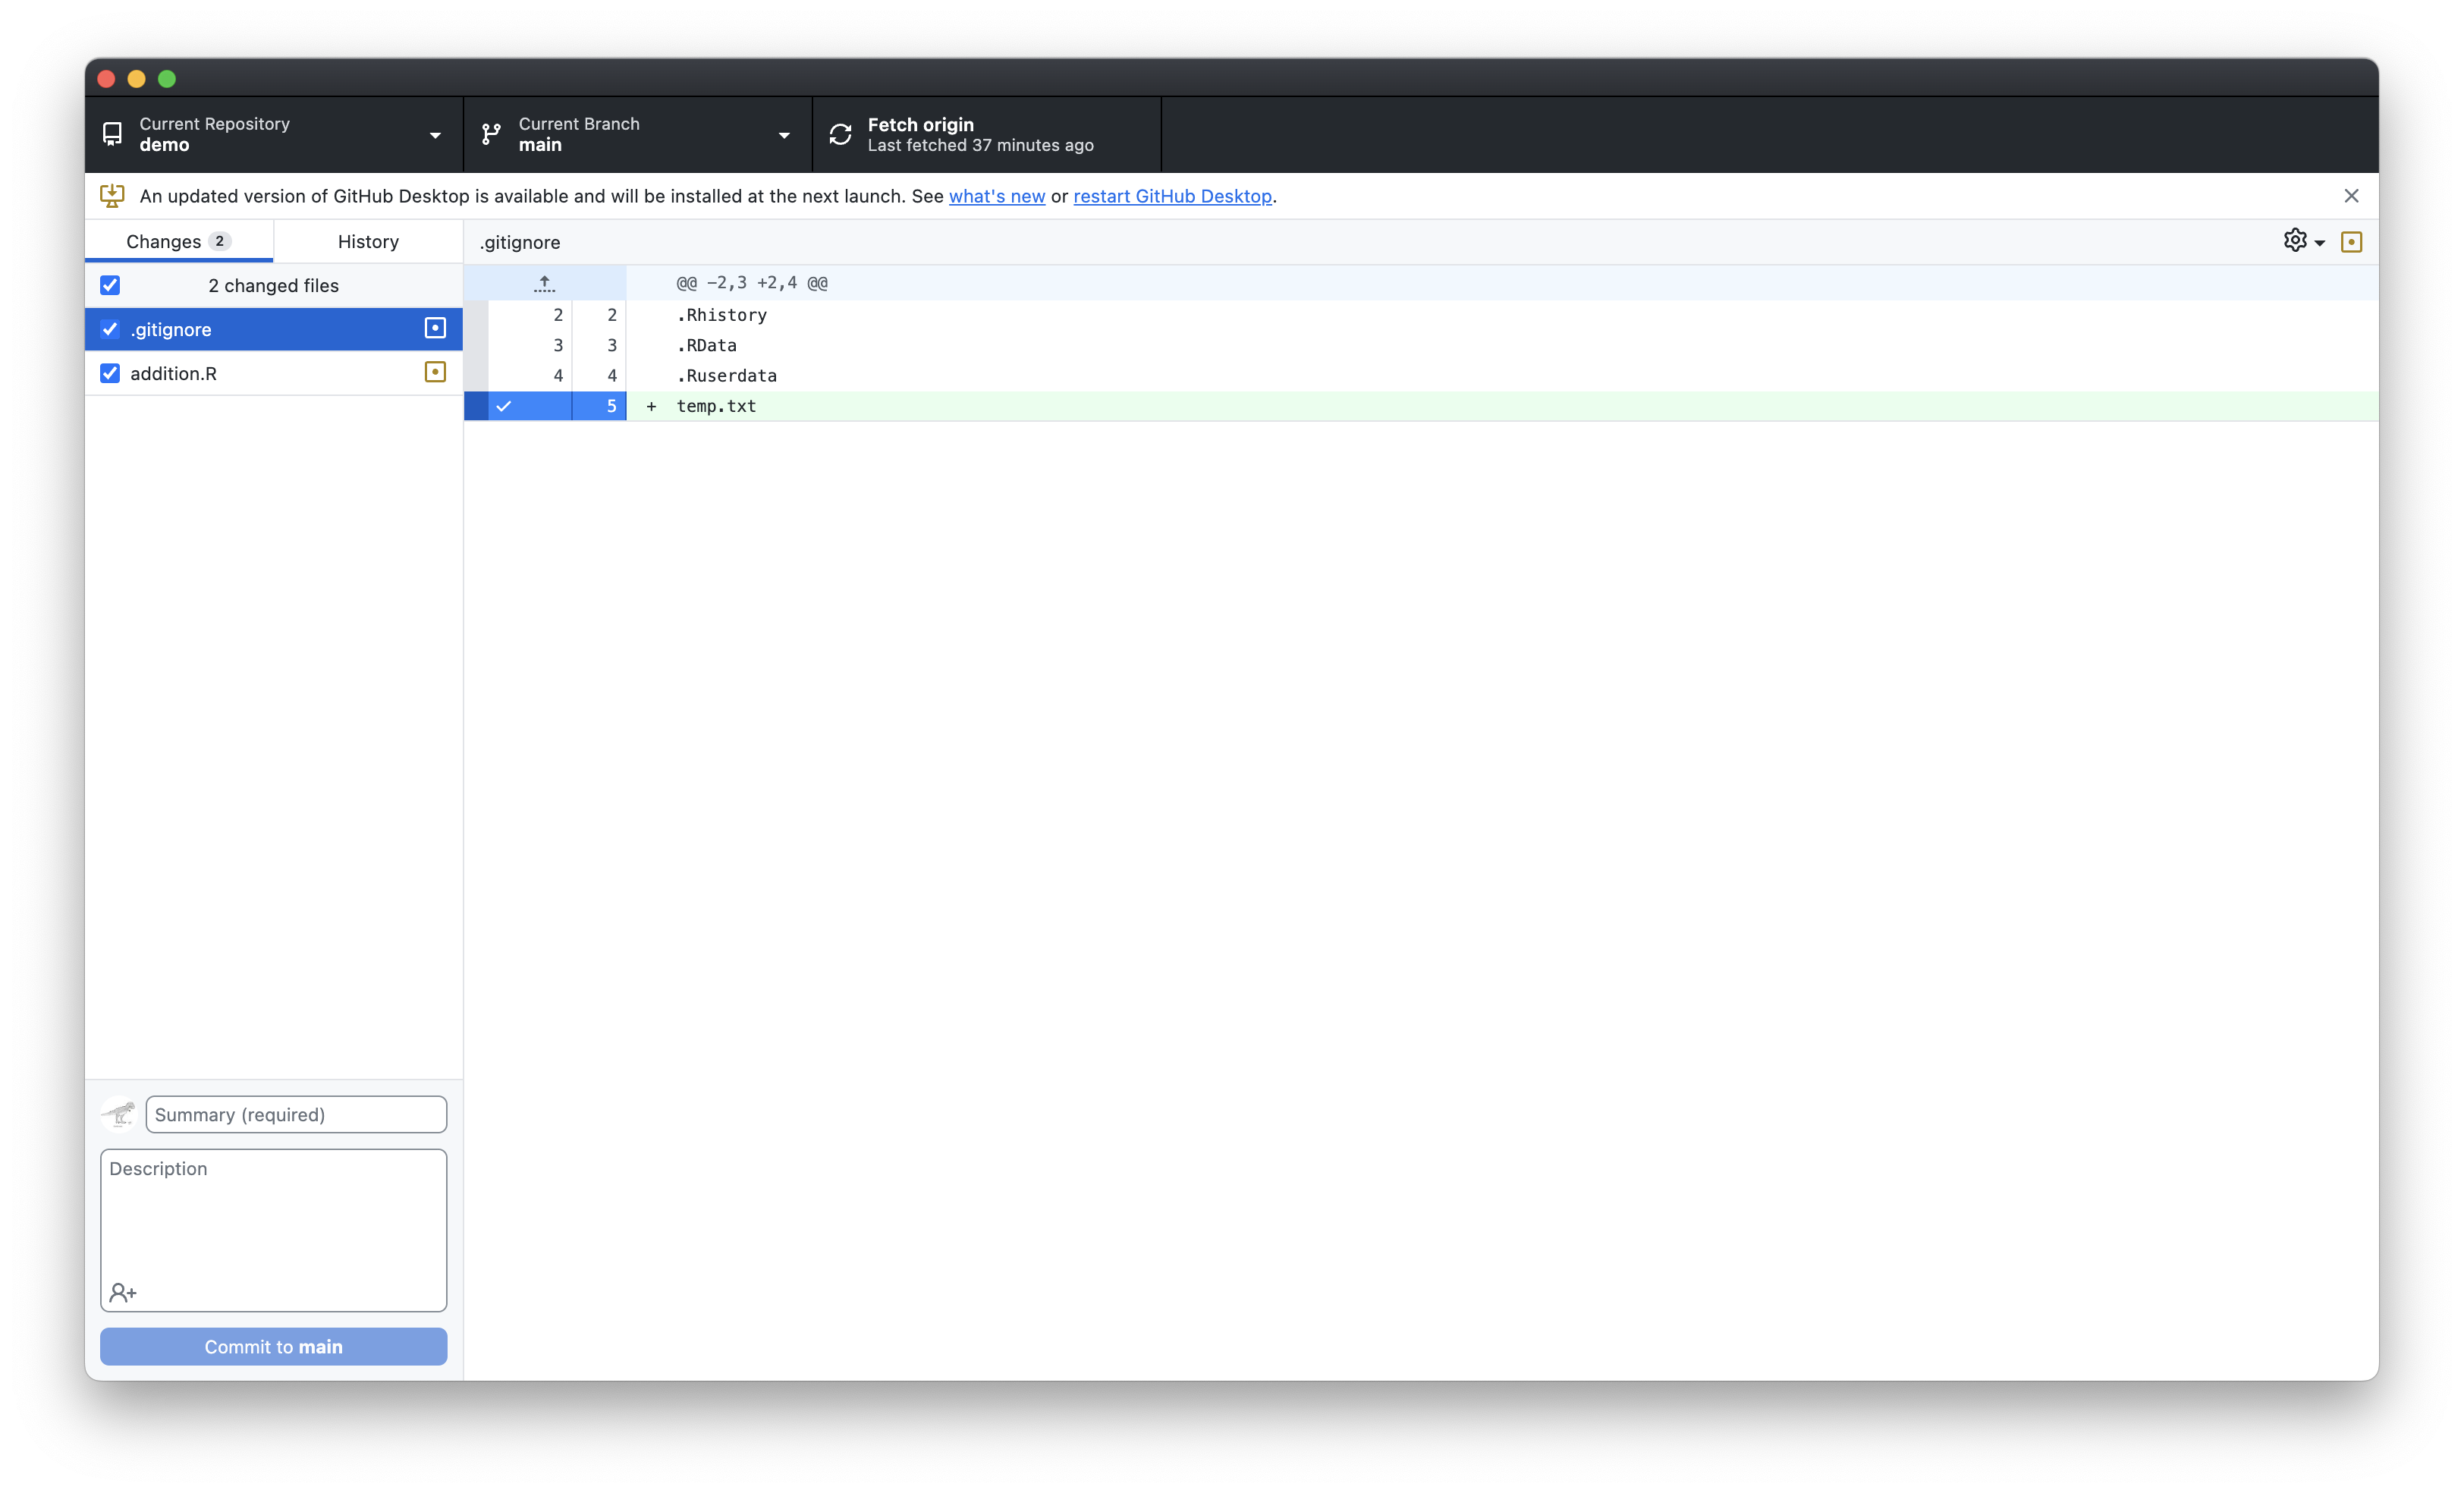
.gitignore (cont’d)
- In GitHub Desktop, right click the file name listed under “changes” and select ignore file (add to .gitignore)
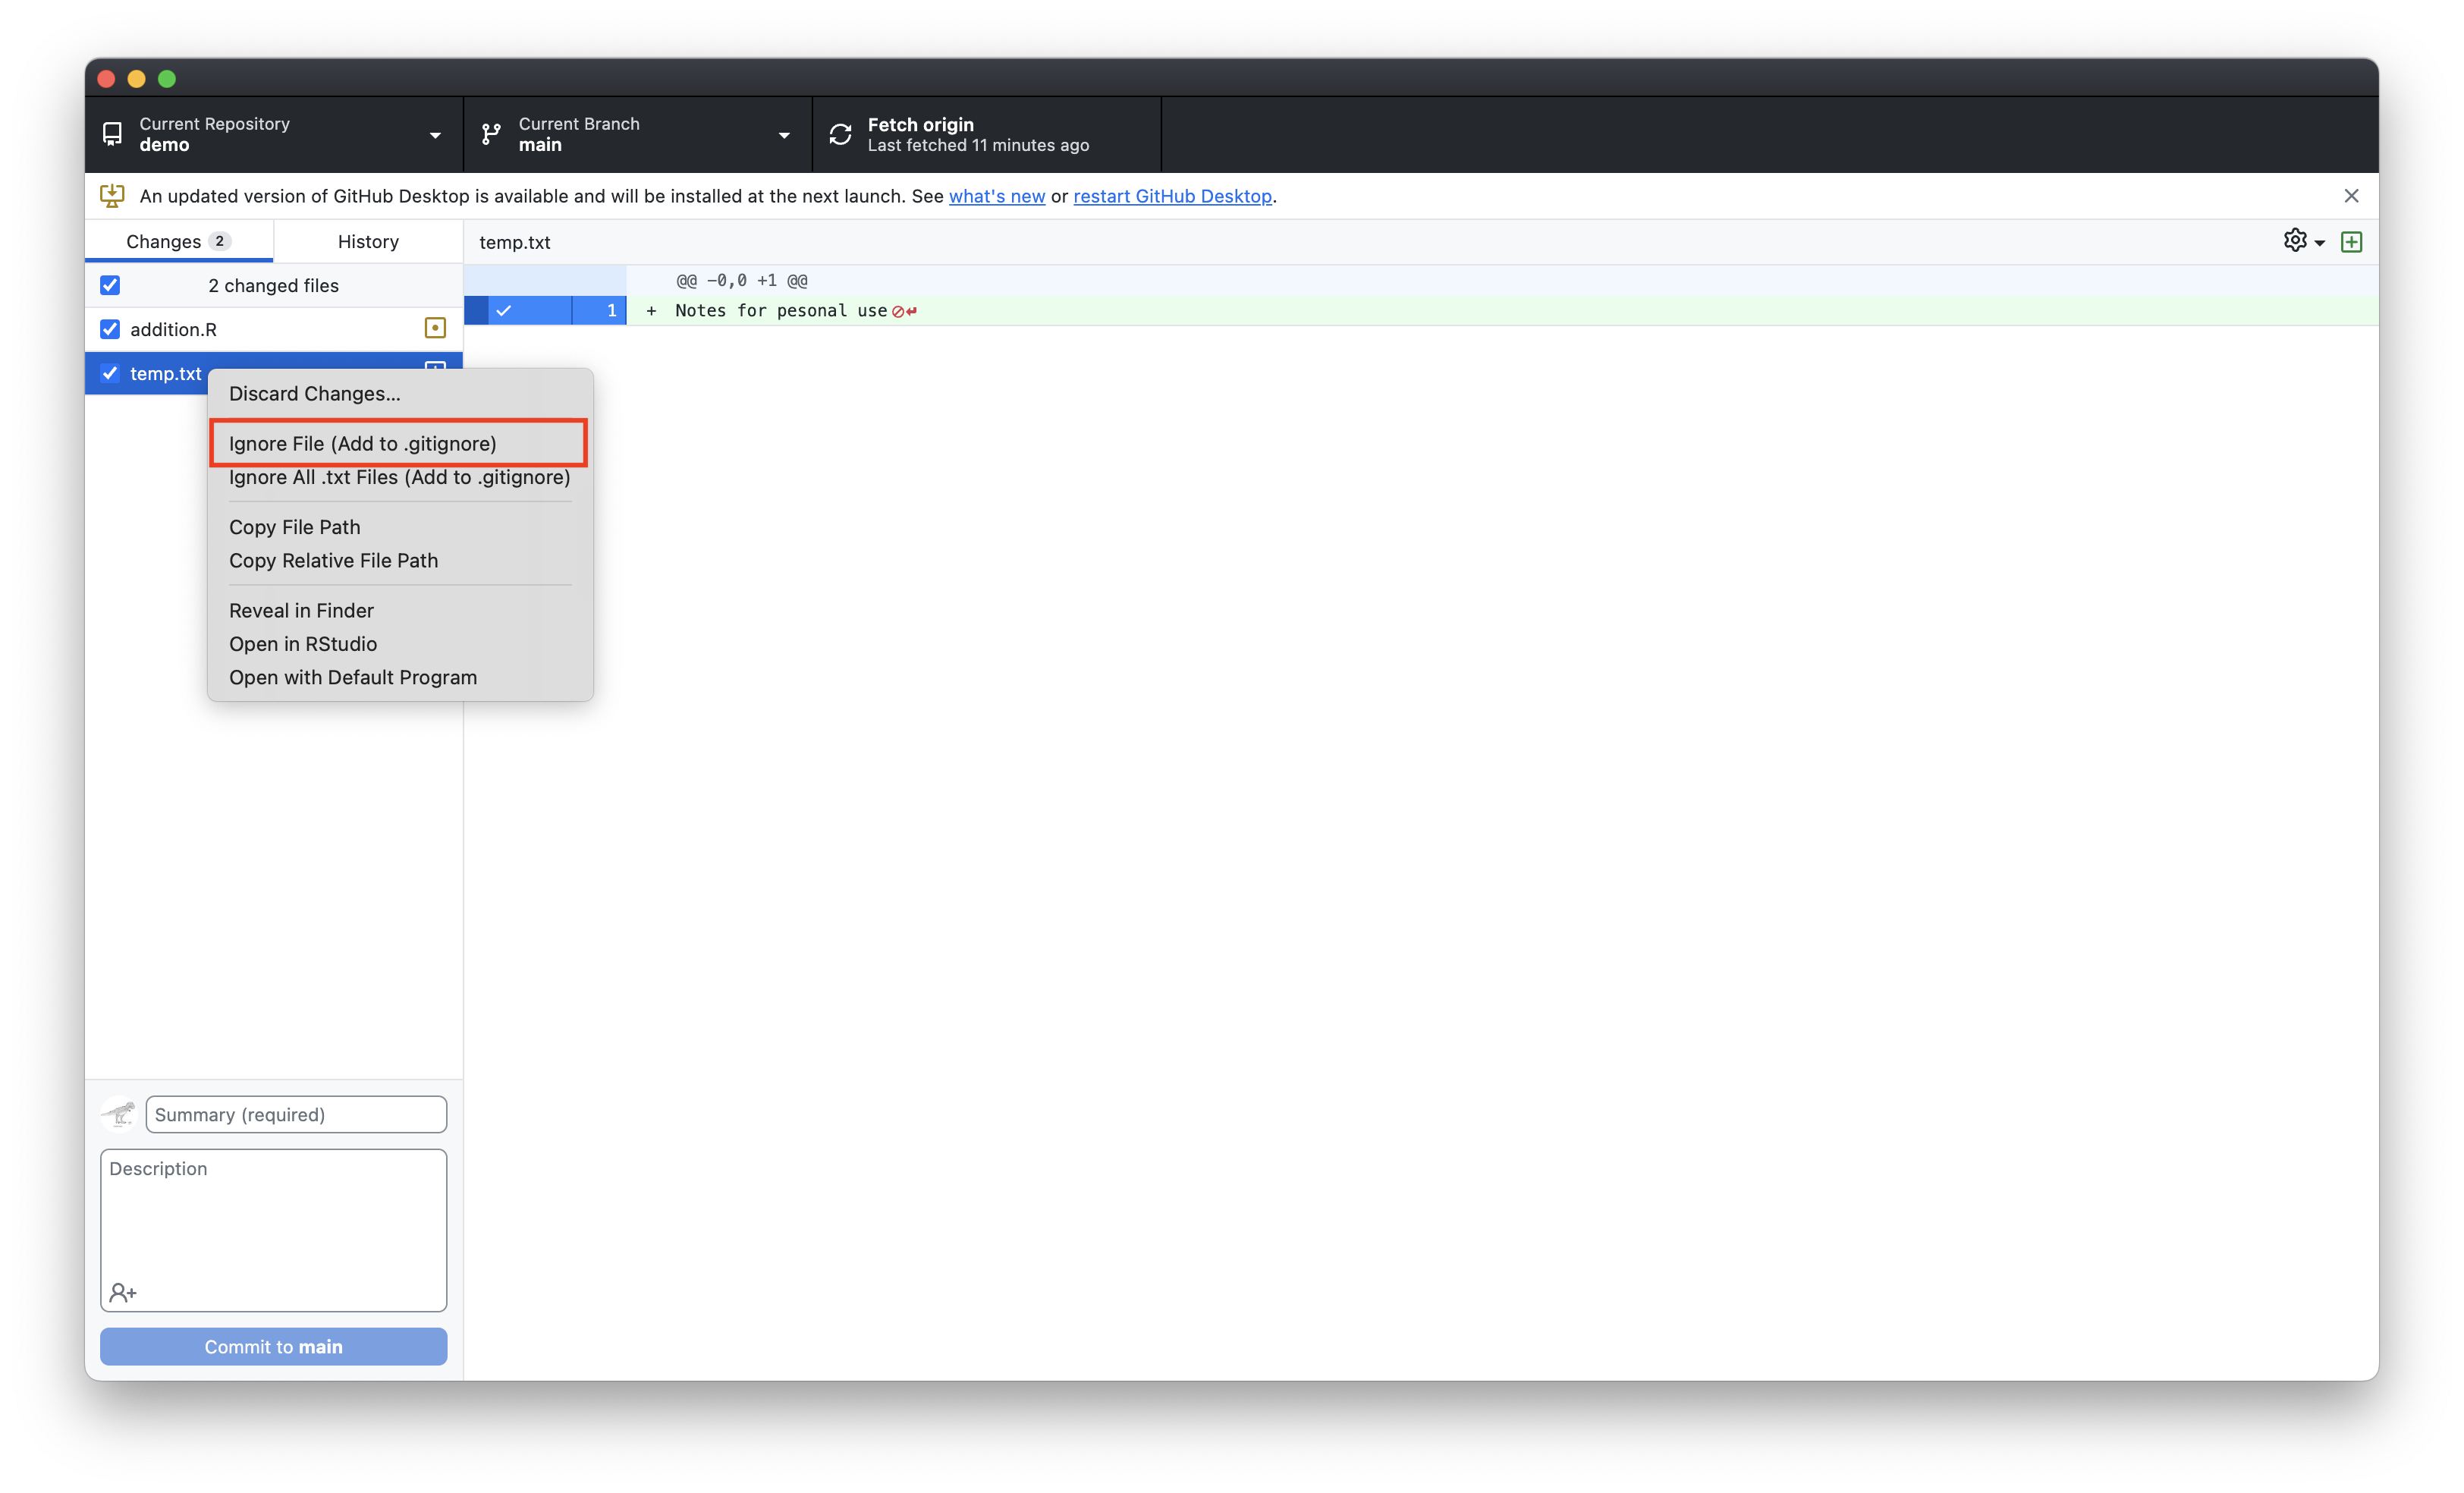
.gitignore (cont’d)
- We can now see that
temp.txthas been added to the.gitignorefile